MC2000 USER GUIDE
11
3. 4 -
CALIBRATION:
Each machine is factory-calibrated and is ready to operate on delivery. However, the crimper
must be tested each month and whenever the crimped diameter does not match the specified
diameter. The calibration procedure is as follows:
Calibrate using –08 Megacrimp calibration shell 8G (7482-19860-5)
- Place die set no. 33 into the machine.
- Set the gauge to 200.
- Crimp the calibration shell.
- Measure the calibration shell diameter - it should be 26.0mm +/- 0.25mm.
- If the crimped diameter matches the specified diameter, the machine is properly calibrated
-
If the crimped diameter does not match the specified diameter, it is necessary to
calibrate the machine as follows:
1 - Calculate in millimeters the difference between the crimped diameter and the
calibration diameter of 26.0 mm
2 - Open the crimping head to its maximum
3 - Unscrew the two M6 screws which hold the stop strip on the back of the piston
(Fig. 2 / 2) then remove the strip (Fig. 2 / 13).
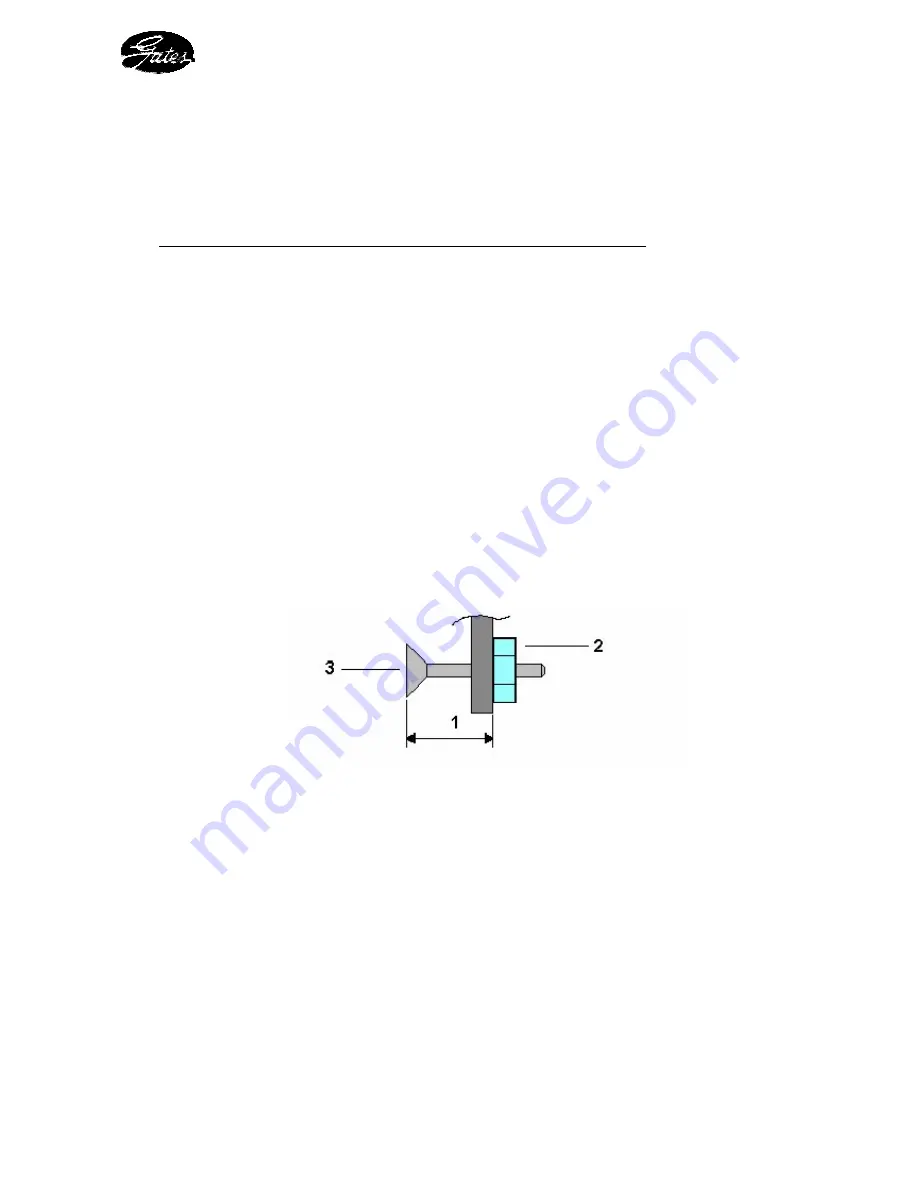
4 - Calibrate the machine using the M6 screw (Fig. 5 / 3) positioned on the strip itself
as follows:
- Measure the dimension (Fig. 5 / 1) of the screw head relative to the strip
Figure 5 : stop strip
- Release the locknut (Fig. 5 / 2)
- Adjust screw (Fig. 5 / 3) by screwing (clockwise) to reduce the crimping
diameter or unscrewing (anti-clockwise) to increase the crimping diameter.
Caution
: One turn of the screw or a 1mm change in the dimension
(Fig. 5 / 1) alters the crimping diameter by 0.65 mm
5 - Tighten the locknut (Fig. 5 / 2)
6 - Replace the stop strip at the back using the two M6 screws.
- Crimp another standard calibration shell (-08 MegaCrimp shell) and check the crimping
diameter obtained.
- Recalibrate the machine as described above if the crimping diameter obtained is still
incorrect.


