background image

Workshop manual

-32-

1. Lever assembly
2. Washer 5x12x1.5
3. Self-locking nut  
4. Impeller lever shaft
5. Screw M5x6
6. Impeller external lever
7. Bearing
8. Screw 
9. Valve shaft bracket
10. Screw
11. Seeger DIN.6799E7
12. Water pump shaft bearing
13. Water pump needle impeller
14. Water pump gear
16. Centrifugal spring seal
17. Exhaust valve spring
18. Washer
19. Exhaust valve needles
21. Spacer
22. Impeller cap
23. Impeller shaft
24. Impeller balls
25. O-ring
26. Adjustable spring seal
27. Water pump sprocket shaft
28. Water pump bearing
29. Seeger water pump

30. Water pump gaskets
31. Water pump impeller
32. Impeller sprocket
33. Screw M6x16
34. Water pump washer 25.8x17.5x0.5
35. Impeller assembly
37. Hexagon nut M5
38. Hexagon inner screw
39. Bearing 8x19x6
40. Screw
41. Bearings
42. Washer
43. Left-hand exhaust valve
44. Screw
45. Exhaust valve lever
46. Exhaust valve bearing separator
47. Bearings
48. Exhaust valve bearing spacer
49. Right-hand exhaust valve
50. Screw
51. Short exhaust valve shaft
52. Central exhaust valve
53. Long exhaust valve shaft

Summary of Contents for Enduro 2T 200CC

Page 1: ......

Page 2: ...in part is prohibited without the written permission of the copyright holder The company has the right without prior notice to change the technical content of the products The models in the images may...

Page 3: ...tains precise instructions for carrying out all repairs as well as the necessary technical data to perform maintenance on the motorcycles It also has extensive information about special GG tools that...

Page 4: ...ATION 6 TECHNICAL DATA TABLE 10 REMOVING THE ENGINEFROM THE FRAME 11 FITTING THE ENGINE TO THE FRAME 15 DISMANTLING THE ENGINE 19 SERVICING AND REPAIRING THE ENGINE S COMPONENTS 30 ASSEMBLING THE ENGI...

Page 5: ...Workshop manual 5 This page has been left blank intentionally General information...

Page 6: ...extremely toxic Make sure that the work area is ventilated MAINTENANCE Always use original GG spare parts and lubricants recommended by the manufacturer Non original spare parts can damage the engine...

Page 7: ...5 5 40 19 mm 14 mm 85 8 5 61 22 mm 26 mm 130 13 0 94 A Distance between the planes of the nut B External diameter of the screw thread ENGINE IDENTIFICATION The engine serial number is stamped on the...

Page 8: ...en or loosen the fork bars Ref BE21105GG CLJ 1 These tools are used to fit the fork seal and dust cover Ref BE20225GG CLJ 1 This tool is used to remove the fork cartridge Ref BE21106GG CLJ 1 This tool...

Page 9: ...014 This tool will be needed to remove the stator Ref ME25634045 This tool is used to fit the crankshaft into the crankcase Ref ME25950000 This tool is used to separate the crankcases and open the eng...

Page 10: ...79 24 19 Secondary transmission By chain Secondary reduction 3 67 13 49 EC 200 250 3 69 13 48 EC300 Competition models only 3 30 13 42 EC 200 250 300 Chain 110 Links 5 8 x 1 4 with seals 112 links com...

Page 11: ...ame Thoroughly clean the motorcycle before beginning the removal Place the motorcycle on a suitable support to enable work to be carried out on it Remove the fuel tank together with the two side cover...

Page 12: ...oling circuit Note Drain the coolant into a clean container for later use Remove the radiator cap Unscrew the coolant drain screw on the water pump and allow the fluid to drain into a container Wipe a...

Page 13: ...retaining ring pliers Remove the output sprocket 2 from the secondary shaft Detach the gear lever 3 Release the wiring of the magnetic flywheel from its attachments to the frame and uncouple the conne...

Page 14: ...ws arrows that secure the engine to the frame at the bottom Extract the nut 1 remove the shaft from the swinging arm and move it back wards Properly position the engine for extraction and remove it RE...

Page 15: ...ld the engine must be replaced with new ones Lightly tighten all of the nuts and then to the specified torque Nuts Tightening torque A 60 Nm B 25 Nm C 60 Nm D 80 Nm Fit the carburettor Fit the magneti...

Page 16: ...nt pipes are not cut or damaged Attach the spark plug connector arrow and connect the coolant pipes on both sides of the engine Note Make sure that the coolant drain screw on the water pump is tight a...

Page 17: ...art pedal 3 or 4 times and check the oil level with the gauge arrow Position the entire exhaust system and lightly tighten the screws Check the condition of the O rings on the exhaust pipe and replace...

Page 18: ...If damaged replace it with a new one If not damaged clean and reattach it see user manual Fit the fuel tank together with the two side covers seat and frame side guards Note After carrying out a firs...

Page 19: ...s will speed up reassembly and ensure that all parts are properly fitted Parts should be kept away from any fire source All gaskets seals and O rings must be replaced every time the engine is partiall...

Page 20: ...wheel Remove the magnetic flywheel by holding the extractor with a spanner while turning the screw Remove the cotter pin from the cone of the crankshaft Extract the screws arrows from the ignition sta...

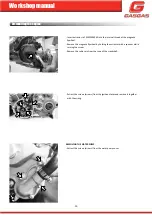
Page 21: ...pump turbine Extract the entire water pump seal arrows REMOVING THE CYLINDER HEAD AND CYLINDER Extract the screws 1 from the clutch disc cover and remove it Extract the screws 2 from the clutch cover...

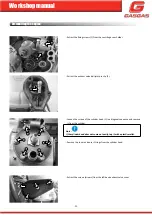
Page 22: ...the screws of the cylinder head 1 in a diagonal sequence and remove it from the cylinder Note If the cylinder head does not come out easily tap it with a plastic mallet Remove the inner and outer O ri...

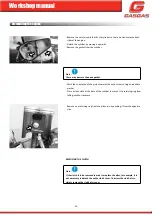
Page 23: ...of the piston towards the exhaust port using an indelible marker Place a clean cloth at the base of the cylinder to prevent the retaining ring from falling into the crankcase Remove one retaining rin...

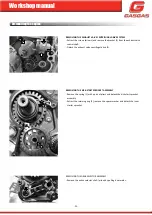
Page 24: ...osen the nut by holding the clutch hub Attention The clutch hub nut loosens to the left Remove the sealing washer and detach the clutch hub Note The clutch hub has a fitting position relative to the p...

Page 25: ...t valve centrifugal drive 2 REMOVING THE KICK START SPROCKET ASSEMBLY Remove the spring 1 with a pair of pliers and detach the kick start sprocket assembly Extract the retaining ring 2 remove the spac...

Page 26: ...ngine does not feature an inertial flywheel Remove the nut bevelled washer crankshaft sprocket flywheel and crankshaft cotter pin REMOVING THE REED BLOCK Remove the screws arrow and detach the reed bl...

Page 27: ...er bushing from the output sprocket arrow located on the shaft Attention Do not use screwdrivers or levers to separate the semi crankcases REMOVING THE GEAR SELECTOR AND ASSEMBLY Remove the fork shaft...

Page 28: ...l 28 REMOVING THE CRANKSHAFT Remove the crankshaft assembly arrow by pulling it upwards Note If the crankshaft does not come out easily tap it with a plastic mallet alternately on both shafts Dismantl...

Page 29: ...d end bearing 4 Connecting rod 5 Crankshaft assembly 6 Cylinder 7 Hexagon screw with washer 6x14 8 Viton exhaust duct O ring 44x3 9 Exhaust duct 10 Exhaust gasket 11 Breather 12 Piston pin retaining r...

Page 30: ...or scratches jamming marks and deformation due to overheating Check the grooves of the rings cleanliness absence of deposits of carbon breakage etc If necessary clean them with a wire brush that does...

Page 31: ...8 mm PIN Check the pin for jamming marks grooves and overheating Measure the pin bore with a micrometre at three different points Pin bore STD 17 994 mm Limit 17 98 mm CYLINDER Cylinder internal measu...

Page 32: ...24 Impeller balls 25 O ring 26 Adjustable spring seal 27 Water pump sprocket shaft 28 Water pump bearing 29 Seeger water pump 30 Water pump gaskets 31 Water pump impeller 32 Impeller sprocket 33 Scre...

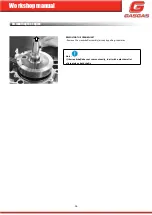
Page 33: ...the exhaust port of the cylinder Note To remove the centrifuge simply compress spring 19 to the pin and remove it CHECK Centrifugal shaft Check that the centrifugal shaft does not show signs of jammin...

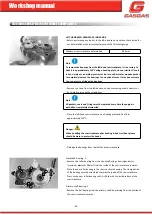
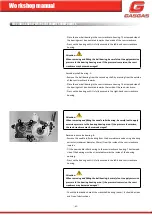
Page 34: ...right hand exhaust valves Check the valves for cracks jamming marks or deformation due to overheating Clean the valves to remove any carbon deposits with a wire brush that does not damage their surfa...

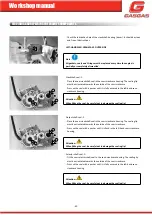
Page 35: ...Centrifugal regulating cap 31 Crankcase assembly 1 Clutch cover gasket 2 Central crankcase gasket 3 Water inlet valve 4 Hollow head screw 6 Cylinder bolt 7 Crankcase bushing 9 Friction bushing 10 Oil...

Page 36: ...C using a heating plate stove or similar Once it is hot simply use an ordinary extractor tool or a soft metal or wooden pusher to remove the bearings completely In exceptional cases it may be necessar...

Page 37: ...aring be careful not to apply excessive pressure to the bearing housing area If the pressure is excessive the semi crankcase may become damaged Secondary shaft bearing 3 Remove the ball bearing from t...

Page 38: ...eating plate stove or similar Once it is hot simply use an ordinary extractor tool or a soft metal or wooden pusher to remove the bearings completely In exceptional cases it may be necessary to use a...

Page 39: ...s the inside of the housing opening Press on the bearing until it is fully encased in the right hand semi crankcase housing Crankshaft seal 3 Place the new crankshaft seal in the semi crankcase housin...

Page 40: ...rings must be replaced every time the engine is partially or completely dismantled Place the left hand semi crankcase on a heating plate and heat it to approximately 150 C Danger When handling the sem...

Page 41: ...g until it is fully encased in the right hand semi crankcase housing Attention When removing and fitting the needle roller bearing be careful not to apply excessive pressure to the bearing housing are...

Page 42: ...eful not to damage the sealing lip Output shaft seal 2 Place the new crankshaft seal in the semi crankcase housing The sealing lip must be orientated towards the outside of the semi crankcase Press on...

Page 43: ...with a screwdriver Note All gaskets seals and O rings must be replaced every time the engine is partially or completely dismantled Place the clutch cover on a heating plate and heat it to approximate...

Page 44: ...rientated towards the outside of the housing opening Press on the bearing until it is fully encased in the clutch cover housing Kick start shaft seal 1 Fit the new kick start shaft seal to the clutch...

Page 45: ...ch hub assembly 1 Clutch basket washer 22 1x42x2 8 2 Clutch sprocket washer 3 Silentblock rubber 4 Clutch basket rivets 5 Complete clutch basket 6 Clutch basket bearing 7 Clutch basket bushing 8 Clutc...

Page 46: ...ch press Check condition and clutch disc contact surface for scratches and excessive wear Bearing and pusher Check the clutch bearing and pusher for jamming marks grooves and gaps Lined clutch discs C...

Page 47: ...1 for scratches and excessive wear Check that oil circulation holes 2 are free of dirt and metal particles Clutch basket sprocket Check the contact surface of bearing 1 for jamming marks grooves and g...

Page 48: ...elector spring 9 Flat washer 6x16x1 5 10 Special screw 11 Desmodromic valve bearing 12 Desmodromic valve bearing 13 Selector seal 12 22 7 14 Selector spring centring screw 15 Scorpion spring 16 Scorpi...

Page 49: ...e ends of the scorpion spring into the selector shaft and scorpion brackets Gear selector Check that the bearing on the end of the selector is in good condition that it turns easily and that there is...

Page 50: ...anual 50 SERVICING AND REPAIRING THE ENGINE S COMPONENTS Check the clearance between the fork and its housing on the sprocket Clearance between the fork and its housing on the sprocket STD 0 15 mm Lim...

Page 51: ...change unit 1 Gear change washer 18x31 5x0 7 2 Primary 2nd sprocket 3 Circlip DIN 471 4 Grooved washer 31 5x1 5 Primary 6th sprocket 6 Primary 3rd and 4th sprocket 7 Washer 25 2x31 5x1 8 Primary 5th s...

Page 52: ...some sprockets are free of dirt and metal particles Once the shaft elements have been removed clean them thoroughly and replace all of the retaining rings Primary shaft Properly lubricate all of the...

Page 53: ...k start sprocket 7 Kick start intermediate sprocket 8 Kick start washer 20x40x1 9 Kick start sprocket washer 24x15 15x0 8 10 Clutch shaft Seeger 15 11 Kick start spring 12 Kick start spring centring b...

Page 54: ...free of debris Ratchet Check that the ratchet teeth show no signs of excessive wear Kick start sprocket Check that the sprocket shows no signs of excessive wear or gaps Check that the teeth of the ki...

Page 55: ...55 SERVICING AND REPAIRING THE ENGINE S COMPONENTS 1 Reed block assembly 2 Reed block clamp 3 Reed block rubber 4 Pipe 5 Special screw M6x25 6 Crankcase reed block gasket 7 Pipe reed block gasket 8 I...

Page 56: ...t the reeds are free of cracks and signs of ageing Check that the reeds are firmly laying on each other and are watertight Reed spacer bracket Check that none of the surfaces of the spacer are deforme...

Page 57: ...er 6x12x1 5 31 Electric motor cover 2 Screw UFK 3 Magnetic flywheel 4 Electric starter sprocket 5 Screw ULS Torx M5x8 6 Hexagon screw 10x25 7 Ignition cover 8 Hexagon screw 6x40 9 Hexagon screw 5x15 1...

Page 58: ...20 Exciter Black Red Red White 12 7 20 Charging coil Yellow Earth 0 67 20 White Yellow 0 16 20 Note All measurements should be taken at a temperature of 20 C Otherwise significant errors can be produ...

Page 59: ...rankcase Insert the crankshaft into the semi crankcase bearing On the opposite side of the semi crankcase fit the O ring and then the crankcase seal bushing with the recessed side facing outwards FITT...

Page 60: ...nd 3 long through the forks to their housings on the semi crankcase Note Check that the transmission functions correctly by turning the desmodromic valve by hand Position the transmission gears in neu...

Page 61: ...haft Replace the nut that fixes the engine to the bedplate Check that no semi crankcase gasket debris is left on the support surface of the cylinder FITTING THE REED BLOCK Remove any semi crankcase ga...

Page 62: ...HE GEAR SELECTOR ASSEMBLY Fit the gear selector assembly with the spring arrow untensioned and tighten screw 1 Use threadlocker Tightening torque 6 Nm Position the spring arrow with a pair of pliers F...

Page 63: ...TTING THE EXHAUST VALVE CENTRIFUGAL DRIVE SYSTEM Lubricate the semi crankcase centrifugal shaft bearing Fit centrifugal drive 2 to the semi crankcase Fit bracket 1 making sure that the output lever is...

Page 64: ...0 Nm FITTING THE CYLINDER AND CYLINDER HEAD Check that the piston and pin are clean Lubricate the connecting rod end bearing Position the piston with the arrow marked on the head towards the exhaust p...

Page 65: ...e lever screw and position the lever rod assembly in the desired position Fit the new O rings to the top of the cylinder Check that the cylinder head support surface is completely clean Insert the cyl...

Page 66: ...to the clutch disc cover and tighten the screws diagonally Screws 4 25 mm Screws 5 75 mm Tightening torque 10 Nm FITTING THE WATER PUMP Fit the new water pump seal arrow to the clutch cover Position w...

Page 67: ...m Make sure rubber cap 2 is correctly positioned Fit the magnetic flywheel and tighten nut 1 Use threadlocker Tightening torque 40 Nm Fit a new gasket to the ignition cover and tighten the screws arro...

Page 68: ...Workshop manual 68...

Page 69: ...Workshop manual 69...

Page 70: ...Workshop manual 70...

Page 71: ...Workshop manual 71 This page has been left blank intentionally...

Page 72: ......

Reviews: