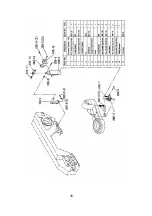
Fig.6
3.2 INSTALLATION
Inspect the machine to ensure that it is not damaged and
proceed with its positioning.
When choosing the machine position it is recommended
to consider:
·
That the chosen position is not humid and that it is
sheltered from atmospheric agents;
·
That the surface is perfectly level, it is a non-slip surface
and that its bearing capacity is suitable for the weight of
the machine;
·
That there is adequate, free space around the machine;
·
That the location in which the machine is installed is
guarded or enclosed, to prevent children or
unauthorized persons from accessing the machine;
·
That suitable, approved lighting is provided;
·
That it is located near a main switch equipped with an
overload cutout;
·
That the power supply system is equipped with earthing
which complies with the relevant standards;
·
That the ambient temperature ranges between 0
o
C and
45
o
C;
·
That the workplace is not in an explosive atmosphere.
After positioning the machine proceed ad follows:
·
Make the position of the fixing holes (16 fig.1);
·
Lift the machine and place it to the side;
·
Use an appropriate size bit to drill the holes in the
ground and insert the threaded screw anchors;
10
·
Reposition the machine with its base in its position then
secure the base with the screws provided.
If the machine is supplied without a base, then it must
be secured by means of the two holes (15 Fig.1) to a
special structure capable of supporting the weight of
the machine and any unbalancing created when using
it.
WARNING!
The Manufacturing Company declines any
responsibility for damages caused by incorrect
installation and the use of unsuitable bases.
3.2.1 CLEANING THE MACHINE
After positioning the machine (with the work bench level,
and before making the connections) clean off all the
protective oils on the painted and unpainted surfaces with
detergent or mineral naphtha.
These liquids must not be sprayed on; use a cloth
dampened with the liquid, then dispose of the cloth in
accordance with the relevant antipollution regulations.
3.2.2 CONNECTIONS
·
Ensure that the mains voltage corresponds to that of the
machine motor indicated on the identification plate (17
Fig.1)
·
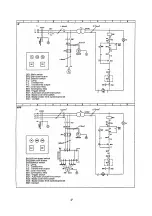
Connect the line cable of the machine to an electrical
board equipped with an automatic main switch (magneto
thermal type), with earth connection ad stipulated by the
safety standards in force, capable of protecting the
machine from overloading and short-circuiting.
·
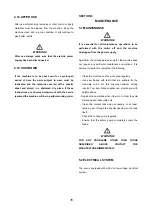
Ensure that the cutting band rotates in the direction of the
arrow on the safety guard which covers it and that the saw
teeth are facing the correct direction (Fig.6).
Remove the handgrip control and the rod with bar-stop from
the supplied accessories and proceed as follows:
Rod with bar-stop
·
Insert the threaded rod into its seat (14 Fig.1) and lock it.
Coolant
·
Pour the coolant, which consists of water and emulsifiable
oil (13 l.) into the recovery tank (13 Fig.1). Dilute the
Summary of Contents for BS260
Page 5: ...4...
Page 6: ...5...
Page 18: ...17...
Page 22: ...21...
Page 23: ...22...
Page 24: ...23...
Page 25: ...24...
Page 26: ...25...
Page 27: ...NOTES Page 27...
Page 28: ...Distributed by Garrick Herbert Pty Ltd KIRRAWEE NSW Australia www garrickherbert com au...


