INSTALLATION
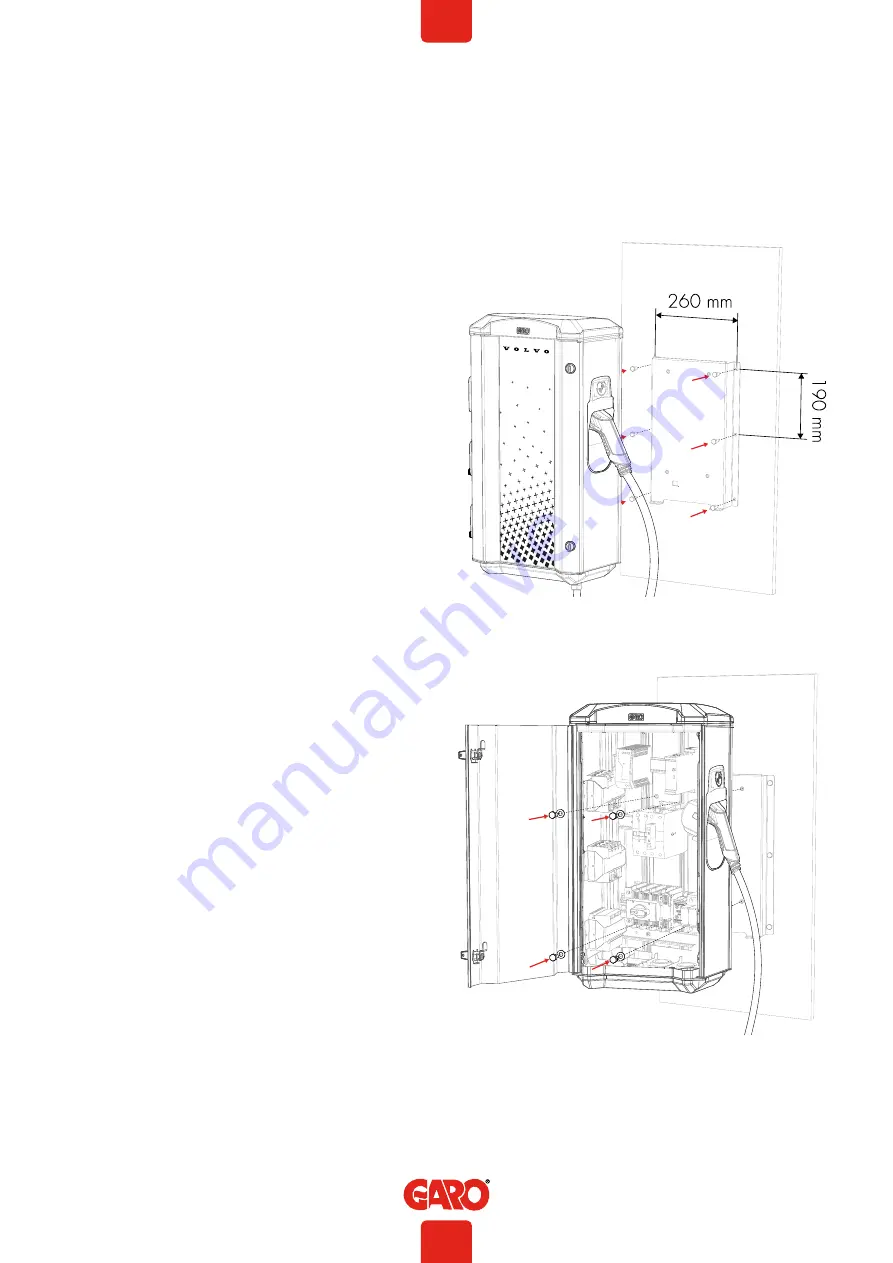
6 Ø 8,5mm (screws not included)
4x M8 L20mm
INSTALLATION
(figure 1)
• Before start of installation, perform a visual inspect the
charging station during unpacking. Do not start installation
process if any damaged parts are discovered.
• Use conductors that are dimensioned in accordance with
local electrical regulations. The selected cable must be able to
sustain long periods of constant load of up to 63A.
• The installation must be carried out by an professional
electrician.
1. Select suitable group fuse and cable dimension for the
electrical installation. Make sure to consider the cable length
during calculation to avoid risk of voltage drop.
Note: Due to high currents for a long time in the cable, there is a
high risk of voltage drop if the cable is under-dimensioned which
can damage the electronics in an EV.
2. Fill in the fuse and cable information in the Installation form
located in the installation manual that is included in the box.
3. Mount the LS4 MINI on a wall or on a pedestal, figure 1-6.
Note: Wall installation requires a minimum 20mm distance
between the wall and the LS4 MINI to ensure correct cooling,
(figure 4) Recommendation is to use the included wallbracket.
4. Install the electric supply cable L1, L2, L3 and N to the Main
Switch and PE to PE terminal, (figure 3).
5. Fill in the Installation form in the manual.
6. Assemble the protection cover and close the front door,
(figure 5)
7. Turn on electrical power.
8. Wait a few minutes until the LS4 MINI have finished the startup
process and test the LS4 MINI with a EVSE-tester or an EV.
9. Complete the Installation form with all required information.
The completed form shall be handed over to the owner of the LS4
MINI.
10. With a mobile phone, scan the QR code on the ID-label
located on the side of the LS4 MINI and follow the on-screen
instructions to complete commissioning of the LS4 MINI.
(figure 2)
5
EN


