GARNI ND5010 Desktop Weather Station
Instruction Manual
Introduction
This desktop weather station comes with barometric weather prediction, clock, calendar,
indoor and outdoor temperature and humidity display. It is battery powered with AC
charger. It is recommended to use the AC charger at all times.
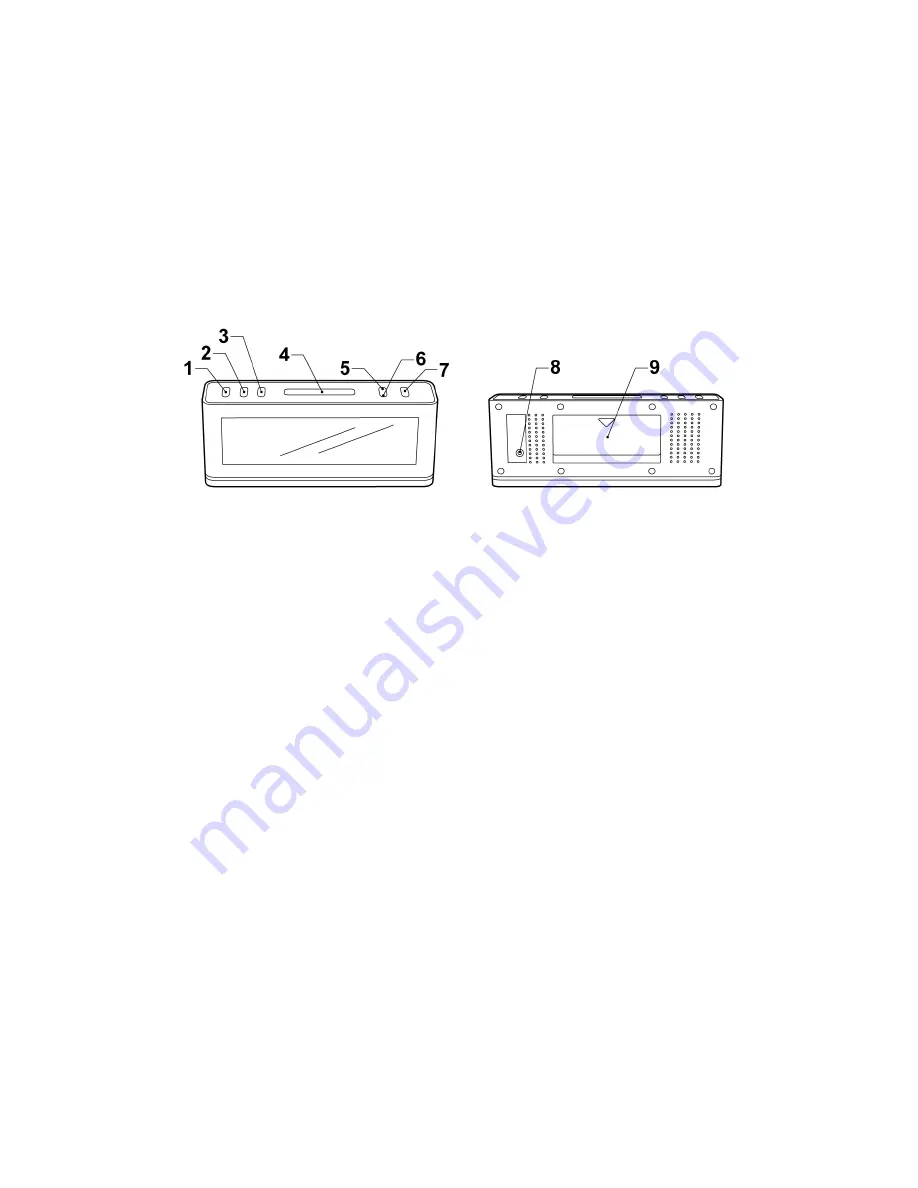
Fig. 1 Front view
Fig. 2 Back view
1. ‘MODE’ button
2. ‘+
/
°
C /
°
F’ button
3. ‘-
/
RCC’
button
4. ‘SNOOZE / LIGHT’ button
5. ‘HISTORY’
button
6. ‘CHANNEL’
button
7. ‘MAX / MIN’ button
8. DC line in jack
9. Battery
compartment
General notes:
1. It is recommended to set up the remote temperature sensor before setting up the
weather station / clock. See
“Configuring Remote Temperature Sensor(s)”
for more information. Batteries and AC adapter should be used together.
2.
Please note all other clock / weather station settings seize to function when the
clock is in RCC synchronization mode. See “
RCC Synchronization”
for
additional information.
3. During initial installation, the temperature and humidity sensor may take up to an
hour or more to acclimatize to current conditions.
4. Press ‘SNOOZE / LIGHT’ (4) to change LCD screen backlight brightness from
‘OFF’, ‘LOW’, and ‘HIGH’.
Getting started:
Installing A/C adapter


