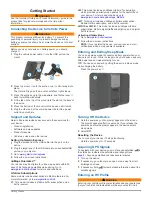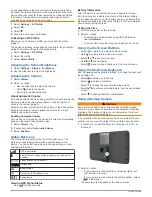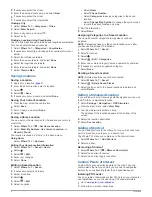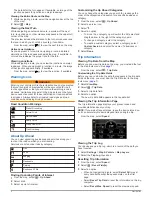
background image

Changing the Fuse in the Vehicle Power Cable

NOTICE

When replacing the fuse, do not lose any of the small pieces 

and make sure they are put back in the proper position. The 

vehicle power cable does not work unless it is assembled 

correctly.

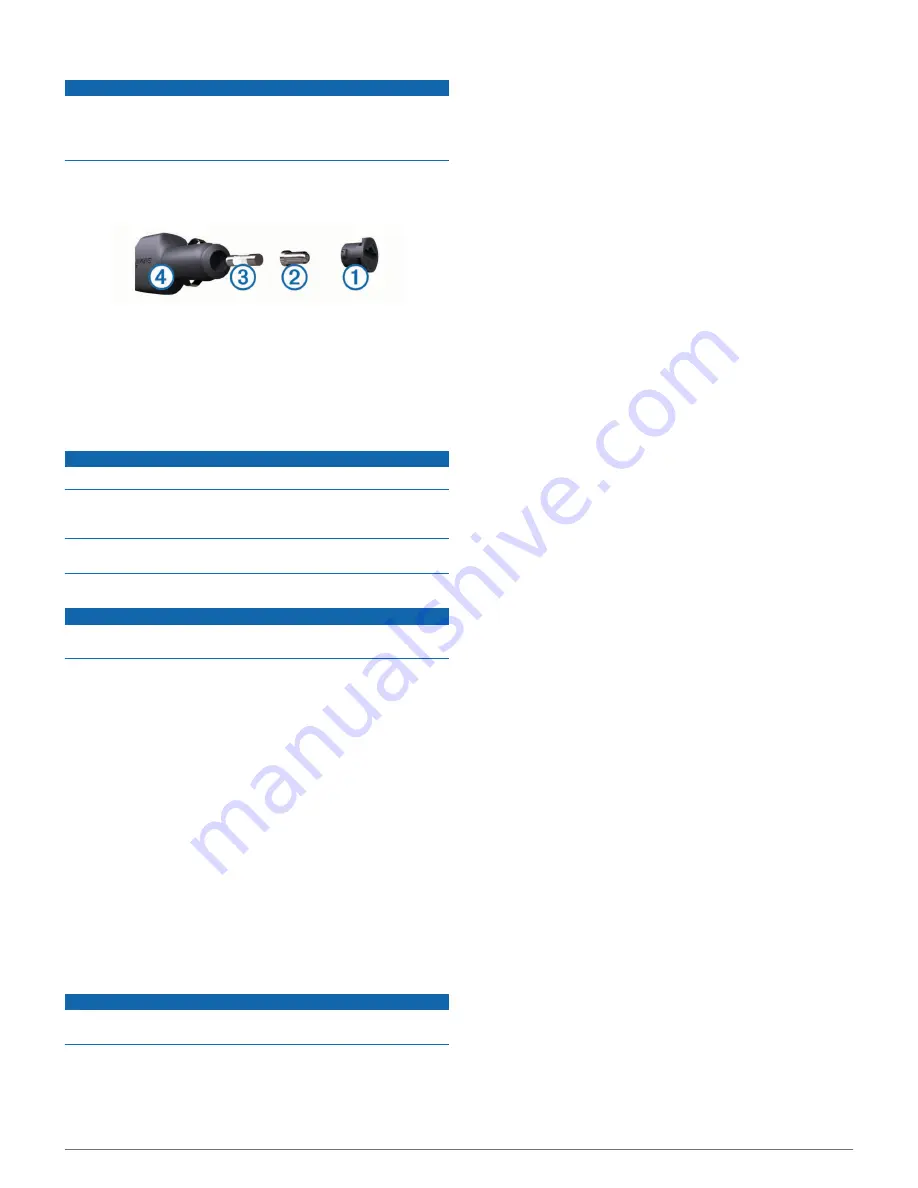
If your device does not charge in your vehicle, you may need to 

replace the fuse located at the tip of the vehicle adapter.

1

Unscrew the end piece 

À

.

TIP: 

You may need to use a coin to remove the end piece.

2

Remove the end piece, the silver tip 

Á

, and the fuse 

Â

.

3

Install a 2 A fast-blow fuse.

4

Place the silver tip in the end piece.

5

Screw the end piece back into the vehicle power cable 

Ã

.

Device Care

NOTICE

Avoid dropping your device.
Do not store the device where prolonged exposure to extreme 

temperatures can occur, because it can cause permanent 

damage.
Never use a hard or sharp object to operate the touchscreen, or 

damage may result.

Cleaning the Outer Casing

NOTICE

Avoid chemical cleaners and solvents that can damage plastic 

components.

1

Clean the outer casing of the device (not the touchscreen) 

using a cloth dampened with a mild detergent solution.

2

Wipe the device dry.

Cleaning the Touchscreen

1

Use a soft, clean, lint-free cloth.

2

If necessary, lightly dampen the cloth with water.

3

If using a dampened cloth, turn off the device and disconnect 

the device from power.

4

Gently wipe the screen with the cloth.

Avoiding Theft

• Remove the device and mount from sight when not in use.
• Remove the residue left on the windshield by the suction 

cup.

• Do not keep your unit in the glove compartment.
• Register your device at 

http://my.garmin.com

.

Mounting on Your Dashboard

NOTICE

The permanent mounting adhesive is extremely difficult to 

remove after it is installed.

Use the mounting disk to mount your device to the dashboard 

and comply with certain state regulations. See 

www.garmin.com 

for more information.

1

Clean and dry the dashboard where you are placing the disk.

2

Remove the backing from the adhesive on the bottom of the 

disk.

3

Place the disk on the dashboard.

4

Remove the clear plastic cover from the top of the disk.

5

Place the suction cup mount on top of the disk.

6

Flip the lever down (toward the disk).

Removing the Device, Mount, and Suction 

Cup

Removing the Device from the Mount

1

Press the release button on the bottom of the device.

2

Tilt the device forward.

Removing the Mount from the Suction Cup

1

Turn the device mount to the right or left.

2

Apply pressure until the socket on the mount releases the 

ball on the suction cup.

Removing the Suction Cup from the Windshield

1

Flip the lever on the suction cup toward you.

2

Pull the tab on the suction cup toward you.

Purchasing Additional Maps

1

Go to your device product page at (

www.garmin.com

).

2

Click the 

Maps

 tab.

3

Follow the on-screen instructions.

Purchasing Accessories

Go to 

http://buy.garmin.com

.

Troubleshooting

The suction cup will not stay on my 

windshield

1

Clean the suction cup and windshield with rubbing alcohol.

2

Dry with a clean, dry cloth.

3

Mount the suction cup (

page 1

).

My device is not acquiring satellite signals

• Verify the GPS simulator is turned off (

page 13

).

• Take your device out of parking garages and away from tall 

buildings and trees.

• Remain stationary for several minutes.

The device does not charge in my vehicle

• Check the fuse in the vehicle power cable (

page 15

).

• Verify the vehicle is turned on and is supplying power to the 

power outlet.

• Verify the interior temperature of the vehicle is between 32° 

and 113°F (between 0° and 45°C).

• Verify that the fuse is not broken in the vehicle power outlet.

My battery does not stay charged for very 

long

• Decrease the screen brightness (

page 14

).

• Shorten the display timeout (

page 14

).

• Decrease the volume (

page 2

).

• Disable Bluetooth wireless technology (

page 14

).

• Put the device in sleep mode when not in use (

page 1

).

• Keep your device away from extreme temperatures.

Troubleshooting

15

Summary of Contents for RV 760

Page 1: ...RV 760 Owner s Manual July 2013 190 01600 00_0A Printed in Taiwan...

Page 2: ...d without the express permission of Garmin BaseCamp HomePort MapSource myGarmin ecoRoute myTrends trafficTrends n Maps Guarantee and n Maps Lifetime are trademarks of Garmin Ltd or its subsidiaries Th...

Page 3: ...ewing Junctions 6 Warning Icons 6 Road Condition Warnings 6 About Up Ahead 6 Finding Upcoming Points of Interest 6 Customizing the Up Ahead Categories 6 Trip Information 6 Viewing Trip Data from the M...

Page 4: ...Device 13 Map and Vehicle Settings 13 Enabling Maps 13 Editing an RV Profile 13 Navigation Settings 13 Route Preferences 14 Display Settings 14 Bluetooth Settings 14 Disabling Bluetooth 14 Traffic Se...

Page 5: ...This model includes a lifetime traffic subscription and a traffic receiver LM This model includes a n Maps Lifetime subscription which provides quarterly map updates for the useful life of your devic...

Page 6: ...logy status appears when Bluetooth is enabled Transportation mode indicator Current time Battery status Connected to Smartphone Link Temperature Viewing GPS Signal Status Hold for three seconds Batter...

Page 7: ...street number street name city and state To search for a city enter the city and state To search for coordinates enter latitude and longitude coordinates 5 Select an option To search using a suggested...

Page 8: ...ange Map Symbol to change the symbol used to mark the saved location on a map 7 Edit the information 8 Select Done Assigning Categories to a Saved Location You can add custom categories to organize yo...

Page 9: ...ace your responsibility to abide by all posted speed limit signs and to use safe driving judgment at all times Garmin will not be responsible for any traffic fines or citations you receive for failing...

Page 10: ...oms Parking Banks and ATMs Finding Upcoming Points of Interest 1 From the map select Up Ahead 2 Select a tab 3 Select a point of interest Customizing the Up Ahead Categories You can change the categor...

Page 11: ...of road to avoid and select Next 4 Select the ending point of the road section and select Next 5 Select Done Disabling a Custom Avoidance You can disable a custom avoidance without deleting it 1 Selec...

Page 12: ...antenna connector Internal antenna Power LED Vehicle power adapter Positioning the Traffic Receiver You can position the traffic receiver power cable for optimal traffic reception 1 Uncoil the cable 2...

Page 13: ...TE Voice command is not available for all languages and regions and may not be available on all models NOTE Voice Activated Navigation may not achieve desired performance when in a noisy environment V...

Page 14: ...umber 3 Select Dial Calling a Contact in Your Phone Book Your phone book is loaded from your phone to the device each time your phone and the device connect It may take a few minutes for the phone boo...

Page 15: ...ces display the Smartphone Link symbol and appear only when the device is connected to Smartphone Link Subscribing to Garmin Live Services Before you can subscribe to Garmin Live Services you must ins...

Page 16: ...r Forecast Before you can use this feature your device must be connected to a supported phone running Smartphone Link page 11 This feature is not available in all areas 1 Select Apps Weather 2 Select...

Page 17: ...computer open the file browser 3 Select a file 4 Select Edit Copy 5 Browse to a folder on the device NOTE For a removable drive or volume you should not place files in the Garmin folder 6 Select Edit...

Page 18: ...Enables the trafficTrends feature page 9 Units and Time Settings To open the Units and Time settings page from the main menu select Settings Units Time Current Time Sets the device time Time Format Al...

Page 19: ...om for more information 1 Clean and dry the dashboard where you are placing the disk 2 Remove the backing from the adhesive on the bottom of the disk 3 Place the disk on the dashboard 4 Remove the cle...

Page 20: ...as a removable drive or volume and not as a portable device Windows versions prior to Windows XP Service Pack 3 use USB mass storage mode My device does not appear as either a portable device or a re...

Page 21: ...p ahead 6 fuel prices 11 fuel economy 11 12 See also ecoRoute fuel price changing 11 fuse changing 15 G Garmin Express 1 registering the device 1 updating software 1 Garmin Live Services 11 subscribin...

Page 22: ...stops adding 5 subscriptions Garmin Live Services 11 n Maps Lifetime 1 traffic 1 suction cup 15 T theft avoiding 15 time settings 2 14 traffic 8 9 14 activating a subscription 9 adding subscriptions 9...

Page 23: ......

Page 24: ...9 0800 023 3937 035 539 3727 47 815 69 555 00800 4412 454 44 2380 662 915 35 1214 447 460 34 93 275 44 97 46 7744 52020 Garmin International Inc 1200 East 151st Street Olathe Kansas 66062 USA Garmin E...

Page 25: ...GARMIN...

Page 26: ......

Page 27: ...Updates and Manuals...

Page 28: ...33 99 47 815 69 555 Garmin Europe Ltd Garmin International Inc 1200 East 151st Street Olathe Kansas 66062 USA Garmin Corporation Liberty House Hounsdown Business Park Southampton Hampshire S040 9LR U...

Page 29: ...ures Made for iPhone means that an electronic accessory has been designed to connect specifically to iPhone has been certified by the developer to meetApple performance standards Apple is not responsi...

Page 30: ......

Page 31: ...mationen 14 Informacion importante sabre el producto y tu seguridad 17 lnforma oes lmportantes de Seguran a e do Produto 21 Belangrijke veiligheids en productinformatie 25 Vigtige produkt og sikkerhed...

Page 32: ...urces including road signs road closures road conditions traffic congestion weather conditions and other factors that may affect safety while driving For safety always resolve any discrepancies before...

Page 33: ...e suction cup mount on your windshield check the state and local laws and ordinances where you drive Some state laws prohibit drivers from using suction mounts on their windshields while operating mot...

Page 34: ...mpliance Category I radiocommunication devices comply with Industry Canada Standard RSS 210 Category II radiocommunication devices comply with Industry Canada Standard RSS 310 This device complies wit...

Page 35: ...auctions are not eligible for warranty coverage Online auction confirmations are not accepted for warranty verification To obtain warranty service an original or copy of the sales receipt from the or...

Page 36: ...151st Street Olathe Kansas 66062 USA April2013 Garmin Europe Ltd Liberty House Hounsdown Business Park Southampton Hampshire S040 9LR UK 190 00720 71 OF www garm1n com CE Garmin Corporation No 68 Zan...

Reviews: