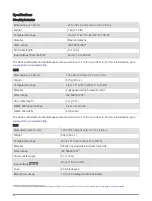
Item
Description
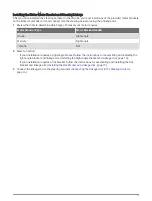
Up to 36 ft. (11 m)
Installing the Steering Actuator
1 If necessary, remove the tiller lock on the motor (
Removing the Tiller Lock on the Motor, page 11
).
2 Prepare the tilt tube on the motor (
Preparing the Tilt Tube, page 11
).
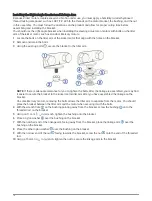
3 Install the steering actuator in the tilt tube (
Installing the Steering Actuator in the Tilt Tube, page 12
).
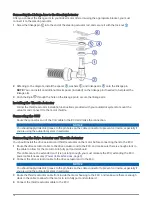
4 Install the bracket on the motor and connect it to the steering actuator (
Installing the Kicker Motor Bracket
).
Removing the Tiller Lock on the Motor
Some motors have a tiller lock that allows you to lock the motor in a specified angle. These locking
mechanisms are unnecessary when using this autopilot system, and may interfere with the installation or
performance of the system. If your motor has a tiller lock, you should remove it before installing the steering
actuator.
1 Determine if your motor has a tiller lock.
2 If necessary, see your motor manual or contact the manufacturer for instructions on removing the tiller lock.
Preparing the Tilt Tube
NOTICE
You must install the steering actuator in a tilt tube made of stainless steel. Installing the steering actuator in a
tilt tube made of material other than stainless steel will cause rust to develop inside of the tilt tube, and
eventually the steering actuator will seize. Mechanical damage to the steering actuator caused by attempting to
free a seized push rod is not covered by the product warranty.
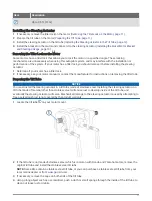
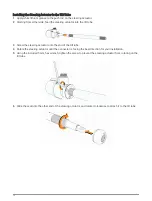
1 Locate the tilt tube on your motor mount.
2 If the tilt tube is not made of stainless steel, which is common with Honda and Yamaha motors, remove the
original tilt tube and install the stainless steel tilt tube.
NOTE: Some kits contain a stainless steel tilt tube, or you can purchase a stainless steel tilt tube from your
local marine dealer or from
.
3 If necessary, remove the caps on both ends of the tilt tube.
4 Using a long object such as a screwdriver, push a cloth or small sponge through the inside of the tilt tube to
clean out loose rust or debris.
11


