background image

Viewing Tide Station Information

 WARNING

Tide and current information is for information purposes only. It is your responsibility to heed all posted water-
related guidance, to remain aware of your surroundings, and to use safe judgment in, on, and around the water 
at all times. Failure to heed this warning could result in property damage, serious personal injury, or death.

The   icon on the chart indicates a tide station. You can view a detailed graph for a tide station to help predict 
the tide level at different times or on different days.
NOTE: This feature is available with premium charts, in some areas.
From the Navigation chart or Fishing chart, select a tide station.

Tide direction and tide level information appear near  .

Select the station name.

Animated Tide and Current Indicators

 WARNING

Tide and current information is for information purposes only. It is your responsibility to heed all posted water-
related guidance, to remain aware of your surroundings, and to use safe judgment in, on, and around the water 
at all times. Failure to heed this warning could result in property damage, serious personal injury, or death.

NOTE: This feature is available with premium charts, in some areas.
You can view indicators for animated tide station and current direction on the Navigation chart or the Fishing 
chart. You must also enable animated icons in the chart settings (

Showing Tides and Current Indicators

page 28

).

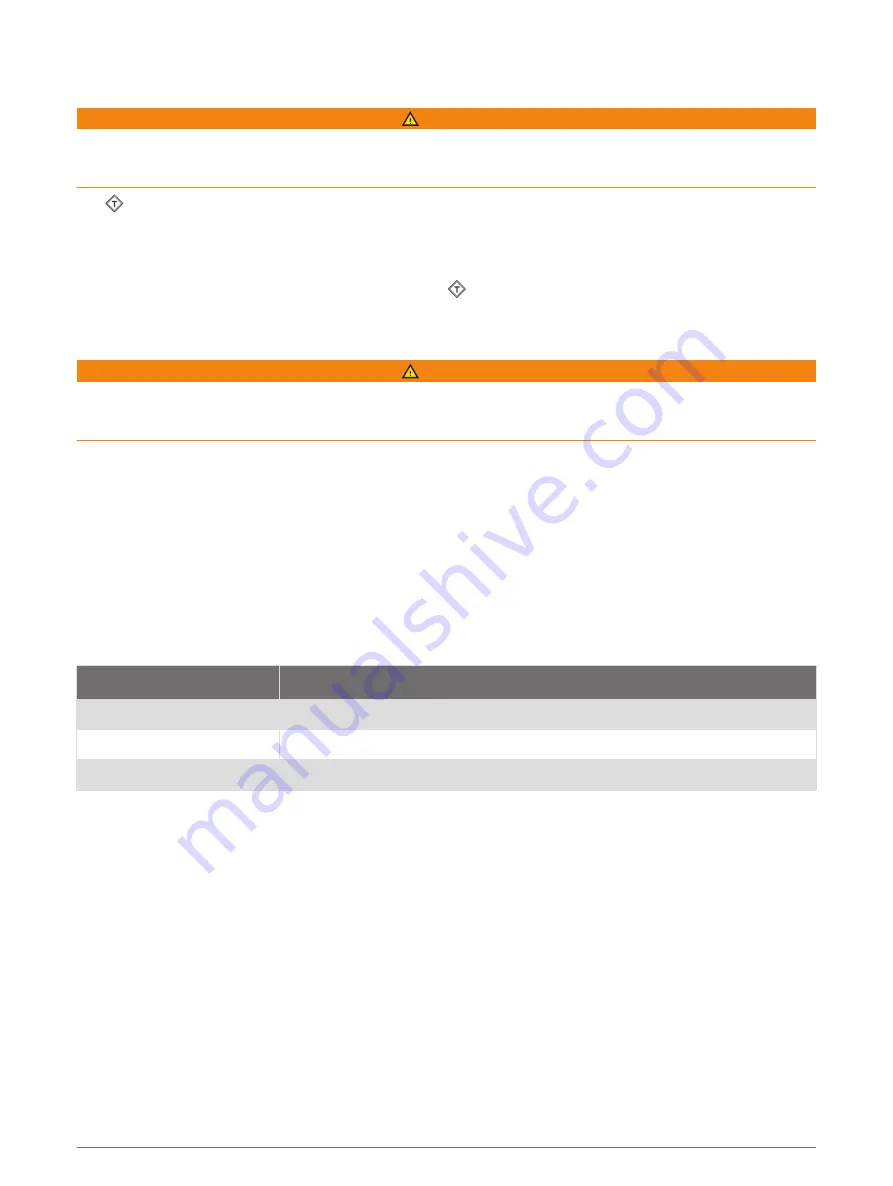
An indicator for a tide station appears on the chart as a vertical bar graph with an arrow. A red arrow pointing 
downward indicates a falling tide, and a blue arrow pointing upward indicates a rising tide. When you move the 
cursor over the tide station indicator, the height of the tide at the station appears above the station indicator.
Current direction indicators appear as arrows on the chart. The direction of each arrow indicates the direction 
of the current at a specific location on the chart. The color of the current arrow indicates the range of speed for 
the current at that location. When you move the cursor over the current direction indicator, the specific current 
speed at the location appears above the direction indicator.

Color

Current Speed Range

Yellow

0 to 1 knot

Orange

1 to 2 knots

Red

2 or more knots

Showing Tides and Current Indicators

NOTE: This feature is available with premium charts, in some areas.
You can show static or animated tide and current station indicators on the Navigation chart or Fishing chart.
From the Navigation or Fishing chart, select Menu > Layers > Chart > Tides & Currents.
Select an option:

• To show animated tide station indicators and animated current direction indicators on the chart, select 

Animated.

• To enables the tides and current slider, which sets the time for which tides and currents are reported on 

the map, select Slider.

28

Charts and 3D Chart Views

Summary of Contents for GPSMAP 8 10 Series

Page 1: ...GPSMAP 84XX 86XX 87XX Owner sManual ...

Page 2: ...rademarks of Apple Inc registered in the U S and other countries Android is a trademark of Google Inc The BLUETOOTH word mark and logos are owned by the Bluetooth SIG Inc and any use of such marks by Garmin is under license Blu Ray is a registered trademark of the Blu ray Disc Association Chromecast is a registered trademark of Google Inc CZone is a trademark of Power Products LLC Color Thermal Vi...

Page 3: ...mizing the Data Overlays 15 Resetting the Station Layouts 15 Presets 15 Saving a New Preset 16 Managing Presets 16 Setting the Vessel Type 16 Adjusting the Backlight 16 Adjusting the Color Mode 16 Turning On the Chartplotter Automatically 16 Enabling Screen Lock 17 Automatically Turning Off the System 17 ActiveCaptain App 17 ActiveCaptain Roles 17 Getting Started with the ActiveCaptain App 18 Enab...

Page 4: ...Enabling AIS Transmission Test Alerts 33 Turning Off AIS Reception 33 Chart Menu 34 Chart Layers 34 Chart Layer Settings 34 Depth Layer Settings 35 My Vessel Layer Settings 35 Laylines Settings 36 User Data Layer Settings 36 Other Vessels Layer Settings 36 Water Layer Settings 37 Depth Range Shading 37 Weather Layer Settings 38 Radar Overlay Settings 38 Chart Settings 38 Fish Eye 3D Settings 39 Su...

Page 5: ...ance Calculation in Progress 51 Setting a Timed Arrival 51 Auto Guidance Path Configurations 52 Adjusting the Distance from Shore 53 Tracks 53 Showing Tracks 53 Setting the Color of the Active Track 54 Saving the Active Track 54 Viewing a List of Saved Tracks 54 Editing a Saved Track 54 Saving a Track as a Route 54 Browsing for and Navigating a Recorded Track 54 Deleting a Saved Track 54 Deleting ...

Page 6: ...4 Selecting a Sonar Source 74 Renaming a Sonar Source 74 Creating a Waypoint on the Sonar Screen 74 Pausing the Sonar Display 74 Viewing Sonar History 74 Sonar Sharing 75 Adjusting the Level of Detail 75 Adjusting the Color Intensity 75 Traditional Garmin ClearVü and SideVü Sonar Setup 76 Setting the Zoom Level on the Sonar Screen 76 Setting the Scroll Speed 77 Adjusting the Range of the Depth or ...

Page 7: ...a Target Object 95 Echo Trails 96 Turning on Echo Trails 96 Adjusting the Length of the Echo Trails 96 Clearing the Echo Trails 96 Radar Settings 96 Radar Gain 96 Adjusting Gain on the Radar Screen Automatically 96 Adjusting Gain on the Radar Screen Manually 97 Minimizing Nearby Large Object Interference 97 Minimizing Side Lobe Interference on the Radar Screen 97 Radar Filter Settings 98 Adjusting...

Page 8: ...11 Assigning a Shortcut to the Trolling Motor Remote Control Shortcut Keys 111 Calibrating the Trolling Motor Compass 111 Setting the Bow Offset 112 Digital Selective Calling 112 Networked Chartplotter and VHF Radio Functionality 112 Turning On DSC 112 DSC List 113 Viewing the DSC List 113 Adding a DSC Contact 113 Incoming Distress Calls 113 Navigating to a Vessel in Distress 113 Man Overboard Dis...

Page 9: ...ar Overview 126 Optimus Overlay Symbols 127 Optimus Limp Home Mode 127 Tide Current and Celestial Information 127 Tide Station Information 127 Current Station Information 127 Celestial Information 128 Viewing Tide Station Current Station or Celestial Information for a Different Date 128 Viewing Information for a Different Tide or Current Station 128 Viewing Almanac Information from the Navigation ...

Page 10: ...n Information 136 Storm Cell and Lightning Information 136 Hurricane Information 136 Forecast Information 136 Viewing a Marine Forecast or an Offshore Forecast 137 Viewing Forecast Information for Another Time Period 137 Weather Fronts and Pressure Centers 137 City Forecasts 138 Viewing Fish Mapping Data 138 Viewing Sea Conditions 138 Surface Winds 139 Wave Height Wave Period and Wave Direction 13...

Page 11: ...io Settings 152 GPS Settings 153 Station Settings 153 Viewing System Software Information 153 Viewing the Event Log 153 Viewing E label Regulatory and Compliance Information 153 Preferences Settings 154 Units Settings 154 Navigation Settings 154 Auto Guidance Path Configurations 155 Adjusting the Distance from Shore 156 Communications Settings 157 NMEA 0183 Settings 157 Configuring NMEA 0183 Outpu...

Page 12: ...D Device with the Chartplotter from the Chartplotter 173 Pairing the GRID Device with the Chartplotter from the GRID Device 173 Rotating the GRID Remote Input Device 173 Cleaning the Screen 173 Viewing Images on a Memory card 174 Screenshots 174 Capturing Screenshots 174 Copying Screenshots to a Computer 174 Troubleshooting 174 My device will not acquire GPS signals 174 My device will not turn on ...

Page 13: ...upport pages will provide answers to frequently asked support questions and you can download software and chart updates There is also contact information to Garmin support should you have any questions Protective Cover NOTICE Before moving the vessel remove the sun cover Leaving the sun cover in place while the boat is moving could result in the sun cover becoming detached and possibly becoming lo...

Page 14: ...ing the Touchscreen Tap the screen to select an item Drag or swipe your finger across the screen to pan or scroll Pinch two fingers together to zoom out Spread two fingers apart to zoom in 2 Introduction ...

Page 15: ...he selected location Removes the last added turn from the route Creates a direct route without turns to the destination Creates an Auto Guidance route to the destination Begins navigation Ends navigation Stops and starts radar transmission Opens the radar gain adjustment menu Opens the radar sea clutter adjustment menu Opens the radar rain clutter adjustment menu Turns on and off the radar echo tr...

Page 16: ...ased upon the model A GPSMAP 8612xsv model is shown below 2 microSD memory card slots 32 GB max NETWORK Garmin Marine Network HDMI IN HDMI in HDMI OUT HDMI out CVBS IN Composite video in AUDIO NMEA 0183 and audio out POWER Power USB Micro USB to connect a compatible Garmin card reader or to connect and control a computer using the chartplotter touchscreen 12 PIN XDCR 12 pin transducer LVS XDCR Liv...

Page 17: ... Power NETWORK Garmin Marine Network HDMI IN HDMI in HDMI OUT HDMI out CVBS IN Composite video in NMEA 0183 NMEA 0183 and audio out USB Micro USB to connect a compatible Garmin card reader or to connect and control a computer using the chartplotter touchscreen NMEA 2000 NMEA 2000 network ENGINE J1939 J1939 engine network Introduction 5 ...

Page 18: ... in Status LED Power ground Power button NMEA 0183 NMEA 0183 and audio out USB HOST Micro USB output for connecting a touchscreen monitor USB OTG Micro USB input from compatible Garmin card reader1 computer or other supported USB accessory NMEA 2000 NMEA 2000 network J1939 J1939 network 1 Only compatible Garmin card readers recommended Third party card readers are not guaranteed to be fully compat...

Page 19: ...elect Power Turn Off System or hold until the Turn Off System bar fills to turn off the chartplotter when available Press and select Power Sleep Station to set the chartplotter to standby mode when available On the home screen of some models swipe up or down on the category buttons along the right side of the screen to view the additional buttons On some models not all category buttons are visible...

Page 20: ...wipe up or down on the category buttons along the right side of the screen to view the additional buttons Not all category buttons are visible The arrows at the top or bottom of the buttons indicate not all buttons are visible On some menu buttons select the button to enable the option A green light on an option indicates the option is enabled When available select the arrow to open the menu Acces...

Page 21: ... recommended An 8 GB memory card is included with GPSMAP 8x10 8x12 8x16 models Model Memory Card Location Memory Card Type 8x10 Back of the device microSD 8x12 Back of the device microSD 8x16 Back of the device microSD 8x17 External card reader SD 8x22 External card reader SD 8x24 External card reader SD 87xx External card reader SD Inserting Memory Cards GPSMAP 8x10 8x12 8x16 This device supports...

Page 22: ...licks 4 Close the card reader door Acquiring GPS Satellite Signals The device may need a clear view of the sky to acquire satellite signals The time and date are set automatically based on the GPS position 1 Turn on the device 2 Wait while the device locates satellites It may take 30 to 60 seconds to acquire satellite signals When the device acquires satellite signals appears at the top of the Hom...

Page 23: ...boat manufacturer you can open the original home screen category tabs by dragging the bar on the right side of the screen to the left The SmartMode items are geared toward an activity such as cruising or docking When a SmartMode button is selected from the home screen each display in the station can show unique information For example when Cruising is selected from the home screen one display can ...

Page 24: ...e change appears only on that display except for the SmartMode name and symbol When you change the SmartMode name or symbol for the layout the new name or symbol appears on all displays in the station 1 Open a page to customize 2 Select Menu 3 Select Edit Layout or Edit Combo 4 Select an option To change the name select Name or Name Symbol Name enter a new name and select Done To change the SmartM...

Page 25: ...SmartMode Layout You can add SmartMode layouts to suit your needs Each customization made to one SmartMode layout for the home screen in a station appears on all displays in the station 1 From the home screen select SmartMode Menu Add Layout 2 Select an option To change the name select Name Symbol Name enter a new name and select Done To change the SmartMode symbol select Name Symbol Symbol and se...

Page 26: ...5 Drag the arrows to resize the windows 6 Hold a window to rearrange it 7 Hold a data field to select new data 8 Select Layout and select a layout 9 Select Name enter a name for the page and select Done 10 Select Overlays and select which data to show 11 Select Done when you have finished customizing the page Deleting a Combination Page 1 Select Combos Menu Delete Combo 2 Select a combination 14 C...

Page 27: ... an option To turn on other data bars like the media controls select Top Bar or Bottom Bar and select the necessary options 3 Select Done Resetting the Station Layouts You can restore the layouts in this station to the factory default settings Select Settings System Station Information Reset Layouts Presets A preset is a collection of settings that optimize the screen or view You can use particula...

Page 28: ... chartplotter settings and to use features customized for your boat type 1 Select Settings My Vessel Vessel Type 2 Select an option Adjusting the Backlight 1 Select Settings System Display Backlight 2 Adjust the backlight TIP From any screen press repeatedly to scroll through the brightness levels This can be helpful when the brightness is so low you cannot see the screen Adjusting the Color Mode ...

Page 29: ...makes no representations about the accuracy completeness or timeliness of information submitted by users Any use or reliance on the information submitted by users is at your own risk The ActiveCaptain app provides a connection to your GPSMAP device charts maps and the community for a connected boating experience On your mobile device with the ActiveCaptain app you can download purchase and update ...

Page 30: ...Data to a Memory Card page 165 Be sure the card is inserted each time you want to use the ActiveCaptain feature 6 From the application store on your mobile device install and open the ActiveCaptain app 7 Bring the mobile device within 32 m 105 ft of the GPSMAP device 8 From your mobile device settings open the Wi Fi connections page and connect to the Garmin device using the name and password you ...

Page 31: ...ou can manage the notifications you must enable the Smart Notifications feature Enabling Smart Notifications page 18 When the Smart Notifications feature is enabled and your mobile device receives a notification a pop up notification appears on the GPSMAP screen briefly You can access and manage the notifications from the ActiveCaptain screen 1 Select ActiveCaptain Smart Notifications Messages A l...

Page 32: ...r the latest chart updates for your device To save space on your mobile device space on the ActiveCaptain card and download time consider using the ActiveCaptain app to download only the areas of the chart you need If you are downloading an entire chart you can use the Garmin Express app to download the map onto a memory card Updating Your Charts Using the Garmin Express App page 168 The Garmin Ex...

Page 33: ...nnecting to a device or if you experience interference 1 Select Settings Communications Wi Fi Network Advanced Channel 2 Enter a new channel You do not need to change the wireless channel of devices connected to this network Changing the Wi Fi Host If there are multiple chartplotters with Wi Fi technology on the Garmin marine network you can change which chartplotter is the Wi Fi host This can be ...

Page 34: ... in degrees clockwise around the mast by which the sensor points away from the center of the front of the boat If the sensor is facing starboard the angle should be between 1 and 180 degrees If the sensor is facing port the angle should be between 1 and 180 degrees 2 Select Settings Communications Wireless Devices 3 Select the wind sensor 4 Select Wind Angle Offset 5 Enter the angle observed in st...

Page 35: ...ovides a detailed view of the bottom contours and depth soundings on the chart This chart removes navigational data from the chart provides detailed bathymetric data and enhances bottom contours for depth recognition This chart is best for offshore deep sea fishing NOTE The Fishing chart is available with premium charts in some areas Perspective 3D Provides a view from above and behind the boat ac...

Page 36: ...hart Zooming In and Out Using the Touchscreen You can quickly zoom in and out of many screens such as the charts and sonar views Pinch two fingers together to zoom out Spread two fingers apart to zoom in Chart Symbols This table contains some of the common symbols you might see on the detailed charts Icon Description Buoy Information Marine services Tide station Current station Overhead photo avai...

Page 37: ...object on the Navigation chart or the Fishing chart 1 From the Navigation chart or Fishing chart select a location or object A list of options appears The options that appear vary based on the location or object you selected 2 If necessary select 3 Select Information Viewing Details about Navaids From the Navigation chart Fishing chart Perspective 3D chart view or Mariner s Eye 3D chart view you c...

Page 38: ...shallow water Use visual sightings and steer to avoid land shallow water and other dangerous objects NOTE The Fishing chart is available with premium charts in some areas NOTE Auto Guidance is available with premium charts in some areas 1 From the Navigation chart or Fishing chart select a location 2 If necessary select Navigate To 3 Select an option To navigate directly to the location select Go ...

Page 39: ...at visually represents the sea floor according to the information on the chart Fishing Charts Shows the chart with enhanced bottom contours and without navigational data This chart works well for offshore deep sea fishing High Resolution Satellite Imagery Provides high resolution satellite images for a realistic view of the land and water on the Navigation chart Showing Satellite Imagery on the Na...

Page 40: ...t You must also enable animated icons in the chart settings Showing Tides and Current Indicators page 28 An indicator for a tide station appears on the chart as a vertical bar graph with an arrow A red arrow pointing downward indicates a falling tide and a blue arrow pointing upward indicates a rising tide When you move the cursor over the tide station indicator the height of the tide at the stati...

Page 41: ... the chart setup Chart Layers page 34 NOTE This feature is available with premium charts in some areas You can use aerial photographs of landmarks marinas and harbors to help orient yourself to your surroundings or to acquaint yourself with a marina or a harbor prior to arrival 1 From the Navigation chart select a camera icon To view an overhead photo select To view a perspective photo select The ...

Page 42: ...e 3D chart view The location of this symbol indicates the closest point of approach to a dangerous target and the numbers near the symbol indicate the time to the closest point of approach to that target NOTE Vessels being tracked with the Blue Force Tracking feature are indicated with a blue green color regardless of their status Heading and Projected Course of Activated AIS Targets When heading ...

Page 43: ...t have a compatible chartplotter connected to an AIS device or radar The safe zone collision alarm is used only with AIS and MARPA MARPA functionality works with radar The safe zone is used for collision avoidance and can be customized 1 Select Settings Alarms Collision Alarm On A message banner appears and an alarm sounds when a MARPA tagged object or an AIS activated vessel enters the safe zone ...

Page 44: ...ocation You can view AIS ATONs on the chart when the chartplotter is connected to a compatible AIS radio To show AIS ATONs from a chart select Menu Layers Chart Navaid ATONs You can view more information about an ATON if you select the ATON on the chart Symbol Meaning Real or synthetic ATON Real or synthetic ATON Topmark North Real or synthetic ATON Topmark South Real or synthetic ATON Topmark Eas...

Page 45: ... Transmission lost Transmission test Appears when a vessel initiates a test of their distress signal device and does not represent a true emergency Transmission test lost Enabling AIS Transmission Test Alerts To avoid a large number of test alerts and symbols in crowded areas such as marinas you can select to receive or ignore AIS test messages To test an AIS emergency device you must enable the c...

Page 46: ... Settings page 35 User Data Shows and hides user data such as waypoints boundaries and tracks and opens user data lists User Data Layer Settings page 36 Other Vessels Adjusts how other vessels are shown Other Vessels Layer Settings page 36 Water Shows and hides depth items Water Layer Settings page 37 Quickdraw Contours Shows and hides Garmin Quickdraw Contours data Garmin Quickdraw Contours Setti...

Page 47: ...ayer Settings From a chart select Menu Layers My Vessel Heading Line Shows and adjusts the heading line which is a line drawn on the map from the bow of the boat in the direction of travel Setting the Heading Line and Angle Markers page 63 Active Tracks Shows the active track on the chart and opens the Active Track Options menu Wind Rose Shows a visual representation of the wind angle or direction...

Page 48: ...entered For a smoother layline that filters out some of the changes in the boat s heading or true wind angle enter a higher number For laylines that display a higher sensitivity to changes in the boat s heading or true wind angle enter a lower number User Data Layer Settings You can show user data such as waypoints boundaries and tracks on the charts From a chart select Menu Layers User Data Waypo...

Page 49: ...hing Relief Shading Shows the gradient of the bottom with shading This feature is available only with some premium maps Sonar Imagery Shows sonar imagery to help show the density of the bottom This feature is available only with some premium maps Lake Level Sets the present water level of the lake This feature is available only with some premium maps Depth Range Shading You can set color ranges on...

Page 50: ...ettings Radar Setup Menu page 99 Edit Overlays Adjusts the data shown on the screen Customizing the Data Overlays page 15 Chart Settings NOTE Not all settings apply to all charts and 3D chart views Some settings require external accessories or applicable premium charts From a chart select Menu Settings Orientation Sets the perspective of the map Vessel Orientation Sets the alignment of the vessel ...

Page 51: ...e Garmin Quickdraw Contours mapping feature allows you to instantly create maps with contours and depth labels for any body of water When Garmin Quickdraw Contours records data a colored circle surrounds the vessel icon This circle represents the approximate area of the map that is scanned by each pass A green circle indicates good depth and GPS position and a speed under 16 km h 10 mph A yellow c...

Page 52: ...Community Connecting to the Garmin Quickdraw Community with Garmin Connect page 41 Connecting to the Garmin Quickdraw Community with ActiveCaptain 1 From your mobile device open the ActiveCaptain app and connect to the GPSMAP device Getting Started with the ActiveCaptain App page 18 2 From the app select Quickdraw Community You can download contours from others in the community Downloading Garmin ...

Page 53: ...nnect account create one 4 Sign in to your Garmin Connect account 5 Select Dashboards Marine to open the Garmin Quickdraw widget TIP Make sure you have a memory card in your computer to share Garmin Quickdraw Contours maps Sharing Your Garmin Quickdraw Contours Maps with the Garmin Quickdraw Community Using Garmin Connect You can share Garmin Quickdraw Contours maps that you have created with othe...

Page 54: ...to load the maps Garmin Quickdraw Contours Settings From a chart select Menu Quickdraw Contours Settings Recording Offset Sets the distance between the sonar depth and the contour recording depth If the water level has changed since your last recording adjust this setting so the recording depth is the same for both recordings For example if the last time you recorded had a sonar depth of 3 1 m 10 ...

Page 55: ...oute and follow the course or route You can follow the course or the route on the Navigation chart Fishing chart Perspective 3D chart view or Mariner s Eye 3D chart view You can set and follow a course to a destination using one of three methods Go To Route To or Auto Guidance Go To Takes you directly to the destination This is the standard option for navigating to a destination The chartplotter c...

Page 56: ...50 How do I change the Auto Guidance settings for my boat See Auto Guidance Path Configurations page 52 Destinations You can select destinations using various charts and 3D chart views or using the lists Searching for a Destination by Name You can search for saved waypoints saved routes saved tracks and marine services destinations by name 1 Select Info Services Search by Name 2 Enter at least a p...

Page 57: ...h back to the course Stopping Navigation While navigating from an applicable chart select an option Select Menu Stop Navigation When navigating with Auto Guidance select Menu Navigation Options Stop Navigation Select Waypoints Waypoints are locations you record and store in the device Waypoints can mark where you are where you are going or where you have been You can add details about the location...

Page 58: ...d a name select Name and enter a name To change the symbol select Symbol To change the depth select Depth To change the water temperature select Water Temp To change the comment select Comment To move the position of the waypoint select Position Moving a Saved Waypoint 1 Select Waypoints 2 Select a waypoint 3 Select Move 4 Indicate a new location for the waypoint To move the waypoint while using t...

Page 59: ... Guidance is available with premium charts in some areas Before you can navigate to a waypoint you must create a waypoint 1 Select Info User Data Waypoints 2 Select a waypoint 3 Select Navigate To 4 Select an option To navigate directly to the location select Go To To create a route to the location including turns select Route To To use Auto Guidance select Auto Guidance 5 Review the course indica...

Page 60: ...Select the starting location of the route The starting point can be your present location or another location 3 Select Add Turn 4 Select the location of the next turn on the chart 5 Select Add Turn 6 If necessary repeat steps 4 and 5 to add more turns 7 Select the final destination Viewing a List of Routes and Auto Guidance Paths 1 Select Info User Data Routes Auto Guidance Paths 2 If necessary se...

Page 61: ...Select Info User Data Routes Auto Guidance Paths 2 Select a route 3 Select Navigate To 4 Select Offset to navigate parallel to the route offset from it by a specific distance 5 Indicate how to navigate the route To navigate the route from the starting point used when the route was created to the left of the original route select Forward Port To navigate the route from the starting point used when ...

Page 62: ...isual sightings and avoid any land shallow water or other obstacles that may be in your path All route and navigation lines displayed on the chartplotter are only intended to provide general route guidance or to identify proper channels and are not intended to be precisely followed Always defer to the navaids and conditions on the water when navigating to avoid groundings or hazards that could res...

Page 63: ...ce path select the path on the navigation chart and select Adjust Path 3 Select a location on the path 4 Drag the point to a new location 5 If necessary select a point and select Remove 6 Select Done Canceling an Auto Guidance Calculation in Progress From the Navigation chart select Menu Cancel TIP You can select Back to quickly cancel the calculation Setting a Timed Arrival You can use this featu...

Page 64: ...hartplotter uses when calculating an Auto Guidance path Preferred Depth Sets the minimum water depth based on chart depth data that your boat can safely travel over NOTE The minimum water depth for the premium charts made before 2016 is 3 feet If you enter a value of less than 3 feet the charts only use depths of 3 feet for Auto Guidance path calculations Vertical Clearance Sets the minimum height...

Page 65: ...intains a wide clearance from obstacles in open water even if you set the Shoreline Distance setting to Near or Nearest As a result the chartplotter may not reposition the Auto Guidance line unless the destination selected requires navigation through a narrow waterway 8 Select an option If the placement of the Auto Guidance line is satisfactory select Menu Navigation Options Stop Navigation and pr...

Page 66: ...d Tracks 2 Select a track 3 Select Select Edit Track Save as Route Browsing for and Navigating a Recorded Track Before you can browse a list of tracks and navigate to them you must record and save at least one track Tracks page 53 1 Select Info User Data Tracks Saved Tracks 2 Select a track 3 Select Follow Track 4 Select an option To navigate the track from the starting point used when the track w...

Page 67: ...ost efficient use of memory 1 Select Info User Data Tracks Active Track Options Interval 2 Select an option To record the track based on a distance between points select Interval Distance Change and enter the distance To record the track based on a time interval select Interval Time Change and enter the time interval To record the track plot based on a variance from your course select Interval Res...

Page 68: ...SmartMode layout to automatically open the layout when entering or exiting the boundary For example you can set a boundary around your marina and automatically open the Docking layout when you approach the marina 1 Select Info User Data Boundaries 2 Select a boundary 3 Select Review Link SmartMode SmartMode 4 Select Entering and select a layout 5 Select Exiting and select a layout Setting a Bounda...

Page 69: ...d time and after you start the race timer a predictor line appears The predictor line extends from your current location toward the start line and the laylines that extend from each pin The end point and color of the predictor line indicate where the boat will be when the timer expires based on your current boat speed When the end point is before the start line the line is white This indicates the...

Page 70: ...er The race timer is added to the Sail Racing combination screen by default 1 From the Sail Racing combination screen select Start NOTE You can also access this from the Sailing SmartMode screen and the navigation chart 2 When necessary select Sync to synchronize with the official race timer Stopping the Race Timer From the Sail Racing combination screen select Stop Setting the Distance between th...

Page 71: ...ind angle enter a higher number For laylines that display a higher sensitivity to changes in the boat s heading or true wind angle enter a lower number Polar Tables WARNING This feature allows you to load and use data from a third party Garmin makes no representations about the accuracy reliability completeness or timeliness of the data generated by third parties Any use or reliance on data genera...

Page 72: ... App Wind Angle To show the difference between the current boat speed and the optimal boat speed shown as speed select Δ Polar Speed To show the difference between the current boat speed and the optimal boat speed as a percentage select Δ Polar Speed Percent To show the difference between the current boat speed and the target boat speed shown as speed select Δ Target Speed To show the difference b...

Page 73: ...o the keel of the boat Enter this value as a positive number If the transducer is installed at the bottom of the keel and you want to know the true depth of the water measure the distance from the transducer to the water line Enter this value in as a negative number 2 Complete an action If the transducer is connected to the chartplotter or a sonar module select Settings My Vessel Depth and Anchori...

Page 74: ...Wind Hold Adjusting the Wind Hold Angle with the Autopilot You can adjust the wind hold angle on the autopilot when wind hold is engaged To adjust the wind hold angle in increments of 1 select or To adjust the wind hold angle in increments of 10 hold or Tack and Gybe You can set the autopilot to perform a tack or gybe while heading hold or wind hold is engaged Tacking and Gybing from Heading Hold ...

Page 75: ...sensor and the GPS antenna select COG and Heading This displays both the heading line and the COG line on the chart 3 Select Display and select an option Select Distance Distance and enter the length of the line shown on the chart Select Time Time and enter the time used to calculate the distance your boat will travel in the specified time at your present speed Sonar Fishfinder When properly conne...

Page 76: ...tional sonar view shows a large image of the sonar readings from a transducer The range scale along the right side of the screen shows the depth of detected objects as the screen scrolls from the right to the left Depth information Suspended targets or fish Bottom of the body of water Split Frequency Sonar View In the split frequency sonar view the two sides of the screen show a full view graph of...

Page 77: ...y sonar provides a detailed picture of the fishing environment around the boat in a detailed representation of structures the boat is passing over Traditional transducers emit a conical beam The Garmin ClearVü scanning sonar technology emits two narrow beams similar to the shape of the beam in a copying machine These beams provide a clearer picture like image of what is beneath the boat Sonar Fish...

Page 78: ...el does provide built in SideVü sonar you need a compatible SideVü transducer SideVü scanning sonar technology shows you a picture of what lies to the sides of the boat You can use this as a search tool to find structures and fish Left side of the boat Right side of the boat The transducer on your vessel Logs Old tires Trees Water between the vessel and the bottom Distance from the side of the boa...

Page 79: ...anoptix Sonar Views To receive Panoptix sonar you need a compatible transducer The Panoptix sonar views allow you to see all around the boat in real time You can also watch your bait underwater and bait schools in front of or below your boat The LiveVü sonar views provide you a view of the live movement either in front of or below your boat The screen updates very quickly producing sonar views tha...

Page 80: ...his sonar view shows a two dimensional view of what is below the boat and can be used to see a bait ball and fish Panoptix down view history in a scrolling sonar view Boat Range Trails Drop shot rig Bottom 68 Sonar Fishfinder ...

Page 81: ...LiveVü Forward Sonar View This sonar view shows a two dimensional view of what is in front of the boat and can be used to see a bait ball and fish Boat Range Fish Trails Bottom Sonar Fishfinder 69 ...

Page 82: ...ows a three dimensional view of what is in front of the transducer This view can be used when you are stationary and you need to see the bottom and the fish approaching the boat Color legend Boat Ping indicator Fish Bottom Range 70 Sonar Fishfinder ...

Page 83: ... This sonar view shows a three dimensional view of what is below the transducer and can be used when you are stationary and want to see what is around your boat Color legend Boat Sonar beam Range Fish Bottom Sonar Fishfinder 71 ...

Page 84: ...ructure Fish FrontVü Sonar View The Panoptix FrontVü sonar view increases your situational awareness by showing obstructions under the water up to 91 meters 300 feet in front of the boat The ability to effectively avoid forward collisions with FrontVü sonar decreases as your speed rises above 8 knots To see the FrontVü sonar view you must install and connect a compatible transducer such as a PS21 ...

Page 85: ... or fish Bottom of the body of water Perspective View This sonar view shows a live view of what is around and ahead of your boat and can be used to see shorelines fish and structures This view is best used in shallow water of 50 feet 15 meters or less To see this sonar view you must install a Panoptix LiveScope transducer on a Perspective Mode Mount 010 12970 00 Sonar Fishfinder 73 ...

Page 86: ...are using more than one sonar data source for a particular sonar view you can select the source to use for that sonar view For example if you have two sources for Garmin ClearVü you can select the source to use from the Garmin ClearVü sonar view 1 Open the sonar view for which you will change the source 2 Select Menu Sonar Setup Source 3 Select the source for this sonar view Renaming a Sonar Sourc...

Page 87: ...ghest intensity signal returns on the screen you can lower the gain or brightness to remove lower intensity returns and noise If you want to see all return information you can increase the gain or brightness to see more information on the screen This also increases noise and can make it more difficult to recognize actual returns 1 From a sonar view select Menu 2 Select Gain or Brightness 3 Select ...

Page 88: ...iews Installation Configures the transducer Traditional Garmin ClearVü and SideVü Transducer Installation Settings page 81 Setting the Zoom Level on the Sonar Screen 1 From a sonar view select Menu Zoom Mode 2 Select an option To set the depth and zoom automatically select Auto If necessary select Set Zoom to modify the zoom setting Select View Up or View Down to set the depth range of the magnifi...

Page 89: ... structure it is recommend to use the Auto setting To scroll faster select Up To scroll more slowly select Down Adjusting the Range of the Depth or Width Scale You can adjust the range of the depth scale traditional and Garmin ClearVü sonar views and the range of the width scale for the SideVü sonar view Allowing the device to adjust the range automatically keeps the bottom within the lower or out...

Page 90: ...s the appearance of returns such as the bottom When smoothing is set to high more of the low level noise remains than when using the interference control but the noise is more subdued because of averaging Smoothing can remove speckle from the bottom Smoothing and interference work well together to eliminate low level noise You can adjust the interference and smoothing settings incrementally to rem...

Page 91: ...r because the sonar signal takes longer to travel to the water bottom and back to the transducer The 1 1 setting draws one column of information on the screen per sounder return The 2 1 setting draws two columns of information on the screen per sounder return and so on for the 4 1 and 8 1 settings Echo Stretch Adjusts the size of the echoes on the screen to make it easier to see separate returns o...

Page 92: ...d when the transducer detects a suspended target within the specified depth from the surface of the water and from the bottom Fish Fish Sets an alarm to sound when the device detects a suspended target sets the alarm to sound when fish of all sizes are detected sets the alarm to sound only when medium or large fish are detected sets the alarm to sound only when large fish are detected Advanced Son...

Page 93: ...rough sea conditions Wider beam widths generate larger arches for fish target returns making them ideal for locating fish Wider beam widths also perform better in deep water because the lower frequency has better deep water penetration CHIRP frequencies allow you to sweep each pulse through a range of frequencies resulting in better target separation in deep water CHIRP can be used to distinctly i...

Page 94: ...al flasher along the right side of the view showing you what is underneath the transducer right now You can use the a scope to identify target returns that may be missed when the sonar data is quickly scrolling across the screen such as when your boat is moving at high speeds It can also be helpful for detecting fish that are close to the bottom The a scope above shows fish returns and a soft bott...

Page 95: ...the screen returns to a full screen view Adjusting the RealVü Viewing Angle and Zoom Level You can change the viewing angle of the RealVü sonar views You can also zoom in and out of the view From a RealVü sonar view select an option To adjust the viewing angle diagonally select To adjust the viewing angle horizontally select To adjust the viewing angle vertically select To adjust the viewing angle...

Page 96: ...nually adjusting the range enables you to view a specified range The bottom can appear on the screen as long as it appears within the range you have set Manually reducing this option can reduce the effectiveness of the FrontVü Alarm reducing your reaction time to low depth readings Transmit Angle Adjusts the focus of the transducer to the port or starboard side This feature is available only with ...

Page 97: ...ur speed rises above 8 knots LiveVü and FrontVü Appearance Settings From a LiveVü or FrontVü Panoptix sonar view select Menu Sonar Setup Appearance Color Scheme Sets the color palette Color Gain Adjusts the intensity of colors shown on the screen You can select a higher color gain value to see targets higher in the water column A higher color gain value also allow you to differentiate low intensit...

Page 98: ...sting the range enables you to view a specified range which can be useful for tracking a bottom that has large terrain changes such as a drop offs or cliffs The bottom can appear on the screen as long as it appears within the range you have set Available in LiveScope sonar view Forward Range Adjusts the range of the forward scale Allowing the device to adjust the range automatically adjusts the fo...

Page 99: ...tive Appearance Settings From the LiveScope or Perspective sonar view select Menu Sonar Setup Appearance Color Scheme Sets the color palette Color Gain Adjusts the contrast of colors shown on the screen You can select a higher color gain value to see minor variances in targets with large color changes You can select a lower color gain value to see more similar colors in the same situation Trails S...

Page 100: ...ransducer automatically When this setting is turned off you can enter the specific installation angle for the transducer using the Pitch Angle setting Many forward view transducers are installed at a 45 degree angle and down view transducers are installed at a zero degree angle Flipped Sets the orientation of the Panoptix sonar view when the down view transducer is installed with the cables pointi...

Page 101: ...e shaft far enough away from the trolling motor to avoid magnetic interference and deployed in the water Calibration must be of sufficient quality to enable the internal compass NOTE To use the compass you must mount the transducer on the transom or the trolling motor shaft The compass may not work when you mount the transducer on the motor NOTE For best results you should use a heading sensor suc...

Page 102: ...e the radar the better you will become at relying on the radar display when you really need it Radar can be useful in many situations such as avoiding collisions when you have limited visibility for example when it is dark or foggy tracking weather seeing what is ahead of you and locating birds and fish The radar overlay feature can help you interpret the radar display more easily because it overl...

Page 103: ...ary the radar warms up and a countdown alerts you when the radar is ready 3 Select Radar 4 Select a radar mode A countdown message appears while the radar is starting up 5 Select Menu Transmit Radar Stopping the Transmission of Radar Signals From a radar screen select Menu Radar To Standby TIP Press Radar To Standby from any screen to quickly stop radar transmission Setting Up the Timed Transmit M...

Page 104: ...utter setting is configured optimally Select the shortest effective range given your reason for using radar and the present environmental conditions MotionScope Doppler Radar Technology The GMR Fantom radar uses the Doppler effect to detect and highlight moving targets to help you avoid potential collisions find flocks of birds and track weather formations The Doppler effect is the frequency shift...

Page 105: ...ag the location of the outer guard zone corner 3 Select Corner 2 4 Select the location of the inner guard zone corner to define the width of the guard zone 5 Select Done MARPA Mini automatic radar plotting aid MARPA enables you to identify and track targets and is primarily used for collision avoidance To use MARPA you assign a MARPA tag to a target The radar system automatically tracks the tagged...

Page 106: ...matically based on MotionScope guard zones or boundaries 1 From a radar screen select Menu Layers Other Vessels MARPA Auto Acquire 2 Select and adjust additional settings optional Assigning a MARPA Tag to an Object Before you can use MARPA you must have a heading sensor connected and an active GPS signal The heading sensor must provide the NMEA 2000 parameter group number PGN 127250 or the NMEA 01...

Page 107: ...the distance and bearing from your boat to a target object On the Radar screen the VRM appears as a circle that is centered on the present location of your boat and the EBL appears as a line that begins at the present location of your boat and intersects the VRM The point of intersection is the target of the VRM and the EBL Showing and Adjusting the VRM and the EBL You can adjust the diameter of t...

Page 108: ...on the screen From a radar screen select Menu Radar Options Echo Trails Clear Trails Radar Settings NOTE Not all options and settings are available on all radar and chartplotter models NOTE You can optimize the radar display for each radar mode Radar Gain Adjusting Gain on the Radar Screen Automatically The automatic gain setting for each radar mode is optimized for that mode and may differ from t...

Page 109: ...a very bright image of the target to appear on the Radar screen This image can obscure smaller targets located near it NOTE Depending upon the radar in use the gain setting configured for use in one radar mode may or may not be applied to other radar modes or to the Radar overlay 1 From a Radar screen or the Radar overlay select Menu Gain 2 Select Down to lower the gain until the smaller targets a...

Page 110: ...a conditions automatically Adjusting Rain Clutter on the Radar Screen You can adjust the appearance of clutter caused by rain Reducing the radar range also can minimize rain clutter Adjusting the Radar Range page 92 The rain clutter setting affects the appearance of nearby rain clutter and targets more than it affects the appearance of distant rain clutter and targets A higher rain clutter setting...

Page 111: ...ted to the network Chart Display Shows the chart under the radar image When enabled the Layers menu appears Orientation Sets the perspective of the radar display Crosstalk Rej Reduces the appearance of clutter caused by interference from another nearby radar source Rotation Spd Sets the preferred speed at which the radar rotates The High Speed option can be used to increase the refresh rate In som...

Page 112: ...et setting configured for use in one radar mode is applied to every other radar mode and to the Radar overlay 1 From a Radar screen or the Radar overlay select Menu Radar Setup Installation Front of Boat 2 Select Up or Down to adjust the offset Setting a Custom Park Position By default the antenna is stopped perpendicular to the pedestal when it is not spinning You can adjust this position 1 From ...

Page 113: ...figuration NOTICE To avoid damage to your boat the autopilot system should be installed and configured by a qualified marine installer Specific knowledge of marine steering and electrical systems is required for proper installation and configuration The autopilot system must be configured to work properly with your boat You can configure the autopilot using a chartplotter on the same NMEA 2000 net...

Page 114: ...aver You can adjust the level of rudder activity 1 From the autopilot screen select Menu Autopilot Setup Power Mode Setup Power Saver 2 Select a percentage Selecting a higher percentage reduces rudder activity and heading performance The higher the percentage the more the course deviates before the autopilot corrects it TIP In choppy conditions at low speeds increasing the Power Saver percentage r...

Page 115: ... Helm NOTE You must enable the Shadow Drive feature before you can adjust the heading using the helm Enabling Shadow Drive page 102 With the autopilot engaged manually steer the boat The autopilot activates Shadow Drive mode When you release the helm and manually maintain a specific heading for a few seconds the autopilot resumes a heading hold at the new heading Adjusting the Heading with the Cha...

Page 116: ...rd Setting Up and Following the Zigzag Pattern You can use the zigzag pattern to steer the boat from port to starboard and back over a specified time and angle across your present heading 1 From the autopilot screen select Menu Pattern Steering Zigzag 2 If necessary select Amplitude and select a degree 3 If necessary select Period and select a length of time 4 Select Engage Zigzag Following the Wi...

Page 117: ...The default distance between circles is 50 ft 20 m 1 From the autopilot screen select Menu Pattern Steering Search 2 If necessary select Search Spacing and select a distance 3 Select Engage Port or Engage Starboard Cancelling a Steering Pattern Physically steer the boat NOTE Shadow Drive must be enabled to cancel a steering pattern by physically steering the boat Select or to cancel a pattern usin...

Page 118: ...lity to operate your boat It does not relieve you of the responsibility of safely operating your boat Avoid navigational hazards and never leave the helm unattended You can wirelessly connect a Reactor autopilot remote control to the chartplotter to control the compatible Reactor autopilot system For more information about using the remote see the Reactor autopilot remote control instructions at g...

Page 119: ...responsible for the safe and prudent operation of your vessel The autopilot is a tool that enhances your capability to operate your boat It does not relieve you of the responsibility of safely operating your boat Avoid navigational hazards and never leave the helm unattended Always be prepared to promptly regain manual control of your boat Learn to operate the autopilot on calm and hazard free ope...

Page 120: ...The DriftPoint option allows the boat to drift with the wind or current while maintaining the selected heading but does not maintain the position The StayPoint option maintains the position and the heading The Deceleration option stops the motor but does not maintain the position or heading The No Deceleration option does not stop the motor Course Hold Offset Sets a distance to navigate parallel t...

Page 121: ...rmin Force trolling motor on your boat to control the trolling motor from the chartplotter 1 Turn on the chartplotter and the trolling motor 2 Enable the Wi Fi network on the chartplotter Setting Up the Wi Fi Wireless Network page 21 3 If multiple chartplotters are connected on the Garmin Marine Network make sure this chartplotter is the host of the Wi Fi network Changing the Wi Fi Host page 21 4 ...

Page 122: ...creases the speed Enables the cruise control at the current speed over ground SOG Engages the propellor at full speed Trolling motor status Enables anchor lock which uses the trolling motor to hold your position Steers the trolling motor When in anchor lock jogs the anchor lock position forward backward left or right Enables heading hold set and maintain the current heading When the trolling motor...

Page 123: ... safe operation of your boat When using the Manual setting for the Arrival Mode option you must be ready to take control of the boat Auto Power On Turns on the trolling motor when you apply power to the system Prop Stow Side Sets which side of the trolling motor the propellor rotates to when stowing the trolling motor This is helpful when you store other items near the stowed propellor Shortcut Ke...

Page 124: ...information is transmitted with DSC calls The chartplotter can receive digital selective calling DSC distress and position information from the radio The chartplotter can track the positions of vessels sending position reports If you have a Garmin NMEA 2000 VHF radio connected to your chartplotter these features are also enabled The chartplotter allows you to quickly set up and send individual rou...

Page 125: ...List 2 Select a position report call 3 Select Review Navigate To 4 Select Go To or Route To Man Overboard Distress Calls Initiated from a VHF Radio When the chartplotter is connected to a compatible VHF radio with NMEA 2000 and you initiate a man overboard DSC distress call from the radio the chartplotter shows the man overboard screen and prompts you to navigate to the man overboard point If you ...

Page 126: ...il line select Trail Line Deleting a Position Report Call 1 Select Info DSC List 2 Select a position report call 3 Select Review Clear Report Viewing Vessel Trails on the Chart You can view trails for all tracked vessels on some chart views By default a black line indicates the path of the vessel a black dot indicates each previously reported position of a tracked vessel and a blue flag indicates ...

Page 127: ...o call 3 Select Review Call with Radio 4 If necessary select Channel and select a new channel 5 Select Send The chartplotter sends information about the call to the radio 6 On your Garmin VHF radio complete the call Making an Individual Routine Call to an AIS Target 1 From a chart or 3D chart view select an AIS target 2 Select AIS Vessel Call with Radio 3 If necessary select Channel and select a n...

Page 128: ...2 Select a gauge to customize 3 Select an option To set the minimum value of the standard operating range select Rated Min To set the maximum value of the standard operating range select Rated Max To set the lower limit of the gauge lower than the rated minimum select Scale Min To set the upper limit of the gauge higher than the rated maximum select Scale Max 4 Select the limit value 5 Repeat step...

Page 129: ...lation Status Alarms On When an engine alarms is triggered a gauge status alarm message appears and the gauge may become red depending on the type of alarm Enabling Some Engine Gauge Status Alarms 1 From the engine gauges screen select Menu Installation Status Alarms Custom 2 Select one or more engine gauge alarms to turn on or off Gauges and Graphs 117 ...

Page 130: ...et Point functions Helm Master Tank level information Hold a tank to view detailed tank level sensor information Status icons GPS signal strength Helm Master Select to set the Fish Point settings Helm Master Helm Master EX Select to set the trolling speed Helm Master Helm Master EX Mechanical RC Digital Electronic RC 6X6 6X7 Data fields Hold to replace the data Shift position Tachometer and trim a...

Page 131: ...ator is on Serious engine damage will occur Low battery voltage Check the battery and battery connections and tighten all loose battery connections Return to port soon if tightening the battery connections does not increase the battery voltage Consult your Yamaha dealer immediately NOTE Do NOT stop the engine when this alert is on If you do you may not be able to restart the engine Water in the fu...

Page 132: ...lect Done 4 Select Type and select the type of sensor 5 Select Style and select the style of sensor 6 Select Tank Capacity enter the capacity of the tank and select Done 7 Select Calibration and follow the on screen instructions to calibrate the tank levels If you do not calibrate the tank levels the system uses default settings for the tank levels Changing the Data Shown 1 From a data screen hold...

Page 133: ...ontrol Sets the speed source to GPS or RPM Using GPS as the Speed Source is available only with the Helm Master EX system equipped with an autopilot or joystick GPS is not available on the Helm Master system Autopilot Setting Configures the Yamaha autopilot settings Available on the Helm Master EX system equipped with an autopilot For Garmin autopilot information see Autopilot page 101 Joystick an...

Page 134: ...ble Sounds and Display Settings page 152 Failure to set audible alarms could lead to injury or property damage Before you can set a fuel level alarm a compatible fuel flow sensor must be connected to the chartplotter You can set an alarm to sound when the total amount of remaining onboard fuel reaches the level you specify 1 Select Settings Alarms Fuel Set Total Fuel Onboard On 2 Enter the remaini...

Page 135: ... used for wind calculations is based on water speed or GPS speed 1 From the wind gauge select Menu Compass Gauge Speed Display 2 Select an option To calculate the vessel speed based on data from the water speed sensor select Water Speed To calculate the vessel speed based on GPS data select GPS Speed Configuring the Heading Source of the Wind Gauge You can specify the source of the heading display...

Page 136: ...lect an item 3 Select Device and select an item from the list 4 If necessary select Name enter a name for this device and select Done 5 If necessary select Change Icon select a new symbol and select Done 6 Repeat steps 2 through 5 for each device Viewing Graphs Before you can view graphs of various environmental changes such as temperature depth and wind you must have an appropriate transducer or ...

Page 137: ...and chartplotter connect automatically when they are within range Receiving inReach Messages When your inReach device receives a message a pop up notification appears briefly on the GPSMAP screen To review the full message select Review To dismiss the pop up notification select OK or wait for the notification to close automatically Sending an inReach Preset Message Preset messages are messages tha...

Page 138: ...ary the Optimus system provides messages with information instructions and alerts about faults and hazards A no swimming icon indicates that you should not swim when certain Optimus modes are active In these modes propeller control is automatic and could injure someone in the water Activating the Optimus Overlay Bar 1 From a chart select Menu Edit Overlays 2 Select Top Bar or Bottom Bar 3 Select O...

Page 139: ...nsibility to heed all posted water related guidance to remain aware of your surroundings and to use safe judgment in on and around the water at all times Failure to heed this warning could result in property damage serious personal injury or death You can view information about a tide station for a specific date and time including the tide height and when the next high and low tides will occur By ...

Page 140: ...r the day before the date shown select Previous Day Viewing Information for a Different Tide or Current Station 1 Select Info Tides Currents 2 Select Tides or Currents 3 Select Nearby Stations 4 Select a station Viewing Almanac Information from the Navigation Chart 1 From a chart or 3D chart view select a location 2 Select Information 3 Select Tides Currents or Celestial Warning Manager During an ...

Page 141: ...ct a compatible device to the chartplotter Select OneHelm A V Gauges Media Media Player Icons NOTE Not all devices have these icons Icon Description Saves or deletes a channel as a preset Repeats all songs Repeats one song Searches for stations or skips songs Shuffles Selecting the Media Device and Source You can select the media source connected to the stereo When you have multiple stereo or medi...

Page 142: ...etwork NOTE A Fusion PartyBus zone stereo such as the Apollo SRX400 zone stereo cannot stream sources to other Fusion PartyBus devices on the network Because of this zone stereos do not appear as available sources in the chartplotter 1 From the media screen select Source NOTE After few moments the compatible Fusion PartyBus stereos appear as sources 2 Select the Fusion PartyBus stereo 3 If necessa...

Page 143: ...B Playback page 132 For instructions on connecting a DAB adapter and antenna see the installation instructions provided with your adapter and antenna Setting the Tuner Region 1 From the media screen select Menu Installation Tuner Region 2 Select an option Changing the Radio Station 1 From the media screen select an applicable source such as FM 2 Select or to tune to a station Changing the Tuning M...

Page 144: ...t the tuner region to a location where DAB signals are broadcast 1 Select the DAB source 2 Select Scan to scan for available DAB stations When scanning is complete the first available station in the first ensemble found begins playing NOTE After the first scan is complete you can select Scan again to re scan for DAB stations When the re scan is complete the system starts playing the first station ...

Page 145: ...or by tuning your chartplotter to channel 0 1 Select Media Source SiriusXM 2 Tune to channel 0 The SiriusXM radio ID does not include the letters I O S or F Activating a SiriusXM Subscription 1 With the SiriusXM source selected tune to channel 1 You should be able to hear the preview channel If not check the SiriusXM Connect Tuner and antenna installation and connections and try again 2 Tune to ch...

Page 146: ...requires you to enter a passcode to tune to the locked channels Select Browse Parental Lock Unlock A list of channels appears A checkmark indicates a locked channel NOTE When you view the channels after setting parental controls the display changes indicates a locked channel indicates an unlocked channel Clearing All Locked Channels on a SiriusXM Radio Before you can clear all locked channels the ...

Page 147: ...r information sources prior to making safety related decisions You acknowledge and agree that you shall be solely responsible for use of the weather information and all decisions taken with respect to navigating in weather Garmin will not be responsible for any consequences of using SiriusXM weather information NOTE SiriusXM data is not available in all regions A Garmin SiriusXM satellite weather ...

Page 148: ... Information Storm cell are represented by the icon on the weather precipitation chart They indicate both the present position of a storm and the projected path of that storm in the immediate future Red cones appear with a storm cell icon and the widest part of each cone points in the direction of the projected path of the storm cell The red lines in each cone indicate where the storm will most li...

Page 149: ...nts and Pressure Centers Weather fronts appear as lines that indicate the leading edge of an air mass Front Symbol Description Cold front Warm front Stationary front Occluded front Trough Pressure center symbols often appear near weather fronts Pressure Center Symbol Description Indicates a low pressure center which is a region of relatively lower pressure Moving away from a low pressure center re...

Page 150: ...rizzle Viewing Fish Mapping Data NOTE This feature requires a GXM 54 antenna and a SiriusXM Fish Mapping service subscription The Fish Mapping weather chart shows information that can help you locate fish species 1 Select Charts Fish Mapping 2 If necessary select Menu Layers and turn on and off information Viewing Sea Conditions The Sea Conditions feature shows information about surface conditions...

Page 151: ...legend The wave period indicates the time in seconds between successive waves Wave period lines indicate areas that have the same wave period Wave directions appear on the chart using red arrows The direction of each arrow pointer indicates the direction in which a wave is moving Viewing Forecast Sea Conditions Information for Another Time Period 1 Select Charts Sea Conditions 2 Select an option T...

Page 152: ...wer or upper limit Visibility Information Visibility is the forecast maximum horizontal distance that can be seen at the surface as shown in the legend on the left of the screen Variations in the visibility shading show the forecast change in surface visibility NOTE This feature is not available on all devices and in all subscriptions Select Charts Visibility Viewing Forecast Visibility Informatio...

Page 153: ...Select OneHelm A V Gauges Video Selecting a Video Source 1 From the video screen select Menu Source 2 Select the source of the video feed Alternating Among Multiple Video Sources If you have two or more video sources you can alternate between them using a specific time interval 1 From the video screen select Menu Source Alternate 2 Select Time and select the amount of time each video appears 3 Sel...

Page 154: ...ra restores the video settings saved for that preset TIP You can also save and activate presets using the video menu Camera Settings Some cameras provide additional options to control the camera view NOTE Not all options are available on all camera models and chartplotter models Refer to the camera manual for a list of available features You may need to update the camera software to use this featu...

Page 155: ...his camera FLIR Menu Provides access to the settings for the camera Associating the Camera to a Video Source You may need to associate the camera with a video source 1 From the video screen select Menu Source 2 Select the camera 3 Select Video Setup Set Input 4 Select the video input Video Camera Movement Control NOTICE Do not aim the camera at the sun or extremely bright objects Damage to the len...

Page 156: ...Auto To allow the chartplotter to automatically select the source format select Standard Auto Garmin VIRB Action Cameras WARNING Do not view video or photos while operating the vessel Failure to pay attention to the conditions on the water can result in vessel damage personal injury or death Most VIRB action cameras connect to the chartplotter from the camera menu Connecting a VIRB Action Camera p...

Page 157: ...otter NOTE The VIRB image shown on the chartplotter is a in a lower resolution than the VIRB action camera records To view the high resolution video view the video on a computer or television 1 Select OneHelm A V Gauges VIRB 2 Select an option To take a still photograph select To begin recording select When recording the remaining recording memory is shown To stop recording select again If you hav...

Page 158: ...ra into a low power mode to conserve battery power Not available on the VIRB 360 camera Video Setup Sets up the video VIRB Action Camera Video Setup Settings page 146 Edit Overlays Adjusts the data shown on the screen Customizing the Data Overlays page 15 VIRB Action Camera Video Setup Settings NOTE Not all options and settings apply to all camera models Select OneHelm A V Gauges VIRB Menu Video S...

Page 159: ...ge 21 You can add the VIRB action camera control bar to other screens This allows you to start and stop recording from other functions in the chartplotter 1 Open the screen to which you want to add the VIRB action camera control bar 2 Select Menu Edit Overlays Bottom Bar VIRB Bar When viewing a screen that has the VIRB action camera controls you can select to open the full screen view of the VIRB ...

Page 160: ...n Marine Network but it is not shared across the NMEA 2000 network HDCP content is not shared across the Garmin Marine Network Through the HDMI OUT port you can display the chartplotter on an external screen such as a television or monitor You cannot view HDCP content on an external screen The Garmin GPSMAP HDMI accessory cable is 4 5 m 15 ft long If you need a longer cable you should use an activ...

Page 161: ...icon appears on the video screen To always play the HDMI audio even when you are not viewing the HDMI video select Always On The icon appears on the video screen Pairing the GC 100 Camera with a Garmin Chartplotter Before you can connect a wireless device to the chartplotter wireless network you must configure the chartplotter wireless network 1 With the camera within an unobstructed 76 m 250 ft o...

Page 162: ...ted cameras in the system to help with maneuvering and docking The surround view camera system is available only on select vessels and is installed in the factory To view the surround view camera screen from the home screen select OneHelm A V Gauges Surround View Item Description Information Bird s eye view The bird s eye view is always shown on the surround view camera screen You can include the ...

Page 163: ...camera screen select Menu Layout 2 Select the layout Showing and Hiding the Visual Bumper The visual bumper is an adjustable perimeter line you can set around your boat The visual bumper appears on the birds eye view only and can help you judge how close objects are to your boat From the surround view camera screen select Menu Visual Bumper Adjusting the Visual Bumper You must have the visual bump...

Page 164: ...ce to set day or night colors automatically based on the time of day Background Sets the background image Startup Image Sets the image that appears when you turn on the device Startup Layout Sets the layout that appears when you turn on the device Screen Lock Sets the anti theft feature that requires a security PIN Personal Identification Number to prevent unauthorized use of the device Enabling S...

Page 165: ...her displays to make a station GRID Pairing Allows you to pair a GRID remote input device with this station Display Order Sets the order of the displays which is important when using a GRID remote input device Autopilot Enabled Allows you to control the autopilot from this device Reset Layouts Resets the layouts in this station to the factory default settings Reset Station Settings Resets all stat...

Page 166: ...ts the magnetic north as the north reference Position Format Sets the position format in which a given location reading appears Do not change this setting unless you are using a map or chart that specifies a different position format Map Datum Sets the coordinate system on which the map is structured Do not change this setting unless you are using a map or chart that specifies a different map datu...

Page 167: ...the chartplotter uses when calculating an Auto Guidance path Preferred Depth Sets the minimum water depth based on chart depth data that your boat can safely travel over NOTE The minimum water depth for the premium charts made before 2016 is 3 feet If you enter a value of less than 3 feet the charts only use depths of 3 feet for Auto Guidance path calculations Vertical Clearance Sets the minimum h...

Page 168: ...in step 6 review the placement of the Auto Guidance line and determine whether the line safely avoids known obstacles and the turns enable efficient travel Auto Guidance maintains a wide clearance from obstacles in open water even if you set the Shoreline Distance setting to Near or Nearest As a result the chartplotter may not reposition the Auto Guidance line unless the destination selected requi...

Page 169: ...ort You can configure the communication format for each internal NMEA 0183 port when connecting your chartplotter to external NMEA 0183 devices a computer or other Garmin devices 1 Select Settings Communications NMEA 0183 Setup Port Types 2 Select an input or output port 3 Select a format To support the input or output of standard NMEA 0183 data DSC and sonar NMEA input support for the DPT MTW and...

Page 170: ...fied distance or time from a turn or a destination Anchor Drag Sets an alarm to sound when you exceed a specified drift distance while anchored Off Course Sets an alarm to sound when you are off course by a specified distance Boundary Alarms Disables and enables all boundary alarms Setting the Anchor Drag Alarm You can set an alarm to sound if you have moved more than an allowable distance This is...

Page 171: ...1 C above or below the specified temperature Contour Sets an alarm to sound when the transducer detects a suspended target within the specified depth from the surface of the water and from the bottom Fish Fish Sets an alarm to sound when the device detects a suspended target sets the alarm to sound when fish of all sizes are detected sets the alarm to sound only when medium or large fish are detec...

Page 172: ...n offset value to compensate for the water temperature reading from a NMEA 0183 water temperature sensor or a temperature capable transducer Setting the Water Temperature Offset page 162 Fuel Sets the combined fuel capacity and fuel remaining in the fuel tanks on your vessel Setting the Fuel Capacity of the Vessel page 122 Vessel Type Enables some chartplotter features based on the boat type Switc...

Page 173: ...1 Measure the distance If the transducer is installed at the water line or anywhere above the end of the keel measure the distance from the transducer location to the keel of the boat Enter this value as a positive number If the transducer is installed at the bottom of the keel and you want to know the true depth of the water measure the distance from the transducer to the water line Enter this va...

Page 174: ...e that speed sensing device to improve the accuracy of water speed data displayed by the chartplotter 1 Complete an action If the sensor or transducer is connected to the chartplotter or a sonar module select Settings My Vessel Calibrate Water Speed If the sensor or transducer is connected to the NMEA 2000 network select Settings Communications NMEA 2000 Setup Device List select the transducer and...

Page 175: ...MAP 8400 8600 series Water Temp Contour Not available in echoMAP 70s and GPSMAP 507 701 series Fish Collision Alarm General Settings Auto Guidance Preferred Depth Auto Guidance Vertical Clearance Beeper Color Mode Keyboard Layout Language Map Datum Heading Position Format System Units Calibrate Water Speed Radar Antenna Size Chart Settings Chart Borders Hazard Colors Heading Line Land POIs Light S...

Page 176: ...Any reliance on or use of such data is at your own risk You can share user data between compatible devices User data includes waypoints saved tracks routes and boundaries You can share data across the Garmin Marine Network You can share and manage user data using a memory card You must have a memory card installed in the device This device supports up to a 32 GB memory card formatted to FAT32 Sele...

Page 177: ...oad next to the map to update 6 Follow the on screen instructions to complete the download 7 Wait while the update downloads The update may take an extended period of time 8 After the download is complete eject the card from the computer 9 Insert the memory card into the card slot Memory Cards page 9 10 On the chartplotter select Settings System System Information Update Built In Map The updated c...

Page 178: ...lan your trip and sync user data The app checks your devices for available updates and notifies you when an update is available Garmin Express The Garmin Express desktop app allows you to use your computer and a memory card to download and update Garmin chartplotter software and charts Garmin Express App page 166 You should use the Garmin Express app for faster data transfer of larger downloads an...

Page 179: ...ments The chartplotter opens the card management page and creates a file named GarminDevice xml in the Garmin folder on the memory card 4 Remove the memory card from your device 5 Open the Garmin Express app on your computer 6 Insert the memory card into your computer 7 If necessary select Get Started 8 If necessary while the application searches select Sign In next to Have marine charts or device...

Page 180: ...inutes while the update process completes 16 When prompted leave the memory card in place and restart the chartplotter 17 Remove the memory card NOTE If the memory card is removed before the device restarts fully the update is not complete Software Updates You may need to update the software when you install a new device or add an accessory You can use the ActiveCaptain mobile app to update the de...

Page 181: ...ate is copied to the memory card NOTE Copying the update file onto the card may take from a few minutes up to a few hours 9 Close the Garmin Express app 10 Eject the memory card from the computer After loading the update onto the memory card install the software on the chartplotter Updating the Device Software Using a Memory Card page 169 Updating the Device Software Using a Memory Card To update ...

Page 182: ...s then output to the stereo The cable also provides NMEA 0183 inputs and outputs Model Accessory Part Number NMEA 0183 Inputs and Outputs 10 inch 010 12852 00 One differential input and output port 12 inch 010 12852 00 One differential input and output port 16 inch 010 12852 00 One differential input and output port 17 inch 010 12390 21 Four input ports and two output ports 22 inch 010 12390 21 Fo...

Page 183: ...control the computer you must connect the computer to the USB port The Garmin HDMI accessory cable 010 12390 20 is 4 5 m 15 ft long If you need a longer cable you should use an active HDMI cable only You need an HDMI coupler to connect the two HDMI cables The Garmin USB accessory cable 010 12390 10 is 4 5 m 15 ft long If you need a longer cable you should use a USB hub or USB repeater extension ca...

Page 184: ...ST port The HDMI Cable 010 12390 20 is 4 5 m 15 ft long If you need a longer cable you should use an active HDMI cable only You need an HDMI coupler to connect the two HDMI cables The Garmin OTG Adapter Cable 010 12390 11 is 1 8 m 6 ft long and the Garmin USB Cable 010 12390 10 is 4 5 m 15 ft long If you need a longer cable you should use a USB hub or USB repeater extension cable only You must mak...

Page 185: ...n Information GRID Pairing Add 2 Select an action On the GRID remote input device press SELECT On the GRID 20 remote input device press and until the remote control beeps three times Pairing the GRID Device with the Chartplotter from the GRID Device NOTE This is not applicable to the GRID 20 device 1 On the GRID remote input device press and HOME at the same time A selection page opens on all of t...

Page 186: ... could be a few causes If the device has moved a large distance since the last time it has acquired satellites or has been turned off for longer than a few weeks or months the device may not be able to acquire the satellites correctly Ensure the device is using the latest software If not update the device software Software Updates page 168 If the device is using an internal GPS antenna make sure t...

Page 187: ...ypoint location to transfer and share data from one device to the next If you have manually entered a waypoint using coordinates and the location of the point does not appear where the point should be the map datum and position format of the device may not match the map datum and position format originally used to mark the waypoint Position format is the way in which the GPS receiver s position ap...

Page 188: ...ng IEC 60529 IPX7 The device withstands incidental exposure to water of up to 1 m for up to 30 min For more information go to www garmin com water rating Fuse 10 A 125 V fast acting Input voltage From 10 to 32 Vdc Max power usage at 10 Vdc 40 1 W Typical current draw at 12 Vdc 1 5 A Max current draw at 12 Vdc 6 0 A NMEA 2000 LEN 9 Vdc 2 NMEA 2000 draw 75 mA max Max waypoints 5 000 Max routes 100 2...

Page 189: ... 60529 IPX7 The device withstands incidental exposure to water of up to 1 m for up to 30 min For more information go to www garmin com water rating Fuse 10 A 125 V fast acting Input voltage From 10 to 32 Vdc Max power usage at 10 Vdc 45 W Typical current draw at 12 Vdc 1 3 A Max current draw at 12 Vdc 6 0 A NMEA 2000 LEN 9 Vdc 2 NMEA 2000 draw 75 mA max Max waypoints 5 000 Max routes 100 250 waypo...

Page 190: ...29 IPX7 The device withstands incidental exposure to water of up to 1 m for up to 30 min For more information go to www garmin com water rating Fuse 10 A 125 V fast acting Input voltage From 10 to 32 Vdc Max power usage at 10 Vdc 52 1 W Typical current draw at 12 Vdc 1 3 A Max current draw at 12 Vdc 6 0 A NMEA 2000 LEN 9 Vdc 2 NMEA 2000 draw 75 mA max Max waypoints 5 000 Max routes 100 250 waypoin...

Page 191: ... Water rating IEC 60529 IPX7 The device withstands incidental exposure to water of up to 1 m for up to 30 min For more information go to www garmin com waterrating Fuse 15 A Input voltage From 10 to 35 Vdc Max power usage 40 W Typical current draw at 12 Vdc 2 8 A Typical current draw at 24 Vdc 1 4 A Max current draw 3 5 A NMEA 2000 LEN 9 Vdc 2 NMEA 2000 Draw 75 mA max Max waypoints 5 000 Max route...

Page 192: ... Water rating IEC 60529 IPX7 The device withstands incidental exposure to water of up to 1 m for up to 30 min For more information go to www garmin com waterrating Fuse 15 A Input voltage From 10 to 35 Vdc Max power usage 59 W Typical current draw at 12 Vdc 3 9 A Typical current draw at 24 Vdc 1 8 A Max current draw 4 9 A NMEA 2000 LEN 9 Vdc 2 NMEA 2000 Draw 75 mA max Max waypoints 5 000 Max route...

Page 193: ...m Water rating IEC 60529 IPX7 The device withstands incidental exposure to water of up to 1 m for up to 30 min For more information go to www garmin com waterrating Fuse 15 A Input voltage From 10 to 35 Vdc Max power usage 87 W Typical current draw at 12 Vdc 6 1 A Typical current draw at 24 Vdc 2 8 A Max current draw 7 6 A NMEA 2000 LEN 9 Vdc 2 NMEA 2000 Draw 75 mA max Max waypoints 5 000 Max rout...

Page 194: ... External card reader required not included Wireless frequency and protocols Wi Fi and ANT technologies 2 4 GHz 14 15 dBm maximum Sonar Models Specifications Specification Measurement Sonar frequencies2 Traditional 50 200 77 200 83 200 kHz Single Channel CHIRP from 40 to 250 kHz Garmin ClearVü CHIRP 260 455 800 kHz Ultra High Definition Garmin ClearVü 0 8 Mhz 800 kHz CHIRP range 760 to 880 kHz Ult...

Page 195: ...rol 127245 Rudder 127250 Vessel heading 127258 Magnetic variance 127488 Engine parameters Rapid update 127489 Engine parameters Dynamic 127493 Transmission parameters Dynamic 127505 Fluid level 127508 Battery status 128259 Speed Water referenced 128267 Water depth 129025 Position Rapid update 129026 COG and SOG Rapid update 129029 GNSS position data 129283 Cross track error 129284 Navigation data ...

Page 196: ...127251 Rate of turn 127252 Heave 127257 Attitude 127498 Engine parameters Static 127503 AC input status obsolete 127504 AC output status obsolete 127506 DC detailed status 127507 Charger status 127509 Inverter status 128000 Nautical leeway angle 128275 Distance log 129038 AIS class A position report 129039 AIS class B position report 129040 AIS class B extended position report 129044 Datum 129285 ...

Page 197: ...ed broadcast message 129808 DSC call Information 129809 AIS class B CS static data report part A 129810 AIS class B CS static data report part B 130313 Humidity 130314 Actual pressure 130316 Temperature Extended range 130576 Trim tab status 130577 Direction data Appendix 185 ...

Page 198: ...2812 Engine air shutoff command status 65252 2813 Engine alarm output command status 65252 2814 Engine total hours of operation 65253 247 Navigation based vehicle speed 65256 517 Engine fuel temperature 1 65262 174 Engine oil temperature 1 65262 175 Engine fuel delivery pressure 65263 94 Engine oil pressure 65263 100 Engine coolant pressure 65263 109 Engine coolant temperature 65263 110 Engine coo...

Page 199: ...rmation GPRMC RMC Recommended minimum specific GNSS data GPRTE RTE Routes GPVTG VTG Course over ground and ground speed GPWPL WPL Waypoint location GPXTE XTE Cross track error PGRME E Estimated error PGRMM M Map datum PGRMZ Z Altitude SDDBT DBT Depth below transducer SDDPT DPT Depth SDMTW MTW Water temperature SDVHW VHW Water speed and heading Receive Sentence Description DPT Depth DBT Depth below...

Page 200: ...ind direction and speed MDA Meteorological composite MWV Wind speed and angle VDM AIS VHF data link message You can purchase complete information about National Marine Electronics Association NMEA format and sentences from www nmea org 188 Appendix ...

Page 201: ...58 collision alarm 31 162 color mode 16 combinations 14 compass data bar 15 rose 35 computer 173 connectors 4 6 courses 43 current stations 127 128 indicators 28 D DAB 131 133 data backup 165 copying 164 management 164 deleting all user data 57 depth log 124 depth shading 35 37 destinations navigation chart 44 selecting 44 detailed maps 165 device cleaning 173 registration 167 digital selective ca...

Page 202: ...7 overlay 38 overlay screen 90 91 range 92 range rings 99 100 source 100 timed transmit 91 transmitting 91 waypoints 99 radar overlay 90 radio 131 AM 131 FM 131 SiriusXM 133 134 registering the device 167 remote control 21 22 106 107 disconnecting 22 reset 164 resetting settings 134 station layouts 15 restore 164 Route To 43 44 routes 44 47 56 copying 164 165 creating 48 50 deleting 50 editing 48 ...

Page 203: ...43 VIRB camera 146 voltage 158 VRM 95 measuring 95 showing 95 W WAAS 153 warning manager 128 messages 128 129 watch marine 105 106 water speed 162 temperature log 124 temperature offset 162 waypoints 45 175 copying 164 165 creating 25 45 deleting 47 editing 46 man overboard 45 navigating to 47 projecting 46 showing 36 sonar 74 tracked vessel 114 viewing list of 46 weather 135 137 alarms 159 broadc...

Page 204: ...support garmin com GUID 25CCEC48 337E 47C0 8B89 5C35CCDB65AC v18 September 2021 ...

Reviews: