14
Starting to Navigate
With the unit turned on and displaying ‘3D GPS Location’ on the GPS
Information Page, mark a waypoint at your current location. Name this waypoint
‘HOME’, assign the ‘Residence’ Symbol and store the waypoint.
Begin walking holding the GPSMAP 76S in front of you with the top of the
unit pointed toward the sky. As you move, you will see that the unit leaves a
bread crumb trail on the map indicating where you have been. Walk at least a
two minutes in one direction and then make either a right or left turn. Continue
walking in this new direction for approximately another two minutes.
Let’s start the trip back. Remember that unit provides you with direct, straight
line navigation. It is not always possible to navigate using the most direct route,
don’t worry, the GPSMAP 76S will continuously update your Track and Bearing,
always pointing out the shortest route to your destination.
To begin navigation:
1. Press the
NAV
key.
2. Select ‘Go To Point’ then press the
ENTER
key.
3. Select ‘Waypoints’ then press the
ENTER
key.
4. Select ‘HOME’ then press the
ENTER
key.
5. With the ‘Goto’ Button highlighted, press
ENTER
.
If the Compass Page is not displayed, press the
PAGE
or
QUIT
key to display
the Compass Page.
Basic Navigation
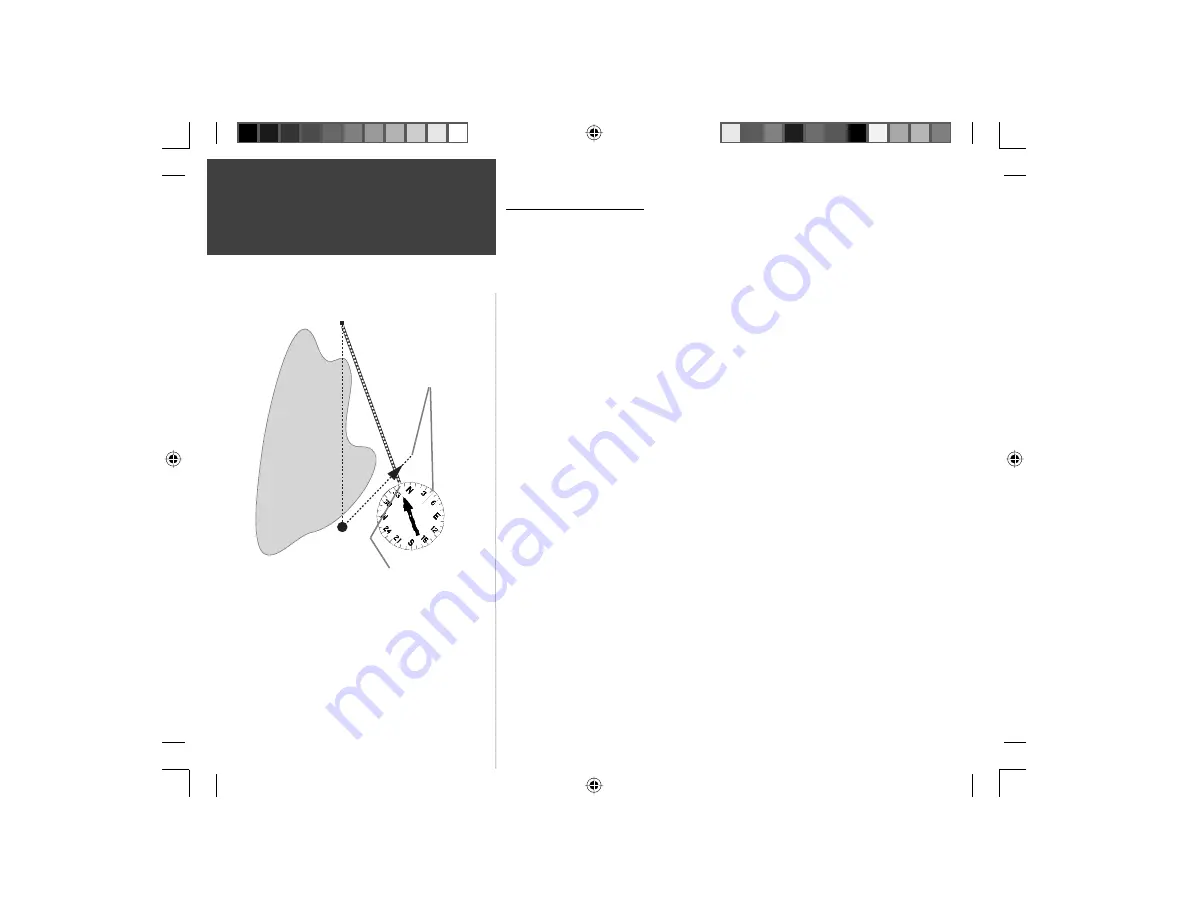
DESTINATION
START
Current
Track 45°
Bearing 000°
from START to
DESTINATION
Bearing 340° from current location
to DESTINATION
The GPSMAP 76 provides a straight line, direct naviga-
tion course to your destination. Since it is not always
possible to follow a straight line from start to fi nish, as you
move, the Pointer will always point toward your destina-
tion and the Compass Ring will always show your current
track.
Continued on next page
Quick Start
190-00249-01_0A.indd 14
9/1/2004, 10:58:41 AM