background image

37

Reference

Route List Page

Route List Page

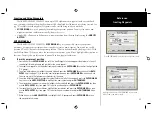
The GPSMAP 2006/2010 Route List page displays all the routes currently stored in memory, along 

with a descriptive name for each route. Once a route has been created, it can be activated and used for 
navigation with the 

NAV

 key. A route may be followed in the same sequence as it was originally created, 

or you can invert the route and navigate from the end waypoint back to the beginning waypoint. From the 
Route list menu, you may choose ‘New Route’ (pg 35), ‘Copy Route’, ‘Delete Route’, or ‘Delete All’.

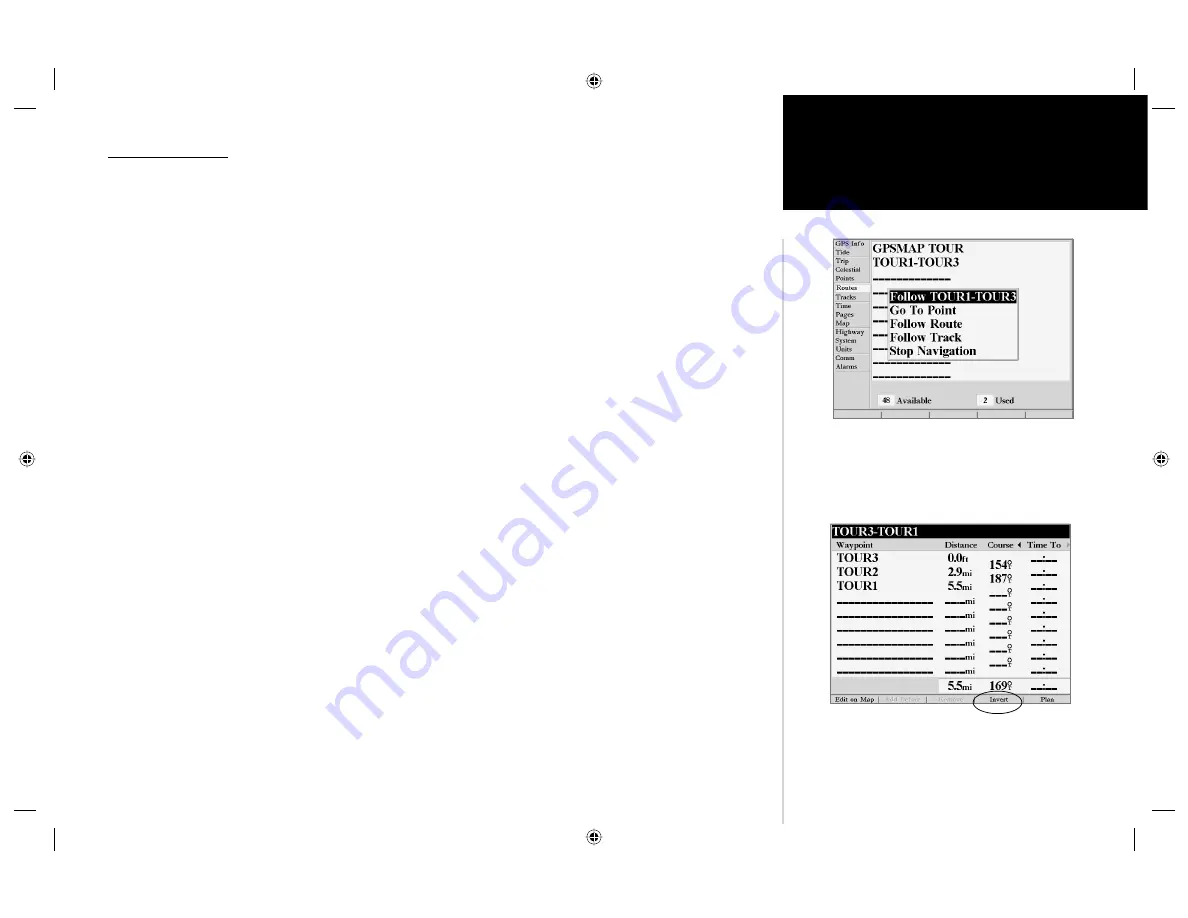
To activate a route with the NAV key:

1.  From any page, press the 

NAV

 key, then using the 

ARROW KEYPAD

, highlight ‘Follow Route’ and press


ENTER/MARK

. (If you highlight a route from the Route List or Route Review page and press 

NAV

, the 

window will automatically display, ‘Follow <the route name>’.)

2.  Highlight the route you wish to navigate and press 

ENTER/MARK

3.  If you wish to navigate from the start to the end (reverse) of your route, press the ‘Invert’ 

SOFT KEY

To deactivate (stop navigation) of a route:

1.  Press the 

NAV 

key, highlight ‘Stop Navigation’ and press 

ENTER/MARK

.

To copy or delete a route:

1.  From the Route List, using the 

ARROW KEYPAD

, highlight the route you want to copy or delete and 

press 

MENU

.

2.  Choose either ‘Copy’ or ‘Delete Route’ and press 

ENTER/MARK

 and with “OK” highlighted, press 

ENTER/MARK

 again to confi rm a deletion. Copy will use the same route name with an additional number, 

starting at 1, at the end of the route name. 

To delete all routes:

1.  From the Route List, press 

MENU

.

2.  Highlight ‘Delete All’ and press 

ENTER/MARK

 and with “OK” highlighted, press 

ENTER/MARK

 again 

to confi rm the deletion. 

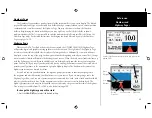
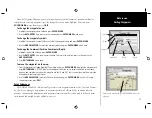
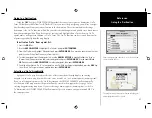
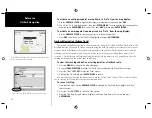
If you highlight a route name from the Route List and press NAV, 
the name will automatically appear.

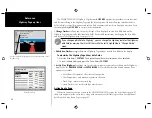
‘Pressing the “Invert” SOFT KEY will reverse the route.

Summary of Contents for GPSMAP 2006

Page 1: ...owner s manual and reference guide chartplotters GPSMAP 2006C and 2010C shown GPSMAP 2006 2010 2006 2010 Cover indd 2 27 02 9 05 AM 1...

Page 2: ...2006 2010 Cover indd 2 27 02 9 05 AM 2...

Page 3: ...ted disseminated downloaded or stored in any storage medium for any purpose without the express prior written consent of GARMIN GARMIN hereby grants permission to download a single copy of this manual...

Page 4: ...ct to our website www garmin com Look for the Product Registration link on the Home page Also be sure to record your serial number in the area provided on page iii of this manual GARMIN s Customer Ser...

Page 5: ...tion This equipment generates uses and can radiate radio frequency energy and if not installed and used in accordance with the instructions may cause harmful interference to radio communications Howev...

Page 6: ...e purchase price at its sole discretion SUCH REMEDY SHALL BE YOUR SOLE AND EXCLUSIVE REMEDY FOR ANY BREACH OF WARRANTY To obtain warranty service contact your local GARMIN authorized dealer Or call GA...

Page 7: ...ted high impact plastic alloy case waterproof to IEC 529 IPX 7 Advanced Navigating and Plotting 3000 alphanumeric waypoints with selectable icons and comments Built in worldwide basemap includes detai...

Page 8: ...d Options 22 Numbers Page and Options 23 Highway Page and Options 23 Waypoints 25 Creating 25 Reviewing and Editing 26 Proximity 29 Going to a Destination 31 TracBack 32 MOB 34 Routes 35 Creating 35 R...

Page 9: ...he unit s function keys 2 Mark your present location as a waypoint 6 25 Go to a destination 10 31 Create and use a route 35 Learn about the Map page 4 9 14 Pan using the map arrow 9 14 Zoom in or out...

Page 10: ...Main Page Sequence 1 Getting Started Soft Keys Data Entry Keys Data Card Slots Function Keys Power Data Cable Port Data Port for future use Mounting Knobs Looking at the 2006 2010 2006 2010 Intro indd...

Page 11: ...Key allows you to quickly access User Waypoints and other items used for navigation The MOB Key immediately stores the location and gives the option of setting direct navigation The POWER Key is used...

Page 12: ...ap Page Adjusting the Contrast and Backlight The 2006 2010 monochrome versions have adjustments for the Contrast and Backlighting the color versions do not have a Contrast adjustment Adjusting the Con...

Page 13: ...next Main Page will be displayed in a reverse sequence While learning the basic operation of the GPSMAP 2006 2010 let s put the unit into its Simulator Mode The Simulator Mode is great for practicing...

Page 14: ...he current time 3 Using the Up Down function of the ARROW KEYPAD scroll through the list until the correct number is displayed Press the ARROW KEYPAD to the right to highlight the next digit 4 Continu...

Page 15: ...ypoint is a position stored in the unit s memory that can be used for navigation Waypoints are used for direct navigation or you can use several waypoints to build a route Creating Marking a waypoint...

Page 16: ...then press the ENTER MARK key This will activate the eld with the highlight on the rst placeholder 2 Press the ARROW KEYPAD to the left to clear the eld 3 We will name this waypoint PRACTICE 1 press t...

Page 17: ...Y keys press the key the appropriate number of times for the character that you want to display The number is always last Soft Keys The SOFT KEYS are located along the bottom of the unit under the dis...

Page 18: ...ng the ENTER MARK key let s create another waypoint using the Map Pointer and then begin navigation to that point Press the PAGE key until the Map Page is displayed Press the IN key several times unti...

Page 19: ...se let s use the Highway Page Going to a waypoint 1 Press the NAV key 2 Highlight Go To Point and press the ENTER MARK key 3 Highlight Waypoints and press the ENTER MARK key This will display the Sele...

Page 20: ...ed in the Compass Ring If you are not heading toward your destination the Bearing Pointer will turn continuing to point toward your destination To head toward your destination turn until the Bearing P...

Page 21: ...10 on 1 Press and hold the POWER key until the display comes on then release the POWER key A warning page will appear asking you to read and acknowledge important information regarding the proper use...

Page 22: ...found the indicated satellite s and is collecting data Solid signal strength bars green on color models the receiver has collected the necessary data and the satellite s are ready for use Once the re...

Page 23: ...r mode determine what cartography is shown on the map display Position mode pans the cartography to keep the present position marker within the display area while cursor mode pans the cartography to k...

Page 24: ...s allowing you to review a selected position directly from the map display To select an on screen waypoint or map item with the cursor 1 Use the ARROW KEYPAD to move the cursor to the desired waypoint...

Page 25: ...information available for the range you ve selected Map coverage will conform to the following conditions When the selected zoom range is covered by either the internal database BlueChart or MapSource...

Page 26: ...Y The following data options are available for data elds on the main pages BEARING Compass direction from your position to destination COMPASS Compass ribbon COURSE Desired Track DEPTH Depth below tra...

Page 27: ...d Active Route Pages will have 4 medium sized elds which may be split to a total of 16 small elds The Numbers Page will display 4 large elds which may be split to a total of 16 medium elds This option...

Page 28: ...ious settings for ease of use The following table lists the le tabs and the settings available under each tab General Detail Orientation AutoZoom Map Colors Source Basemap Data Card Maps Waypoints Way...

Page 29: ...turns all optional BlueChart MapSource data loaded on the data card on or off Waypoints Tab Waypoints Active Route Text None Small Medium and Large controls the screen size of the name Zoom Auto Off...

Page 30: ...se the ARROW KEYPAD to scroll through the list of maps 3 To select deselect a map highlight the check box to the left of the name of the desired map Press ENTER MARK or the On Off SOFT KEY to select d...

Page 31: ...to your destination For instance if the arrow points up you are going directly to the waypoint If the arrow points any direction other than up turn toward the arrow and bug indicator until it points u...

Page 32: ...dels which will indicate the bearing to your course When the dark vertical indicator lines up with the lighter gray or red bar in the middle you are heading directly towards the current navigation poi...

Page 33: ...ow Nmbrs toggles between a Highway Page without or with data elds on the display To maximize the Highway Page show data elds 1 Press the Hide Nmbrs SOFT KEY The Highway Page will now be maximized with...

Page 34: ...ENTER MARK key until the New Waypoint window appears then release it You will see a default three digit name and symbol for the new waypoint 2 To accept the waypoint with the default name and symbol...

Page 35: ...RK key 4 To accept the waypoint with the default name and symbol press ENTER MARK 5 To change the name symbol coordinates or add a comment or depth highlight the appropriate eld and press ENTER MARK M...

Page 36: ...ight on the ARROW KEYPAD 3 Press ENTER MARK when done To move the waypoint on the map 1 From the Waypoint Edit page highlight Show Map and press ENTER MARK Highlight the waypoint and press ENTER MARK...

Page 37: ...that use the same symbol Delete All deletes all waypoints from the unit Once a waypoint is deleted from the list it cannot be recovered from the unit It is advisable to backup important waypoints to...

Page 38: ...ating in these areas If you enter an alarm circle overlap you will only be alerted to the closest proximity waypoint To add a proximity waypoint 1 Use the ARROW KEYPAD to highlight an empty space on t...

Page 39: ...nt from proximity list Clear All removes all waypoints from proximity list To clear one or all proximity waypoint s from the list 1 Use the ARROW KEYPAD to highlight the proximity waypoint to clear 2...

Page 40: ...int from the waypoint lists use the ARROW KEYPAD to highlight either the User or Nearest From Current Location tab select a waypoint and press ENTER MARK Use the zoom IN and OUT buttons and the ARROW...

Page 41: ...ed in the receiver s memory which will eliminate the need to store waypoints along the way TracBack routes are created by reducing your track log into a route of up to 50 turns and activating a route...

Page 42: ...icate your exact path as closely as possible To get the most out of the TracBack feature remember the following tips Always clear the track log at the beginning of your trip The Record Mode option on...

Page 43: ...sition Once a MOB has been activated a MOB waypoint with an international MOB symbol will be created and the unit will be on an active navigation to that point Use any of the Navigation Pages to guide...

Page 44: ...point or map item on screen and press ENTER MARK Map items will not appear in the waypoint list To create a waypoint from a map item see page 26 4 To add a new waypoint to the route use the arrow curs...

Page 45: ...list From either the User or Nearest From Current Location tab lists choose the waypoint you want and press ENTER MARK See page 28 29 for searching for waypoints by name 6 From the Waypoint Review or...

Page 46: ...display Follow the route name 2 Highlight the route you wish to navigate and press ENTER MARK 3 If you wish to navigate from the start to the end reverse of your route press the Invert SOFT KEY To de...

Page 47: ...s one at a time from the list To review individual route points 1 Highlight the desired point and press ENTER MARK 2 On the waypoint review window you may choose Next highlight the next point on the r...

Page 48: ...cursor to the new point or position and press ENTER MARK 4 If you are not inserting an existing waypoint press ENTER MARK to con rm the new waypoint 5 Repeat steps 3 and 4 to insert additional waypoi...

Page 49: ...rom the map highlight the User or Nearest tab and press MENU With Select From Map highlighted press ENTER MARK Use the zoom IN and OUT buttons and the ARROW KEYPAD to highlight a waypoint on the map a...

Page 50: ...Review page or you if you are already on an active route press PAGE or QUIT until the Active Route Page is displayed 2 One of eight available data types appears to the far right of each route point al...

Page 51: ...indicate the next active point rst The Active Route and Route Review pages share many of the same features and options The following route options are available from the Active Route page Edit on Map...

Page 52: ...m any page press FIND 2 Using the ARROW KEYPAD highlight the desired category from the list and press ENTER MARK 3 For Waypoints and Cities you may search using By Name or Nearest Use the ARROW KEYPAD...

Page 53: ...e using the Find feature will also have additional information such as item classi cation distance bearing and coordinates data source etc depending on the type of data on the optional BlueChart or Ma...

Page 54: ...the ARROW KEYPAD to get back to the Menu tab list Press QUIT to the Main Menu page The Main Menu tabs are GPS Info shows satellite status accuracy initialize position Tide Tide page shows 24 hour tide...

Page 55: ...cate a 2D or 3D status The unit will then update the position date and time You can use the sky view to help determine if any satellites are being blocked and whether you have a current position x ind...

Page 56: ...the poorest Accuracy uses DOP and other factors to calculate horizontal position accuracy in feet or meters The status eld will show one of the following conditions Waiting for GPS Antenna the GPS re...

Page 57: ...The DGPS beacon transmitters are operated by the U S Coast Guard or similar government agency in other countries which is responsible for their accuracy and maintenance For DGPS beacon transmitter pr...

Page 58: ...dditional USCG DGPS Beacon tuning options will only appear when Differential Source is set to Auto or Beacon You may have the DGPS beacon receiver if capable automatically scan for the DGPS beacon sig...

Page 59: ...e time of day when using current date and will intersect the tide graph to show their relation The tide curve shows as a shaded area with higher tides blue being taller and lower tides shorter The sol...

Page 60: ...ER MARK If the None Found message appears repeat steps 1 4 until you nd a station You may also change the date to see tide charts for other days To change the date for the tide chart 1 Using the ARROW...

Page 61: ...tab highlight the Position eld and press ENTER MARK 2 From the Find list highlight Other Position or any category except Waypoints and press ENTER MARK To return to the current position choose Current...

Page 62: ...ab the following settings are available Record Mode lets you select one of three track recording options Off No track log will be recorded Note that selecting the Off setting will prevent you from usi...

Page 63: ...time zone and adjust for daylight savings to show correct local time The unit must be receiving valid NMEA position data to display the proper time and date The following options are available Time Fo...

Page 64: ...s messages Speed Filter averages speed readings Choose from Off Auto automatically controls ltering or On allows you to enter a value from 1 to 255 seconds Language select from various languages for t...

Page 65: ...ths of a minute hddd mm mmm The following additional formats are available hddd ddddd latitude longitude in decimal degrees only hddd mm ss s latitude longitude in degrees minutes seconds UTM UPS Univ...

Page 66: ...n at your present position Failure to update this setting may result in substantial differences between the information displayed on your unit and external references such as a magnetic compass Distan...

Page 67: ...meters When the unit is placed in the LORAN TD format mode it simulates the operation of a LORAN receiver Position coordinates may be displayed as TDs and all navigation functions may be used as if th...

Page 68: ...ous position format press the Loran TD Off SOFT KEY If the active GRI Chain secondary stations or offsets have been changed since the waypoint was created the waypoint will now reference the active GR...

Page 69: ...Tracks and Send Waypoints NMEA In NMEA Out supports the output of standard NMEA 0183 version 2 3 data and sonar NMEA input support for the DPT MTW and VHW sentences see page 70 None provides no inter...

Page 70: ...to enter alarm times in the same time format UTC or local you re using for your system The unit must be on for the clock alarm to work Shallow Water Deep Water set alarms to sound when you enter an a...

Page 71: ...07 5 to E022 5 1 E022 5 to E037 5 2 E037 5 to E052 5 3 E052 5 to E067 5 4 E067 5 to E082 5 5 E082 5 to E097 5 6 E097 5 to E112 5 7 E112 5 to E127 5 8 E127 5 to E142 5 9 E142 5 to E157 5 10 E157 5 to E...

Page 72: ...s Lost Its Stored Settings GPS receiver problem Contact your dealer or GARMIN Lost Position From GPS Antenna The unit has lost satellite signals Check antenna connections or try moving to a location w...

Page 73: ...d track name that already exists in memory Modify track name or delete the previous track name Track Memory Is Full Can t Create Track Track log memory is full No additional track log data can be stor...

Page 74: ...a Island Indonesia Dos 1968 Dos 1968 Gizo Island New Georgia Islands Dutch Dutch Easter Isld 67 Easter Island 1967 European 1950 European 1950 Austria Belgium Denmark inland France Germany Gibraltar G...

Page 75: ...parima BWI Trinidad and Tobago Obsrvtorio 66 Observatorio 1966 Corvo and Flores Islands Azores Old Egyptian Old Egyptian Egypt Old Hawaiian Old Hawaiian Mean Value Oman Oman Oman Ord Srvy GB Old Surve...

Page 76: ...estimated time you will reach a GOTO destination or the next waypoint in a route Fuel The fuel required to travel from present position to the indicated route waypoint Leg Distance The distance betwee...

Page 77: ...e desired course and proceed along your route Track The direction of movement relative to a ground position Also referred to as ground track Trip Odometer A running tally of distance travelled since l...

Page 78: ...d Once the data card has been been properly installed and accepted a summary screen noting the card details will appear Press ENTER MARK to acknowledge 4 Close the cover until the locking tab on the d...

Page 79: ...S receiver 95 typical Velocity 0 05 meters sec steady state DGPS WAAS Accuracy Position 3 meters 10 feet 95 typical Velocity 0 05 meters sec steady state Dynamics 6g s Subject to accuracy degradation...

Page 80: ...tive to skin oils waxes and abrasive cleaners CLEANERS CONTAINING AMMONIA WILL HARM THE ANTI REFLECTIVE COAT ING It is very important to clean the lens using an eyeglass lens cleaner which is speci ed...

Page 81: ...Daylight Savings Time 54 Deep Water Alarm 61 Depth 6 17 50 57 61 63 64 DGPS Interface Settings 48 49 70 DGPS Status 46 47 63 Differential Receiver Status 46 47 63 Dilution Of Precision DOP 47 Distance...

Page 82: ...nu 54 Position Format 56 Power Off 2 3 12 Power On 2 3 12 Power Backlight Contrast Key 2 Preface i Proximity Waypoints 29 Q QUIT Key 2 R Receiver Status 12 13 46 47 Re evaluate Active Route 42 Registr...

Page 83: ...3 54 Track Log Saving 32 53 54 Track Log Showing on Map 33 53 54 Track Setup 53 54 Trip and Fuel Planning 40 41 Trip Odometers 52 Trip Timers 52 U Unit Care 71 Units Setting 56 User Datum 57 65 W WAAS...

Page 84: ...he Quadrangle Abbey Park Industrial Estate Romsey SO51 9AQ U K GARMIN Corporation No 68 Jangshu 2nd Road Shijr Taipei County Taiwan www garmin com Part Number 190 00241 00 Rev B For the latest free so...

Reviews: