
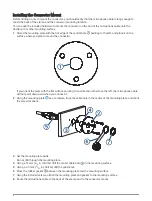
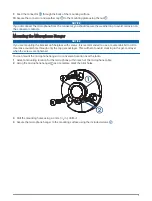


9 Feed the connector through the back of the mounting surface.
10 Secure the connector and weather cap to the mounting plate using the nut .
NOTICE
If you disconnect the microphone from the connector, you should secure the weather cap to avoid corrosion on
the connector contacts.
Mounting the Microphone Hanger
NOTICE
If you are mounting the bracket on fiberglass with screws, it is recommended to use a countersink bit to drill a
clearance counterbore through only the top gel-coat layer. This will help to avoid cracking in the gel-coat layer
when the screws are tightened.
You can mount the microphone hanger in a convenient location near the radio.
1 Select a mounting location for the microphone within reach of the microphone cable.
2 Using the microphone hanger as a template, mark the pilot holes.
3 Drill the mounting holes using a 3 mm (
1
/
8
in.) drill bit.
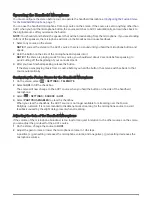
4 Secure the microphone hanger to the mounting surface using the included screws .
5