background image

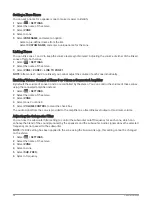
Setting the Stereo as the DHCP Server

If you connected more than two network devices together directly or using a network switch or wireless access 
point and did not install a router, you should configure only one Fusion PartyBus stereo to be a DHCP server.
NOTE: Although the Fusion PartyBus devices can communicate with each other without a DHCP server on the 
network, the devices take longer to connect to each other when you first turn them on. It is highly recommended 
to have a properly-configured DHCP server on the network for the best results.
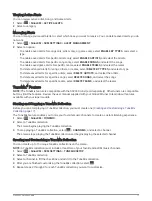
Select 

 > SETTINGS.

Select the name of the stereo.
Select NETWORK > STATIC IP > SAVE.

You must set the stereo to use a static IP address before you can set it as a wired DHCP server.

Select ADVANCED > DHCP SERVER > DHCP ENABLED > SAVE.

You can configure the IP address range of the DHCP server (

DHCP Settings, page 30

).

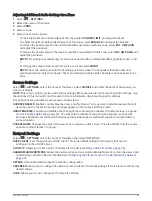
Setting a Static IP Address

If the stereo is configured as a static IP, it is automatically assigned the IP address of 192.168.0.1. You can 
change this IP address.
If the stereo is a DHCP client on the network and you do not want the DHCP server to automatically assign an IP 
address to the stereo, you can set a static IP address.
NOTE: Every device on the network must have a unique IP address. If you select a static IP address that is the 
same as the IP address on the network, the devices will not work properly.
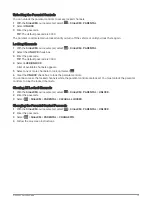
Select 

 > SETTINGS.

Select the name of the stereo.
Select NETWORK > STATIC IP.
Select an option:

• To set the IP address, select IP, and enter the IP address.
• To set the subnet mask, select MASK, and enter the subnet mask.

NOTE: The subnet mask must match all other devices on the network to work properly. A typical subnet 
mask is 255.255.255.0.

• To set the default gateway IP address, select GATEWAY, and enter the gateway IP address.

NOTE: The default gateway is typically set as the IP address of the DHCP server on the network.

Select SAVE.

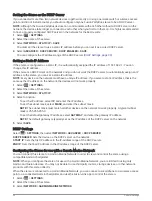
DHCP Settings

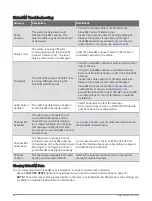
Select 

 > SETTINGS, then select NETWORK > ADVANCED > DHCP SERVER.

DHCP ENABLED: Sets the device as the DHCP server on the network.
START IP: Sets the first IP address in the IP-address range of the DHCP server.
END IP: Sets the final IP address in the IP-address range of the DHCP server.

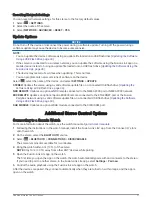
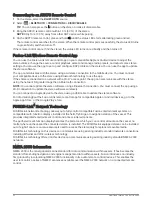
Configuring the Stereo for use with a Garmin Marine Network

You can connect this stereo to a Garmin Marine Network in order to view and control the stereo using a 
compatible Garmin chartplotter.
NOTE: When you configure the stereo for use with a Garmin Marine Network, you are limited to using only 
Garmin and Fusion devices. You may not be able to use third-party routers, storage devices, or other network 
products with this stereo directly.
When the stereo is connected to a Garmin Marine Network, you can connect a smartphone to a wireless access 
point on a connected Garmin chartplotter and use the Fusion-Link app to control the stereo.
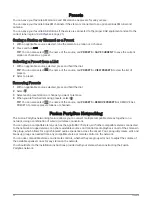
Select 

 > SETTINGS.

Select the name of the stereo.
Select NETWORK > GARMIN MARINE NETWORK.

30

General Settings

Summary of Contents for FUSION APOLLO MS-WB675

Page 1: ...APOLLO MS WB675 MarineEntertainmentSystem...

Page 2: ...ink Fusion Link Lite and Fusion PartyBus are trademarks of Garmin Ltd or its subsidiaries These trademarks may not be used without the express permission of Garmin Apple and AirPlay are trademarks of...

Page 3: ...dia Player 12 Controlling Music Playback on a Connected Android Device 12 Controlling Music Playback on a Connected Apple Device 12 USB Source Settings 12 Radio 13 Setting the Tuner Region 13 Changing...

Page 4: ...Disabling a Zone 27 Setting a Zone Name 28 Linking Zones 28 Enabling Volume Control of Zone 3 or 4 from a Connected Amplifier 28 Adjusting the Subwoofer Filter 28 Adjusting Additional Audio Settings f...

Page 5: ...nnected Apple device 35 My Apple AirPlay audio is interrupted by short breaks 36 The stereo does not receive DAB stations 36 Specifications 36 Stereo Dimension Drawings 37 Side Dimensions 37 Top Dimen...

Page 6: ......

Page 7: ...vice itself Stereo Buttons Press to turn on the stereo Press and hold for two seconds to turn off the stereo Press and hold for ten seconds to reset the stereo Press to make the stereo discoverable to...

Page 8: ...en you use a connected remote control such as a Fusion ERX400 If you control the stereo using a chartplotter an NRX remote control or another stereo on the network you should see the owner s manual fo...

Page 9: ...applicable source AM FM Press to tune to the previous station or preset Press and hold for faster tuning manual mode only AUX Press to decrease the gain SiriusXM source In Live Mode press to tune to t...

Page 10: ...t 1 In a field that allows you to enter text select to erase the existing characters 2 If necessary select or to use numerals symbols or lower case letters when available 3 Turn the dial to choose a c...

Page 11: ...ue names for the sources on each stereo and turn off unused sources General Settings page 25 1 Select SETTINGS 2 Select the device to rename 3 Select DEVICE NAME and select an option Select a pre defi...
Page 12: ...e audio from all grouped stereos is silenced 2 Press and hold the dial to select MUTE SYSTEM Audio from all connected stereos is silenced 3 Press and hold the dial to select UNMUTE SYSTEM Audio is res...

Page 13: ...ers and amplifiers to optimize audio reproduction in their installed locations All DSP settings are configured using the Fusion Link remote control app Fusion Link Wireless Remote Control App page 32...

Page 14: ...marine laws in association with use NOTICE It is the user s responsibility to comply with all applicable laws and ordinances associated with the use of this device Garmin is not responsible for any f...

Page 15: ...your compatible Bluetooth device may ask you to confirm a code on the stereo The stereo does not display a code but it does connect correctly when you confirm the message on the Bluetooth device 8 If...

Page 16: ...s only You can repeat the current selection by selecting the REPEAT ONE option You can repeat all items in the selection by selecting the REPEAT ALL option SHUFFLE Shuffles the tracks in the folder al...

Page 17: ...USB cable included with your media player to connect a media player or mobile device to the USB port The stereo is compatible with iAP2 Apple devices such as the iPhone Xs Max iPhone Xs iPhone XR iPh...

Page 18: ...ct MTP 5 Browse the music files on the Android device and begin playback You can use the stereo controls to select play pause and skip tracks Controlling Music Playback on a Connected Apple Device 1 C...

Page 19: ...ations properly If you are connected to a compatible SiriusXM tuner and antenna and have a subscription USA only you must select the region you are in to receive SiriusXM stations properly NOTE Sirius...

Page 20: ...rd that a user must enter when connecting to the stereo using the AirPlay feature 1 Select SETTINGS 2 Select the name of the stereo 3 Select SOURCE AirPlay AirPlay PASSWORD 4 Enter a password NOTE The...

Page 21: ...uner Region for the SiriusXM Source You must set the stereo to use the USA tuner region before you can listen to SiriusXM Satellite Radio 1 Select SETTINGS 2 Select the name of the stereo 3 Select TUN...

Page 22: ...riusXM tuner to learn about features available with your tuner module Adding an Artist or Song Alert You can set alerts for artists and songs so that when a particular song or a song from a particular...

Page 23: ...s compatible with the SXV300 tuner sold separately Other tuners are compatible but may limit the features Review the user manual supplied with your SiriusXM tuner to learn about features available wit...

Page 24: ...d to the list of SportsFlash alerts Changing SportsFlash Team Priority If more than one team for which you have set up SportsFlash alerts are playing at the same time you can adjust the team priority...

Page 25: ...t LOCK UNLOCK A list of available channels appears 5 Select one or more channels to lock and select 6 Clear the UNLOCK check box to lock the parental controls You cannot access the locked channels whi...

Page 26: ...installation Subscription Updated The radio has detected a change in your SiriusXM subscription status Select any button to clear the message Go to www siriusxm com or call 866 635 2349 with question...

Page 27: ...et the tuner region to a location where DAB signals are broadcast 1 Select the DAB source 2 Select to scan for available DAB stations When scanning is complete the first available station in the first...

Page 28: ...reset station or channel you want to remove 4 When you are finished removing presets select TIP You can also select the name of the source and PRESETS REMOVE PRESETS or REMOVE ALL PRESETS to remove pr...

Page 29: ...oup 3 Select the stereos you want to add to or remove from the group 4 Select DONE Leaving a Group You can leave the Fusion PartyBus group to play local sources on the stereo 1 Select GROUPS 2 Select...

Page 30: ...must remove the stereo from the group before you can change any settings Group Synchronization By default groups you create are not maintained when you turn off stereos in the group If you turn off a...

Page 31: ...hands free mobile phone kit instructions for more information NOTE This setting does not affect a phone connected to the stereo using Bluetooth technology POWER OPTIONS Adjusts the power settings such...

Page 32: ...MIT 4 Adjust the volume limit Maintaining Individual Zone Volume Levels If you adjust the volume levels of individual zones so that some zones are louder than others the individual zone volume setting...

Page 33: ...icate the vessel or wind speed Speed Source Information Select SETTINGS select the name of the stereo then select ZONE SPEED VS VOLUME SPEED SOURCE ENGINE SPEED Uses the RPM reading provided by a supp...

Page 34: ...of zones 3 and 4 are controlled by the stereo You can control the volume of these zones using the connected amplifier instead 1 Select SETTINGS 2 Select the name of the stereo 3 Select ZONE 4 Select z...

Page 35: ...Not all options are available for every source on the stereo SOURCE ENABLED Enables and disables the source on this stereo You may want to disable sources that will never be used on the stereo so the...

Page 36: ...1 Select SETTINGS 2 Select the name of the stereo 3 Select NETWORK STATIC IP 4 Select an option To set the IP address select IP and enter the IP address To set the subnet mask select MASK and enter t...

Page 37: ...cted to the NMEA 2000 port or NMEA 2000 network ERX REMOTE Updates an optional Apollo ERX400 remote connected to the ETHERNET port or the Fusion PartyBus network using a valid software update file on...

Page 38: ...using a Wi Fi connection to update the stereo software wirelessly You can connect an Apple device to the stereo using a USB cable to update the stereo software For information about the Fusion Link re...

Page 39: ...ower during a software update Turning off the power during a software update may cause the device to become unresponsive NOTE You cannot update the software using a USB flash drive formatted using the...

Page 40: ...In the Fusion Link app select CHECK FOR UPDATES 5 Select the stereo 6 Select Download The app downloads the software update file 7 If the Fusion PartyBus network is not connected to the internet afte...

Page 41: ...umbers in the IP addresses match and that the subnet masks on every device are identical If you have made configuration changes that might be causing networking issues reset all network settings to th...

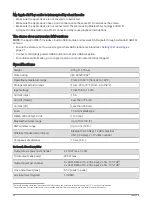
Page 42: ...2 Operating temperature range From 0 to 50 C from 32 to 122 F Storage temperature range From 20 to 70 C from 4 to 158 F Input voltage From 10 8 to 16 Vdc Current max 15 A Current muted Less than 700 m...

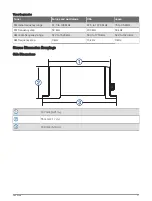
Page 43: ...o 108 MHz 87 5 to 107 9 MHz 76 to 95 MHz FM frequency step 50 kHz 200 kHz 50 kHz AM radio frequency range 522 to 1620 kHz 530 to 1710 kHz 522 to 1620 kHz AM frequency step 9 kHz 10 kHz 9 kHz Stereo Di...

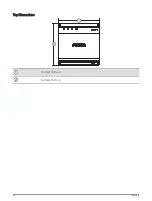
Page 44: ...Top Dimensions 130 mm 5 10 in 130 mm 5 10 in 38 Appendix...

Page 45: ......

Page 46: ...support garmin com GUID 38C8EEA6 CA0D 46DE B7DA A3AC6EDE85DE v1 February 2023...

Reviews: