Introduction
WARNING
See the
Important Safety and Product Information
guide in the
product box for product warnings and other important
information.
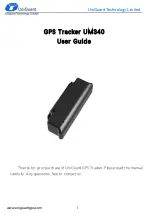
Device Overview
À
Battery cover D-ring
Á
Micro-USB port (under battery cover)
Installing the Batteries
You can use alkaline, NiMH, or lithium AAA batteries. Use NiMH
or lithium batteries for best results.
1
Loosen the fabric strap that covers the battery door.
2
Turn the D-ring counter-clockwise, and pull up to open the
battery door.
3
Insert two AAA batteries, observing polarity.
NOTE:
You should verify the gasket and battery
compartment are free of debris.
4
Close the battery door, and turn the D-ring clockwise.
Long-Term Storage
When you do not plan to use the device for several months,
remove the batteries. Stored data is not lost when batteries are
removed.
Attaching the Wrist Strap
1
Insert the strap behind the pin
À
at the top of the device.
2
Pull the strap length through to the end.
3
Insert the strap behind the pin
Á
at the bottom of the device.
4
If necessary, attach the strap extender to the wrist strap.
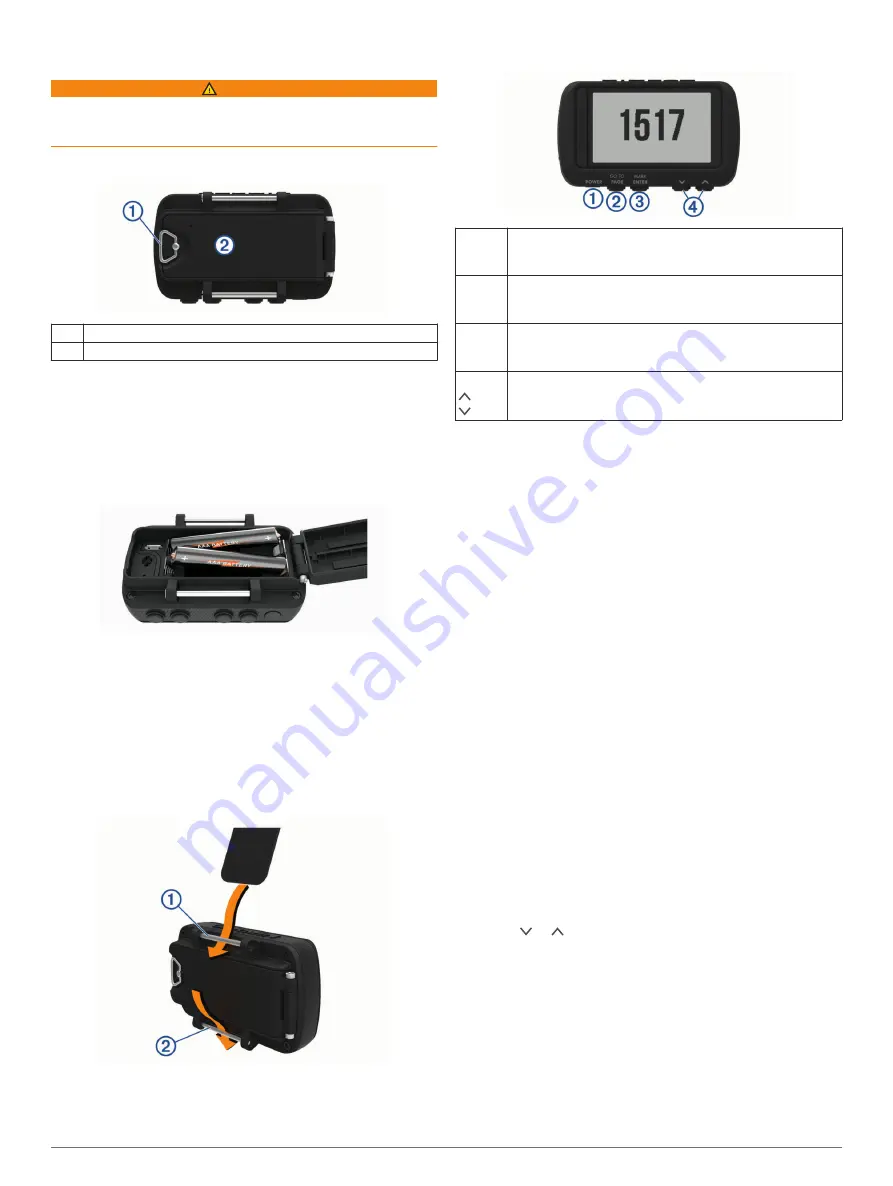
Keys
À
POWER
Hold to turn the device on and off, enter night vision mode,
and enter watch mode.
Select to turn the backlight on and off.
Á
PAGE
GOTO
Select to scroll through the main pages in sequence.
Hold to navigate to a waypoint.
Â
ENTER
MARK
Select to open the menu for the page.
Hold to mark a waypoint.
Ã
Select to scroll through menus and pages.
Select to zoom out or zoom in on the map page.
Turning On the Device
Hold
POWER
.
The first time you turn on the device, you will select the
device language.
Acquiring Satellite Signals
Before you can use GPS navigation features, you must acquire
satellite signals.
When you turn on your navigation device, the GPS receiver
must collect satellite data and establish the current location. The
time required to acquire satellite signals varies based on several
factors, including how far you are from the location where you
last used your navigation device, whether you have a clear view
of the sky, and how long it has been since you last used your
navigation device. The first time you turn on your navigation
device, it may take several minutes to acquire satellite signals.
1
Turn on the device.
2
Wait while the device locates satellites.
It may take 30 to 60 seconds to acquire satellite signals.
3
If necessary, go to an open area, away from tall buildings and
trees.
Using the Backlight
1
Select
POWER
.
The backlight turns on for 30 seconds.
2
Select
POWER
to turn off the backlight.
Main Pages
You can select
PAGE
to scroll through the main pages. You can
select
ENTER
to open the settings menu for each page. You
can select or to scroll through menus and pages and zoom
in and out.
Map page
: The map page shows your position and heading on
the map (
).
As you travel, the position icon moves and leaves a track log
(trail). Waypoint names and symbols appear on the map. The
device automatically rotates the map as you move so that
waypoints always appear above your position.
Compass page
: The compass page guides you to your
destination by displaying a compass and bearing pointer.
When navigating, the compass page displays the name of
the location, the distance to the final destination, the speed of
Introduction
1


![Navig[8]r NAVBIKE-GPS User Manual preview](http://thumbs.mh-extra.com/thumbs/navig-8-r/navbike-gps/navbike-gps_user-manual_3574097-01.webp)