background image

26

Reference

Elevation Page Options

In addition to the Elevation Page basics explained on 

page 14, there are several options that allow the user to 
customize the elevation profi le display.

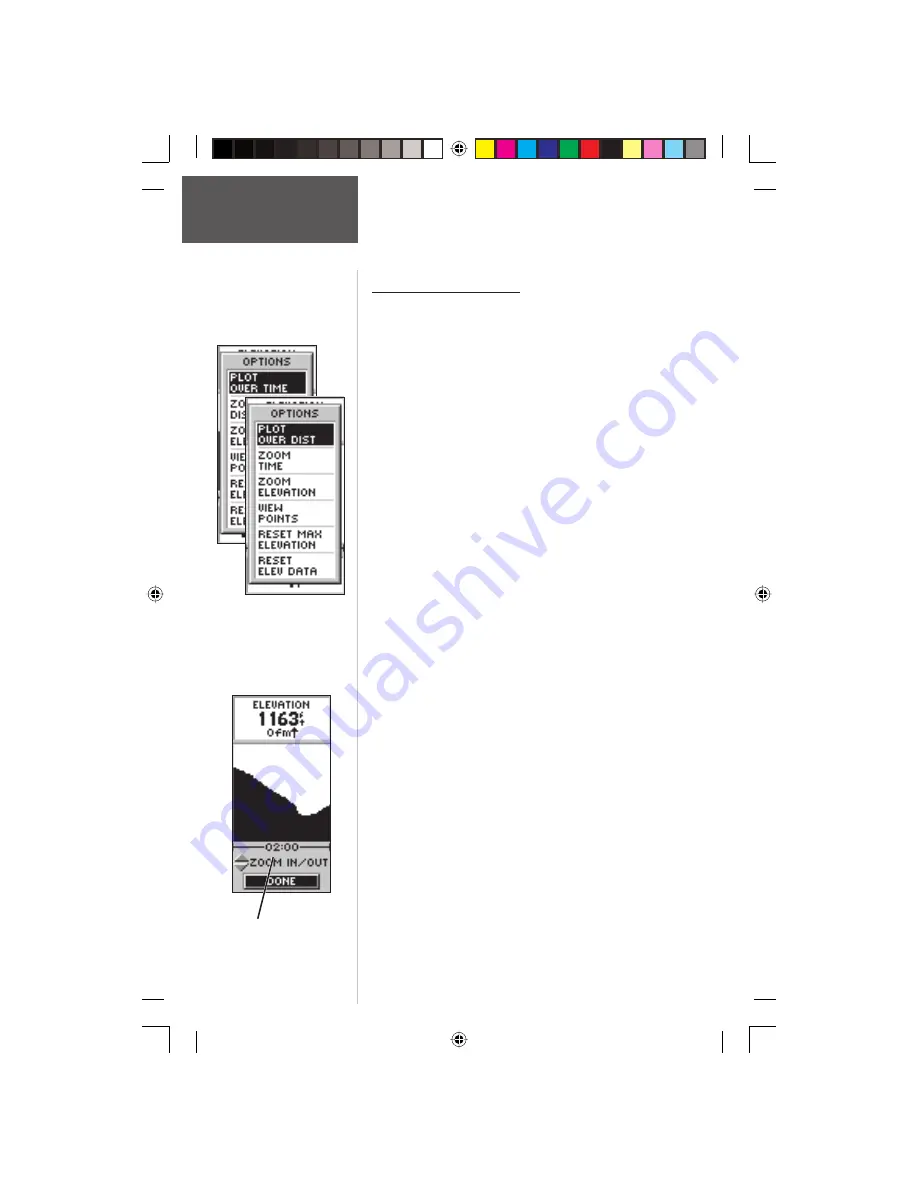
‘PLOT OVER TIME’ sets the elevation profi le to dis-

play changes over a set period of time.

To select ‘PLOT OVER TIME’:

1.   With the ELEVATION Page displayed, press 

ENTER

to display the options list.

2.  Using the 

UP

 or 

DOWN

 Button highlight ‘PLOT OVER 

TIME’ and press 

ENTER

.

With the elevation profi le set to ‘PLOT OVER TIME’

you can set the time duration using the ‘ZOOM TIME’
option.  You can set the profi le to display 2 minutes, 5 
minutes, 10 minutes, 20 minutes, 30 minutes, 1 hour, or 
2 hours of elevation data.

To set Zoom Time:

1.   With the Elevation Page displayed, press 

ENTER

 to 

display the options list.

2.  Using the 

UP

 or 

DOWN

 Button highlight ‘Zoom

Time’ and press 

ENTER

. The display will switch back 

to the elevation profi le.  

3.  Using the 

UP

 or 

DOWN

 Button, set the time scale.

4.  When you have the correct time scale selected press 

ENTER

.

‘PLOT OVER DISTANCE’ sets the elevation profi le to 

display changes over a set period of time.

To select ‘PLOT OVER DISTANCE’:

1.   With the ELEVATION Page displayed, press 

ENTER

to display the options list.

2.  Using the 

UP

 or 

DOWN

 Button highlight ‘PLOT OVER 

DISTANCE’ and press 

ENTER

.

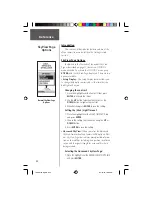
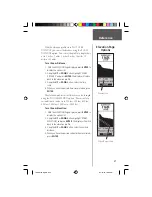
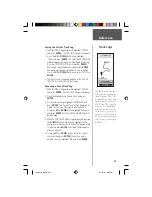
Time Scale

Set the elevation profi le to plot 
over distance or time.

Elevation Page 

Options

190-00193-00_0D.indd

02/12/01, 10:08 AM

26

Summary of Contents for eTrex Summit - Hiking GPS Receiver

Page 1: ...International Inc 1200 East 151st Street Olathe Kansas 66062 U S A GARMIN Europe Ltd Unit 5 The Quadrangle Abbey Park Industrial Estate Romsey SO51 9AQ U K GARMIN Corporation No 68 Jangshu 2nd Road Sh...

Page 2: ...ronic storage medium to be viewed for personal use provided that such electronic or printed copy of this manual contains the complete text of this copyright notice and provided further that any unauth...

Page 3: ...it If you have any questions or comments regarding the use of the eTrex Summit you can visit our website or contact our Customer Service Department M F 8 00 5 00 CST except holidays at 1 800 800 1020...

Page 4: ...age Options 20 21 Map Page Options 22 Pointer Page Options 23 25 Elevation Page 26 29 Mark Waypoint Page 30 31 Waypoint Page 32 Review Waypoint Page 33 34 Routes 35 37 Tracks 38 40 Calibration 41 43 S...

Page 5: ...racted by the eTrex Summit to the exclusion of safe operating practices It is unsafe to oper ate the eTrex Summit while you are driving Failure by the operator of a vehicle equipped with an eTrex Summ...

Page 6: ...er equipment try to correct the problem by relocating the equipment Consult an authorized GARMIN dealer or other quali ed service technician if the problem cannot be cor rected Operation is subject to...

Page 7: ...our eTrex Summit can provide one more critical bene t peace of mind because with the combination of these technologies you ll know where you are where you ve been and where you re going And since you...

Page 8: ...or menu selections Displays Options on main pages Pressing and holding the ENTER Button activates the Mark Waypoint page The PAGE Button Switches display pages Allows you to quit a function Pressing...

Page 9: ...Button UP Button ENTER Button Internal GPS Antenna LCD Display with backlight POWER Button PAGE Button Battery Compartment Waterproof Case Barometric Pressure Sensor Compass Sighting Marks eTrex Summi...

Page 10: ...the battery cover by turn ing the D ring at the back of the unit 1 4 turn counter clockwise Insert the batteries observing proper polarity Attach the battery cover by turning the D ring 1 4 turn cloc...

Page 11: ...needs to receive at least three strong satellite signals to nd your location The SkyView Page shows you graphically eTrex Summit tracking satel lites and the strength of the satellite signals The stat...

Page 12: ...same direction On the display there will be a speed scale that indicates whether you are rotating the unit Too Fast Too Slow or Just Right A message will be displayed when the compass has been success...

Page 13: ...he signals are weak you may need to try a different location for better reception The shorter the signal strength bar the weaker the signals At the top of the page the unit displays the status of the...

Page 14: ...ays displayed in front of the animated gure In the upper left corner of the screen the Map Orientation is displayed To make sure you can see your entire trip the map scale can be changed from 200 feet...

Page 15: ...Compass Ring re ects your heading direction of movement The eTrex Summit will automatically select the correct sensor for you based on your speed By pressing the UP or DOWN Buttons you can cycle throu...

Page 16: ...d a pro le of elevation changes over distance or time The UP or DOWN Buttons can be used to scroll through a variety of user selectable data including Pressure Vertical Speed Max Descent Max Ascent Av...

Page 17: ...splay your local time To change the time zone 1 Using the PAGE Button switch to the MENU Page Using the UP or DOWN Button highlight SETUP and press ENTER The SETUP Page appears 2 Using the UP or DOWN...

Page 18: ...and hold the ENTER Button to activate the MARK WAYPOINT Page The waypoint is assigned a numeric name at the time it is created You could press ENTER and save the waypoint now but there are a couple of...

Page 19: ...ng the UP or DOWN Button highlight the OK eld and press ENTER The MARK WAYPOINT Page appears 4 Using the UP or DOWN Button highlight the OK eld and press ENTER Your location named HOME is now marked a...

Page 20: ...rection of the destination waypoint Walk in the direc tion the arrow is pointing until the arrow points to the top of the compass ring If the arrow points to the right you need to go to the right If t...

Page 21: ...ing the UP or DOWN Button highlight TRACKS Press ENTER 3 You are now on the TRACKS Page Using the UP Button highlight CLEAR and press ENTER 4 Using the DOWN Button highlight YES Press ENTER 5 Press th...

Page 22: ...vate the slider 2 Use the UP Button to darken the contrast or the DOWN Button to lighten the contrast 3 When nished press ENTER to save the setting Setting the Back Light Timeout 1 Place the highlight...

Page 23: ...ient the satel lite view with your current track toward the top of the display When you select ORIENT SKY NORTHWARD the satellite postion will be oriented with North at the top of the display When ORI...

Page 24: ...STOP NAVIGATION stops any active navigation navigation means there is a destina tion waypoint or active route This option cannot be selected if there is no active navigation To select a Map Page optio...

Page 25: ...will return to step 3 If you selected PROJECT proceed to step 6 A Projection Waypoint is a waypoint created at a speci ed distance from the eTrex Summit s current GPS location 6 The PROJECT WAYPOINT...

Page 26: ...ding Compass this allows the user to select between seeing either large heading numbers or a large compass Reset Max Speed this resets the Maximum Speed achieved during a trip Reset Trip the trip time...

Page 27: ...height above mean sea level Location shows your current latitude and longi tude Sunrise the time of sunrise at your present location Sunset the time of sunset at your present location Trip Time the t...

Page 28: ...inutes 10 minutes 20 minutes 30 minutes 1 hour or 2 hours of elevation data To set Zoom Time 1 With the Elevation Page displayed press ENTER to display the options list 2 Using the UP or DOWN Button h...

Page 29: ...ou have the desired time scale selected press ENTER The elevation pro les vertical distance can be changed using the ZOOM ELEVATION option The vertical ele vation distance can be set to 200 feet 400 f...

Page 30: ...crolls the display right select the point along the pro le 4 When nished press ENTER to exit VIEW POINTS RESET MAX ELEVATION resets the maximum eleva tion data eld at the bottom of the page To reset t...

Page 31: ...Current Normalized or Ambient pres sure based on the pressure setting in System Setup see page 55 12HRS PRESSR Tracks pressure changes over a 12 hour period MAX ELEVATION Highest elevation reached MIN...

Page 32: ...N Button and highlight MARK Press ENTER 2 Press the UP or DOWN Button and highlight the small ag and press ENTER 3 Using the UP or DOWN Button scroll through the symbols Press ENTER to save the select...

Page 33: ...tion displayed To change the location latitude longitude 1 Press the PAGE Button and switch to the MENU Page Press the UP or DOWN Button and highlight MARK Press ENTER The MARK WAYPOINT Page appears 2...

Page 34: ...N Button and highlight NEAREST Press the ENTER Button The NEAREST WAYPOINTS Page appears The nine closest waypoints appear in a list showing their name and distance from your location You can select a...

Page 35: ...the UP or DOWN Button high light NO and press ENTER The con rmation mes sage box disappears and the waypoint remains in memory you can also press the PAGE Button to exit To start a GOTO 1 On the REVIE...

Page 36: ...op down number list 5 Using the UP or DOWN Button select the correct number then press ENTER When all numbers are entered correctly highlight OK and press ENTER 6 Using the DOWN Button highlight the b...

Page 37: ...e route feature is more powerful because it is more automatic When you reach one waypoint the eTrex Summit automatically guides you to the next waypoint on the route without needing to touch any butto...

Page 38: ...rex Summit will guide you to the selected nal destination following each waypoint in the route There are two ways to insert a waypoint into a route One way is to insert the waypoint before an exist in...

Page 39: ...ing the UP or DOWN Button highlight the waypoint you want to remove and press ENTER The INSERT REMOVE window appears Press the UP or DOWN Button and highlight REMOVE Press ENTER and the waypoint is re...

Page 40: ...ercentage of memory used by the current Track Log is displayed at the top of the Tracks page After the Track Log is CLEARED it will show zero percent When the display shows 99 the most recent track po...

Page 41: ...nd press ENTER The Saved Track will be displayed on a map At the top of the map is a default name Using the UP or DOWN Button highlight the name and press ENTER The EDIT TRACK NAME Page will be displa...

Page 42: ...ed highlight a SAVED TRACK and press ENTER 2 Using the UP or DOWN Button highlight TRAC BACK and press ENTER The direction window appears asking you if you want the destination to be at the beginning...

Page 43: ...mind press the UP or DOWN Button and select NO Press ENTER or you can press PAGE to exit at any time The tracks remain in memory Calibrating the Compass and Altimeter The CALIBRATE selection on the M...

Page 44: ...d press ENTER A message CALIBRATION COMPLETED SUCCESS FULLY will be displayed highlight OK and press ENTER to end the calibration 5 If you selected NO you will be asked DO YOU KNOW THE CORRECT BAROMET...

Page 45: ...orth reference operating mode display contrast and display back light timeout Time Format The Time Page allows you to select a 12 hour or 24 hour time format enter the proper time zone and choose Dayl...

Page 46: ...lock settings when daylight savings goes into or out of effect You can choose Yes to manually add daylight savings or No to remain on standard time To change the daylight davings eld 1 Press the PAGE...

Page 47: ...AY and press ENTER Press the UP or DOWN Button and highlight the CONTRAST icon and press ENTER 3 Press the UP or DOWN Button and adjust the con trast and ENTER Press PAGE to get back to the SETUP page...

Page 48: ...datum is usually listed in the title block of the map If you are comparing GPS coordinates to a paper map or other reference the map datum in the eTrex Summit should match the hori zontal map datum u...

Page 49: ...WN Button select the UNITS eld Press ENTER 4 Press the UP or DOWN Button to select the desired unit Press ENTER Press PAGE to select the page of your choice Elevation VSPD vertical speed The eTrex Sum...

Page 50: ...ect the page of your choice Angle You can set the eTrex Summit to display directional information in DEGREES or in MILS To select an Angle setting 1 With the MENU Page displayed using the UP or DOWN B...

Page 51: ...aypoint route and track data with a PC GARMIN DGPS Allows DGPS input using a GARMIN beacon receiver and a standard RTCM SC 104 format and DGPS tuning NMEA OUT supports the output of standard NMEA 0183...

Page 52: ...mat Press ENTER Press PAGE to return to the page of your choice Heading Page The eTrex Summit will automatically switch between the Electronic Compass and GPS to determine your head ing The eTrex Summ...

Page 53: ...ct HEADING and press ENTER The HEADING Page appears 3 Using the UP or DOWN Button select the USE GPS HEADING WHEN EXCEEDING eld and press ENTER A list of selections will appear 4 Using the UP or DOWN...

Page 54: ...North Reference setting If you have selected TRUE NORTH the Electronic Compass will point TRUE NORTH not Magnetic North To change the North Reference 1 With the MENU page displayed using the UP or DO...

Page 55: ...power Demo Mode The DEMO mode is designed for dealers to show the features and functions of the eTrex Summit to potential customers inside a closed building where satellite recep tion is not possible...

Page 56: ...STEM Page appears 3 Using the UP or DOWN Button highlight the COM PASS eld and press ENTER 4 Using the UP or DOWN Button highlight the desired mode and press ENTER Altimeter The Altimeter can use GPS...

Page 57: ...or DOWN Button highlight the desired pressure and press ENTER Language The eTrex Summit can display in 12 languages To select a language 1 With the MENU Page displayed highlight SETUP and press ENTER...

Page 58: ...wer Input Two 1 5 volt AA batteries4 Battery Life Up to 16 hours of typical use5 Speci cations subject to change without notice 1 With optional GARMIN Differential Beacon Receiver Input such as GARMIN...

Page 59: ...and 60 degrees South latitudes What this means is you can receive satellite signals any where in the world at any time One of the biggest bene ts over previous land based navigation systems is GPS wo...

Page 60: ...ly what a GPS receiver does With a minimum of three or more satellites your GPS can determine a latitude longitude position what s called a 2D position x With four or more satellites a GPS receiver ca...

Page 61: ...x Summit asks IS TODAY dd mmm yy If you answer YES the date matches the current date the eTrex Summit will continue tracking satellites and switch to the Satellite Page 4 If you answer NO the date is...

Page 62: ...t 5 7 0 0 E 2 5 7 3 0 E o t 5 2 2 0 E 3 5 2 5 0 E o t 5 7 3 0 E 4 5 7 6 0 E o t 5 2 5 0 E 5 5 2 8 0 E o t 5 7 6 0 E 6 5 7 9 0 E o t 5 2 8 0 E 7 5 2 1 1 E o t 5 7 9 0 E 8 5 7 2 1 E o t 5 2 1 1 E 9 5 2...

Page 63: ...ions for data input output PC Cable with Cigarette Lighter Part No 010 10268 00 Allows for serial transfer of data between a PC and an eTrex Summit while providing unit power from an automobile cigare...

Page 64: ...e PSLIB beacon receiver control DGPS Differential GPS corrections are accepted in RTCM SC 104 version 2 0 format through the Data In line The GARMIN GBR 21 is the recommended beacon receiver for use w...

Page 65: ...Summit coordinates do not match the location on your map 1 Check to make sure the eTrex Summit is con gured to use the same datum as your map See page 46 The Electronic Compass heading is incorrect 1...

Page 66: ...ty S A Without S A the eTrex Summit is accurate to within 15 meters Using differential techniques the eTrex Summit can be as accurate as 1 5 meters Why can t I see the display in the daylight Adjust t...

Page 67: ...g but it is always activated Remember that if you clear the track log you are also clearing the elevtation pro le What does the message NO DGPS POSITION mean eTrex Summit had a differential x and lost...

Page 68: ...10 Cancelling a GOTO 19 Change a Data Field 25 Change the Elevation 31 Change the Location 31 Change the Symbol 30 Change the Waypoint Name 17 Clear Route Waypoints 37 Clear a Cluttered Map 19 Clear...

Page 69: ...33 35 H Heading Page 50 I Installing the Batteries 8 Interface Page 50 Introduction 20 L Lanyard Installation 8 Location 25 M Main Pages 11 Map Datums 46 Map Display 19 Map Page 12 Map Page Option 22...

Page 70: ...enaming a Saved Track 39 Reset Max Speed 24 Reset the Elevation Data 28 Reset the Maximum Elevation 28 Route 5 35 37 S Satellite Page 11 Saving the Tracklog 39 Select a Waypoint 32 Selecting a Page 11...

Page 71: ...Trip Odometer 25 Trip Time 25 Troubleshooting 63 Turning the GPS Receiver Off 53 U Units of Measure 47 Units Page 45 Using Sight N Go 23 UTC Offset 44 60 V Vertical Distance Scale 27 View Points 28 W...

Page 72: ...ROM STATE TO STATE IN NO EVENT SHALL GARMIN BE LIABLE FOR ANY INCIDENTAL SPE CIAL INDIRECT OR CONSEQUENTIAL DAMAGES WHETHER RESULTING FROM THE USE MISUSE OR INABILITY TO USE THIS PRODUCT OR FROM DEFEC...

Page 73: ...International Inc 1200 East 151st Street Olathe Kansas 66062 U S A GARMIN Europe Ltd Unit 5 The Quadrangle Abbey Park Industrial Estate Romsey SO51 9AQ U K GARMIN Corporation No 68 Jangshu 2nd Road Sh...

Reviews: