background image

Home Screen Overview

The home screen gives you quick access to all the features of 

the Edge.


Where To?

Searches for a location or route.


View Map

Shows the map.
Opens the device history.

Opens the setup menu.

Using the Touchscreen

• When the timer is running, tap the screen to view the timer 

overlay.
The timer overlay allows you to use the settings and search 

features during a ride.

• Select   to save your changes and close the page.
• Select   to close the page and return to the previous page.
• Select   to return to the previous page.
• Select   to return to the home screen.
• Select   and   to scroll.
• Select   to search for a location.
• Select   to search near a location.
• Select   to search by name.
• Select   to delete an item.
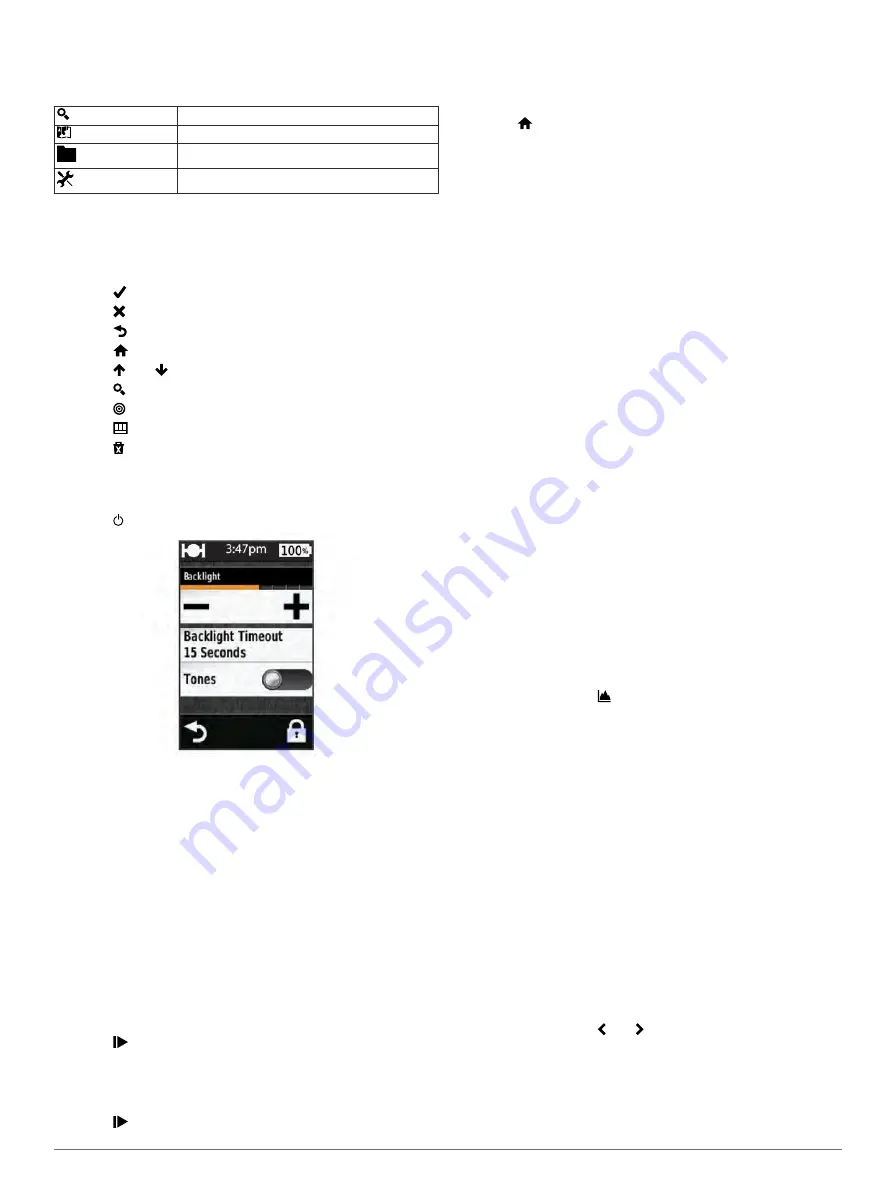
Using the Backlight

• At any time, select anywhere on the screen to turn on the 

backlight.

• Select   to adjust the backlight brightness and timeout.

Acquiring Satellite Signals

The device may need a clear view of the sky to acquire satellite 

signals. The time and date are set automatically based on the 

GPS position.

1

Go outdoors to an open area.
The front of the device should be oriented toward the sky.

2

Wait while the device locates satellites.
It may take 30–60 seconds to locate satellite signals.

Navigation

Recording a Ride

You can record details of your ride such as the track, time, and 

elevation.

1

Select  .

2

Wait while the device locates satellites.

3

Swipe the screen for additional data pages.

4

If necessary, tap the screen to view the timer overlay.

5

Select   to stop the timer.

6

Select 

Save

.

Navigating Back to the Starting Location

1

During your ride, tap the screen to view the trip page overlay.

2

Select   > 

Where To?

 > 

Back to Start

.

3

Select an option:
• To return by the same route, select 

Along Same Route

.

• To return by the shortest possible route, select 

Most 

Direct Route

.

4

Select 

RIDE

.

Planning and Riding a Route

You can create and ride a custom route.

1

From the home screen, select 

Where To?

 > 

Route Planner 

Add First Location

.

2

Select an option:
• To select a saved location, select 

Saved

, and select a 

location.

• To select a location for which you recently searched, 

select 

Recent Finds

, and select a location.

• To select a location on the map, select 

Use Map

, and 

select a location.

• To browse for and select a point of interest, select 

POI 

Categories

, and select a nearby point of interest.

• To select a city, select 

Cities

, and select a nearby city.

• To select an address, select 

Address

, and enter the 

address.

• To use coordinates, select 

Coordinates

, and enter the 

coordinates.

3

Select 

Use

.

4

Select 

Add Next Location

.

5

Repeat steps 2–4 until you have selected all locations for the 

route.

6

Select 

View Route

.

The device calculates your route, and a map of the route 

appears.

TIP: 

You can select   to view an elevation plot of the route.

7

Select 

RIDE

.

Creating a Round-Trip Route

The device can create a round-trip route based on a specified 

distance and a starting location.

1

From the home screen, select 

Where To?

 > 

Round-Trip 

Routing

.

2

Select 

Distance

, and enter the total distance for the route.

3

Select 

Start Location

.

4

Select an option:
• Select 

Current Location

.

NOTE: 

If the device cannot acquire satellite signals to 

determine your current location, the device prompts you 

to use the last known location or to select the location on 

the map.

• Select 

Use Map

 to select a location on the map.

5

Select 

Search

.

6

Select a route to view it on the map.

TIP: 

You can select   and   to view the other routes.

7

Select 

RIDE

.

Locations

You can record and store locations in the device.

2

Navigation

Summary of Contents for EDGE Touring

Page 1: ...Edge Touring Owner s Manual June 2013 190 01605 00_0C Printed in Taiwan ...

Page 2: ...e Garmin logo and Edge are trademarks of Garmin Ltd or its subsidiaries registered in the USA and other countries ANT and Garmin Connect are trademarks of Garmin Ltd or its subsidiaries These trademarks may not be used without the express permission of Garmin Mac is a registered trademark of Apple Computer Inc microSD and the microSDHC logo are trademarks of SD 3C LLC Windows is a registered trade...

Page 3: ...ferring Files to Your Device 4 Deleting Files 4 Disconnecting the USB Cable 4 Sending Your Ride to Garmin Connect 4 Garmin Connect 5 Customizing Your Device 5 Routing Options 5 Customizing the Trip Pages 5 Map Settings 5 Compass Settings 5 Elevation Settings 5 Customizing the Timer Page 5 Marking Laps by Distance 5 Marking Laps by Position 5 Display Settings 5 Changing the Start Notice 6 Changing ...

Page 4: ......

Page 5: ... 5 Charge the device completely A fully charged battery can run for up to 15 hours before it must be recharged About the Battery WARNING This device contains a lithium ion battery See the Important Safety and Product Information guide in the product box for product warnings and other important information Installing the Standard Mount For the best GPS reception position the bike mount so the front...

Page 6: ...art 3 Select an option To return by the same route select Along Same Route To return by the shortest possible route select Most Direct Route 4 Select RIDE Planning and Riding a Route You can create and ride a custom route 1 From the home screen select Where To Route Planner Add First Location 2 Select an option To select a saved location select Saved and select a location To select a location for ...

Page 7: ...jecting the distance and bearing from a marked location to a new location 1 From the home screen select Where To Saved Locations 2 Select a location 3 Select the location information at the top of the screen 4 Select Project Location 5 Enter the bearing and distance to the projected location 6 Select Editing Locations 1 From the home screen select Where To Saved Locations 2 Select a location 3 Sel...

Page 8: ... from the mini USB port 2 Plug the small end of the USB cable into the mini USB port 3 Plug the large end of the USB cable into a computer USB port Your device and memory card optional appear as removable drives in My Computer on Windows computers and as mounted volumes on Mac computers Transferring Files to Your Device 1 Connect the device to your computer page 4 Your device and memory card optio...

Page 9: ...Enables or disables the maps currently loaded on the device Changing the Map Orientation 1 From the home screen select Trip Pages Map Orientation 2 Select an option Select North Up to show north at the top of the page Select Track Up to show your current direction of travel at the top of the page Select 3D Mode to show an automotive perspective with the direction of travel at the top Compass Setti...

Page 10: ...nd acquire satellites the device automatically detects your time zone and the current time of day Device Information Edge Specifications Battery type 1100 mAh rechargable built in lithium ion battery Battery life 15 hours typical usage Optional external battery accessory 20 hours typical usage Water resistance IPX7 Operating temperature range From 4º to 140ºF from 20º to 60ºC Charging temperature ...

Page 11: ...n the course Dist Lap The distance traveled for the current lap Dist to Dest The remaining distance to the final destination You must be navigating for this data to appear Dist to Next The remaining distance to the next waypoint on the route You must be navigating for this data to appear Distance The distance traveled for the current track or activity Elevation The altitude of your current locatio...

Page 12: ...ore you reach the destination You must be navigating for this data to appear Time to Next The estimated time remaining before you reach the next waypoint in the route You must be navigating for this data to appear Total Ascent The total elevation distance ascended since the last reset Total Descent The total elevation distance descended since the last reset 8 Appendix ...

Page 13: ...L language 6 laps 1 locations 2 3 deleting 3 editing 3 finding with the map 3 recently found 3 locking screen 7 M maps finding locations 3 orientation 5 settings 5 memory card 6 mounting the device 1 N navigation 3 back to start 2 stopping 3 O O rings bands 6 on screen buttons 2 P pairing eBike 4 heart rate monitor 3 photos 3 power save 7 product registration 7 profiles 6 R registering the device ...

Page 14: ...0 023 3937 035 539 3727 47 815 69 555 00800 4412 454 44 2380 662 915 35 1214 447 460 34 93 275 44 97 46 7744 52020 Garmin International Inc 1200 East 151st Street Olathe Kansas 66062 USA Garmin Europe Ltd Liberty House Hounsdown Business Park Southampton Hampshire SO40 9LR UK Garmin Corporation No 68 Zhangshu 2nd Road Xizhi Dist New Taipei City 221 Taiwan R O C TA 2013 035 2013 Garmin Ltd or its s...

Reviews: