Getting Started
WARNING
See the
Important Safety and Product Information
guide in the
product box for product warnings and other important
information.
When using the device the first time, complete these tasks.
1
Register your device (
).
2
Charge the device (
).
3
Turn on the device (
).
4
Update your device software and courses (
).
5
Go play a game of golf (
).
Charging the Device
WARNING
This device contains a lithium-polymer battery. See the
Important Safety and Product Information
guide in the product
box for product warnings and other important information.
NOTICE
To prevent corrosion, thoroughly dry the mini-USB port, the
weather cap, and the surrounding area before charging or
connecting to a computer.
The device is powered by a built-in lithium-polymer battery that
you can charge using a standard wall outlet or a USB port on
your computer.
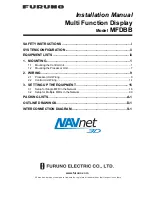
1
Pull up the weather cap
À
from the mini-USB port
Á
.
2
Plug the small end of the USB cable into the mini-USB port.
3
Plug the large end of the USB cable into the AC charger.
4
Plug the AC charger into a standard wall outlet.
5
Charge the device completely.
A fully charged battery can run for up to 15 hours.
Turning On the Device
The first time you use the device, you are prompted to choose a
language and unit of measure. You can also set up club advice
during initial set up.
Hold .
Registering Your Device
Help us better support you by completing our online registration
today.
• Go to
• Keep the original sales receipt, or a photocopy, in a safe
place.
Locking the Touchscreen
You can lock the screen to prevent inadvertent screen touches.
1
Select .
2
Select .
Playing Golf
1
Select
Play
.
2
Select a course.
Hole View
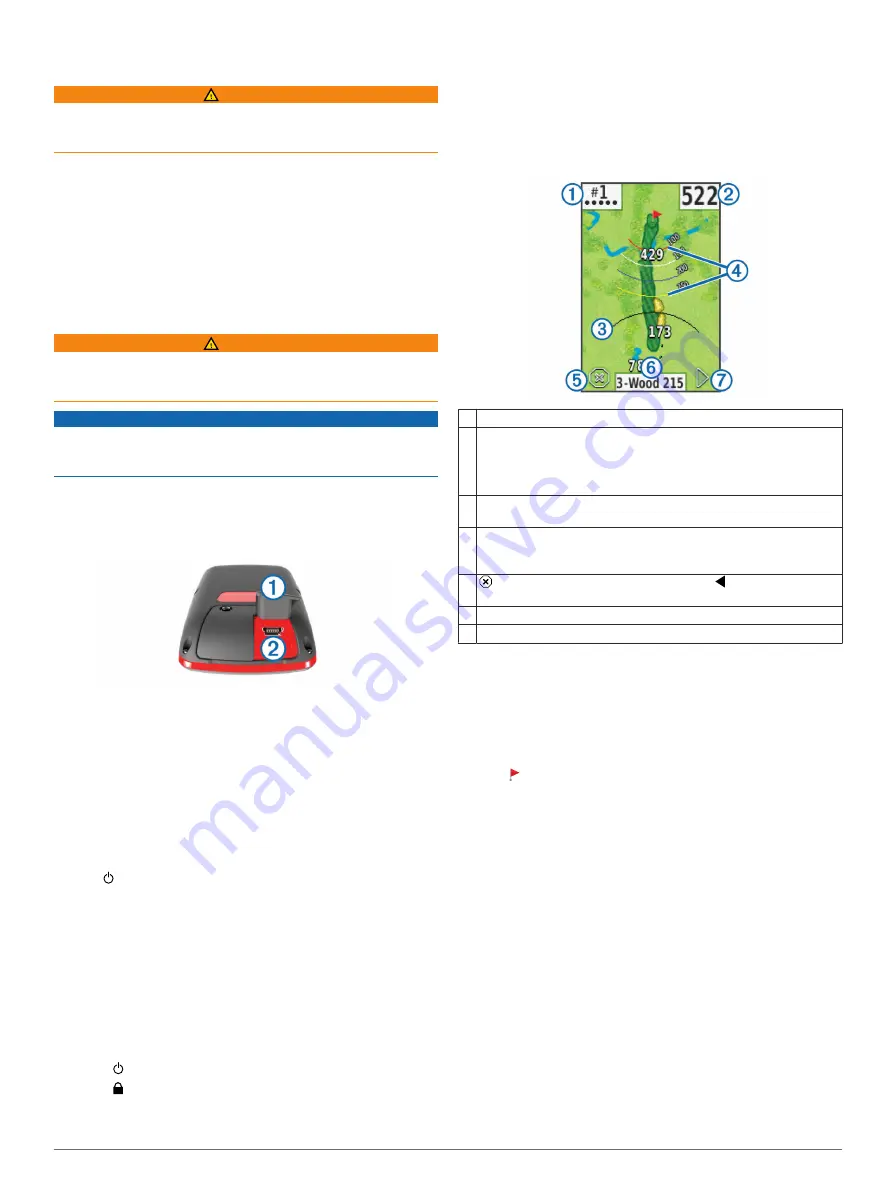
The device shows the current hole you are playing.
À
Displays the hole number. The number of dots indicates par.
Á
Displays the distance to the middle of the green.
NOTE:
Because pin locations change, the device calculates the
distance to the middle of the green and not the actual pin location.
Enables big numbers mode when selected.
Â
Displays the club range arc for the recommended club when club
advice is enabled.
Ã
Displays layup arcs that indicate the distance to the pin.
Four arcs appear for par 5 or higher, three arcs appear for par 4,
and zero arcs appear for par 3.
Ä
ends the round (first and last holes only). displays the
previous hole.
Å
Displays the recommended club when club advice is enabled.
Æ
Moves you to the next hole when selected.
Viewing the Green
While previewing a course, or during a game, you can take a
closer look at the green and move the pin location.
1
) or previewing a course
(
).
2
Select
GREEN
to zoom in on the green.
3
Drag to move the pin location.
Clubs
You can save distance information for each club type.
If club advice is enabled, the device uses your club information
to recommend a club for your next shot.
Setting Up Clubs
1
Select
Setup
>
Clubs
.
2
Select an option:
• Select
Add Club
to add a club the existing list.
• Select a club, and select
Move Up
or
Move Down
to
relocate the club in the list.
• Select a club, and select
Reset
to clear shot data from the
club.
• Select a club, and select
Delete
to remove the club from
the list.
Viewing Club Averages
Before you can view club averages, you must measure your
shots and add the shots to your clubs (
).
Getting Started
1