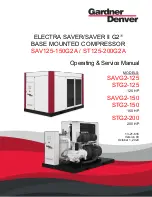
background image


ELECTRA SAVER/SAVER II G2


BASE MOUNTED COMPRESSOR 

SAV125-150G2A / ST125-200G2A


Operating & Service Manual


MODELS:


SAVG2-125 

STG2-125 

125 HP 


SAVG2-150 

STG2-150 

150 HP 


STG2-200 

200 HP 


13-21-616 

Version 00 

October 1, 2020


Summary of Contents for ELECTRA-SAVER

Page 1: ...A SAVER SAVER II G2 BASE MOUNTED COMPRESSOR SAV125 150G2A ST125 200G2A Operating Service Manual MODELS SAVG2 125 STG2 125 125 HP SAVG2 150 STG2 150 150 HP STG2 200 200 HP 13 21 616 Version 00 October...

Page 2: ...he necessary parts to simplify servicing your compressor Authorized distributor service technicians are factory trained and skilled in compressor maintenance and repair They are ready to respond and a...

Page 3: ...nomical operation and minimum downtime Boxed text formats are used within this manual to alert users of the following conditions Safety Labels are used within this manual and affixed to the appropriat...

Page 4: ...uipment in De Energized State Do Not Lift Equipment with Hook No Lift Point Handle Package at Forklift Points Only Loud Noise Hazard Wear Ear Protection Read the Operator s Manual before Proceeding wi...

Page 5: ...or oil system until the unit is shut down and the air pressure has been relieved Electrical shock can and may be fatal Perform all wiring in accordance with the National Electrical Code NFPA 70 and a...

Page 6: ...formation 8 Section 2 Installation 12 Section 3 Starting Operating Procedures 22 Section 4 Controls Instrumentation 33 Section 5 Lubrication Oil Cooler Oil Filter Separator 51 Section 6 Air Filter 71...

Page 7: ...ing 62 Oil Sampling Valve 60 Oil Separator Compressor GD Eliminator 67 Inspection 68 Oil Carryover 67 Pressure Differential Gauging 68 Removal For Inspection Or Replacement 69 Oil Specifications 51 Oi...

Page 8: ...een 31 Figure 3 10 Jogs Motor Screen 32 Figure 4 1 Controller Keypad 33 Figure 4 2 Schematic Tubing Diagram 34 Figure 4 3 Minimum Discharge Pressure Check Valve 35 Figure 4 4 Turn Valve Electra Saver...

Page 9: ...ins as rotors unmesh at the inlet port and air is drawn into the cavity between the main rotor lobes and secondary rotor grooves A When the rotors pass the inlet port cutoff air is trapped in the inte...

Page 10: ...discharges into the compressor main oil gallery A portion of the oil is directed through internal passages to the bearings gears and shaft oil seal The balance of the oil is injected directly into th...

Page 11: ...13 21 616 v00 Page 10 Figure 1 4 COMPRESSOR MOTOR SIDE 125 150 HP Figure 1 4a COMPRESSOR MOTOR SIDE 200 HP 300EBG797 00 Ref Drawing...

Page 12: ...13 21 616 v00 Page 11 Figure 1 5 COOLER RESERVOIR SIDE Figure 1 6 AIR OIL FLOW DIAGRAM 300EBG797 00 Ref Drawing 307EBD797 EA Ref Drawing...

Page 13: ...e of air In some cases it may be necessary to install the air filter at some distance from the compressor to obtain proper air supply Do not electric weld on the compressor or base bearings can be dam...

Page 14: ...ing Air is drawn in on the motor side of the unit and is exhausted through the roof on the separator side of the unit Do not block the air flow to and from the unit Allow three and one half 3 1 2 feet...

Page 15: ...piping rigidity angle of tilt or danger of shifting from outside vibration or moving vehicles may require the use of mounting bolts and shims to provide uniform support for the base OIL RESERVOIR DRA...

Page 16: ...will depend on the severity of the environment The following are general guidelines for outside installations Cold Weather Down To 10 F 12 C 1 Be sure all drains traps and control lines including pre...

Page 17: ...eceiver is not required if the piping system is large and provides sufficient storage capacity to prevent rapid cycling When used an air receiver should be of adequate size provided with a relief valv...

Page 18: ...ischarge service line to allow the unit to be safely isolated during service If a rotary screw and a reciprocating compressor are manifolded together an air receiver must be located between the two un...

Page 19: ...PIPING Water Cooled Heat Exchanger Models Only On machines equipped with water cooled heat exchangers the water inlet and outlet connections are located in the unit enclosure flange on the end of the...

Page 20: ...water warmer than 90 F 32 C is used higher compressor oil inlet temperatures and high water usage will result Most water systems will require control of impurities filtration softening or other treatm...

Page 21: ...pressor package is factory wired for all connections from the starter to the motor for the horsepower and voltage specified on the order The standard unit is supplied with open drip proof motors and a...

Page 22: ...filled with Mobil Polyrex EM 5 Leave the relief plug temporarily off Reconnect the unit and run for about 20 minutes to expel the excess grease 6 Stop the unit Replace the relief plug 7 Restart the un...

Page 23: ...ration and after shutdown the system will partially drain back into the oil reservoir and the oil level may read higher than when operating on load DO NOT DRAIN OIL TO CORRECT on the next loaded cycle...

Page 24: ...SURE ON THE COMPRESSOR NAMEPLATE See Operational Settings in the Controller Operating and Service Manual 9 Operating Mode Refer to Section 4 for detailed information on the control system 10 Enclosure...

Page 25: ...rm up period is required If the unit is a water cooled heat exchanger model open any manual water inlet valves wide open Start the unit by pushing RUN DAILY CHECK Refer to Section 8 Maintenance Schedu...

Page 26: ...and operating mode and start the compressor Logging In Before making any changes to the settings on the controller you must log in with an appropriate access level The current access level is indicat...

Page 27: ...ns Factory Contact Gardner Denver Full access to all settings and features The password rotates automatically throughout the life of the machine It may not be changed This password should only be requ...

Page 28: ...he Settings Configuration menu as shown in Figure 3 3 Figure 3 3 Configuration Menu First ensure that the units are set as desired by selecting the Locale link from the Configuration menu The Pressure...

Page 29: ...mezone properly ensures that daylight savings time adjustments will be accounted for automatically The Date and Time Configuration screen is shown in Figure 3 5 Figure 3 5 Date and Time Configuration...

Page 30: ...gs of the machine are acceptable for most installations However if the Pressure Band displayed on the gauge on the Home screen does not match the desired pressure range for the site the Pressure Band...

Page 31: ...d maximum values that will be allowed for each box will change dynamically based on the design pressure of the machine as well as the values of the other settings For example to increase the Load pres...

Page 32: ...ge Status Bar on the Home screen or by navigating to Alarms Active Alarms through the Menu The Active Alarms screen is shown in Figure 3 9 Figure 3 9 Active Alarms Screen If the alarm icon in the Alar...

Page 33: ...wn as shown You will need to jog both individually to verify correct rotation The Jog Delay field allows you to delay the start of the jog from the time that you press the Start Jog button This is to...

Page 34: ...ee to the Wiring Diagrams listed by voltage at the end of this section for more details on the location of the referredhardware Governor Controller The compressor package features the Governor Control...

Page 35: ...oil reservoir outlet ahead of the minimum pressure valve When the solenoid is de energized the valve opens and the coolant system is blown down When the solenoid is energized the valve closes to allow...

Page 36: ...pproximately 65 psig in the oil reservoir When the air pressure on the upstream reservoir side of the valve rises above 65 psig the spring is overridden and the valve opens to full porting The valve d...

Page 37: ...both valves de energized the normally open IVC valve allows control pressure to the inlet piston to close the valve If IVC only is energized the inlet valve is held in its current position If both val...

Page 38: ...st be clean and free of burrs and scale Take care not to scrape the cylinder walls when moving the pistons Solenoid Valves TVC and TVO Electra Saver only These valves control the position of the turn...

Page 39: ...ensor is located near the separator and is used to monitor temperature and shut down the compressor if high temperatures are detected Emergency Stop Push Button This is a maintained push button and re...

Page 40: ...ntrol and overload protection for the main drive motor Wiring diagrams for typical Wye Delta applications are illustrated on pages 43 thru 50 Overload protection is provided for each motor on voltage...

Page 41: ...13 21 616 v00 Page 40 FIGURE 4 6 COMPRESSOR PACKAGE P ID 300EBF797 EB Ref Drawing...

Page 42: ...On On A D D Open Increasing Open TV Modulate Closed Off Closed On Open On Closed Off Closed On On A D D Open Decreasing Open IV Modulate Open On Closed On Closed Off Closed Off Closed On On A D D Ope...

Page 43: ...efore doing any service or diagnostics on the electrical system FIGURE 4 8 ELECTRA SAVER II WIRING DIAGRAMS WIRING DIAGRAM HP VOLTAGE STARTER 311EBG546 125 575 3 60 YES 150 200 313EBG546 125 380 3 50...

Page 44: ...13 21 616 v00 Page 43 313EBG546 06 Ref Drawing Page 2 of 14 FIGURE 4 9 WIRING DIAGRAM WYE DELTA AIR COOLED WATER COOLED 125 200 HP 460 VOLT...

Page 45: ...13 21 616 v00 Page 44 313EBG546 06 Ref Drawing Page 3 of 14 FIGURE 4 10 WIRING DIAGRAM WYE DELTA AIR COOLED WATER COOLED 125 200 HP 460 VOLT...

Page 46: ...13 21 616 v00 Page 45 313EBG546 06 Ref Drawing Page 4 of 14 FIGURE 4 11 WIRING DIAGRAM WYE DELTA AIR COOLED WATER COOLED 125 200 HP 460 VOLT...

Page 47: ...13 21 616 v00 Page 46 313EBG546 06 Ref Drawing Page 5 of 14 FIGURE 4 12 WIRING DIAGRAM WYE DELTA AIR COOLED WATER COOLED 125 200 HP 460 VOLT...

Page 48: ...13 WIRING DIAGRAM WYE DELTA AIR COOLED WATER COOLED 125 200 HP 460 VOLT FIGURE 4 14 WIRING DIAGRAM WYE DELTA AIR COOLED WATER COOLED 125 200 HP 460 VOLT 313EBFG46 06 Ref Drawing Page 6 of 14 313EBG54...

Page 49: ...13 21 616 v00 Page 48 313EBG546 06 Ref Drawing Page 8 of 14 FIGURE 4 15 WIRING DIAGRAM WYE DELTA AIR COOLED WATER COOLED 125 200 HP 460 VOLT...

Page 50: ...13 21 616 v00 Page 49 313EBG546 06 Ref Drawing Pages 9 of 14 FIGURE 4 16 WIRING DIAGRAM WYE DELTA AIR COOLED WATER COOLED 125 200 HP 460 VOLT...

Page 51: ...06 Ref Drawing Pages 10 of 14 313EBG546 06 Ref Drawing Pages 11 of 14 FIGURE 4 17 WIRING DIAGRAM WYE DELTA AIR COOLED WATER COOLED 125 200 HP 460 VOLT FIGURE 4 18 WIRING DIAGRAM WYE DELTA AIR COOLED W...

Page 52: ...NDED LUBRICANT Gardner Denver compressors are factory filled with AEON lubricants These lubricants are formulated to the highest quality standards and are factory authorized tested and approved for us...

Page 53: ...ure that it is operating properly The best method for detecting moisture is a disciplined lubricant sampling analysis program every 2 000 hours of operation If moisture is observed in the oil reservoi...

Page 54: ...is of the chart and then reading the appropriate pressure curve to determine the corresponding dew point temperature on the left axis of the chart The compressor discharge temperature must be maintain...

Page 55: ...13 21 616 v00 Page 54 300EBF797 EB Ref Drawing Figure 5 3 FLOW DIAGRAM AIR OIL SYSTEM...

Page 56: ...13 21 616 v00 Page 55 301EBG797 00 Ref Drawing Figure 5 4 OIL FLOW DIAGRAM REMOTE MOUNTED COOLER...

Page 57: ...sealant on all steel to aluminum threaded connections All piping should be firmly supported to avoid strain on the cooler manifold and connections Flexible connections should be installed in all inte...

Page 58: ...This will shut the oil stop valve and prevent excessive oil from running into the reservoir Failure to install these parts or installations with pipe lengths and or vertical runs outside the recommend...

Page 59: ...f the fill range is shown in Figure 5 5 page 59 Repeated addition of oil between oil changes may indicate excessive oil carry over and should be investigated LUBRICANT CHANGE PROCEDURE Following are t...

Page 60: ...EVEL GAUGE Figure 1 6 page 11 and Figure 5 5 indicates the amount of oil in the oil reservoir Read oil level only when unit is on In operation the oil level will fluctuate as the compressor loads and...

Page 61: ...9000SP Change Interval Up to 180 F 82 C 4000 hrs 8000 hrs 180 F to 190 F 82 C to 88 C 3000 hrs 6000 hrs 190 F to 200 F 88 C to 93 C 2000 hrs 4000 hrs 200 F 93 C 1000 hrs 2000 hrs Figure 5 6 OIL CHANG...

Page 62: ...the drain valve to a suitable container or sump 3 If the drained oil and or the oil filter element are contaminated with dirt flush the entire system reservoir oil cooler mixing valve and lines Inspe...

Page 63: ...RRECT On the next start oil will again fill the system and the gauge will indicate operating at the proper level DO NOT OVERFILL as oil carryover will result The quantity of oil required to raise the...

Page 64: ...the gasket face of the filter body 4 Coat the new element gasket with clean lubricant used in the unit 5 Screw the new element on the filter body and tighten by hand DO NOT OVER TIGHTEN THE ELEMENT 6...

Page 65: ...mix with oil from the bypass After the unit is warmed up the mixing valve maintains oil injection temperature into the compressor at a minimum of 130 F 55 C or 160 F 71 C depending on the air end Thi...

Page 66: ...one or more of these conditions exist may result in increased maintenance and operation expense reduced equipment life and emergency shutdown It is strongly recommended that a reputable local water t...

Page 67: ...ing screw is an index line for use with the index scale 0 to 8 in obtaining a desired setting These valves must be handled with care and proper tools and techniques must be used when working on the va...

Page 68: ...ation 303EBD797 Ref Drawing Figure 5 12 OIL SEPARATOR COMPRESSOR GD ELIMINATOR OIL SEPARATOR located in a separate housing consists of a renewable cartridge type separator element and provides the fin...

Page 69: ...e condition of the separator can be determined by pressure differential gauging or by inspection Pressure Differential Gauging The CHANGE SEPARATOR advisory will occur when the pressure differential a...

Page 70: ...K The following readings are based on ambient temperature of 80 F 27 C for air cooled oil cooler and 80 F 27 C inlet water on water cooled oil cooler with the system in good condition Compressor shoul...

Page 71: ...et temperature is approximately the same as air discharge temperature see the gauge on the instrument panel The outlet oil temperature may be checked by installing a tee at the oil filter outlet Oil C...

Page 72: ...element cylinder and lift off the air filter element cylinder and shroud The shroud can be removed for easier handling of the filter assembly by removing the wingnut on top of the shroud and lifting...

Page 73: ...would indicate a rupture or crack in the filter element Inlet Tube Inspect the inlet tube for dirt accumulation each time the filter is serviced Clean the tube when required by ramming a clean dry clo...

Page 74: ...ted by a resilient type flexible coupling with a single cushion The coupling does not require lubrication If maintenance on mating parts is required reassemble coupling as follows Rotating machinery c...

Page 75: ...7 1 69 in 40 43mm A smaller gap will produce abnormal wear of the element by friction and excessive thermal expansion the latter could cause compressor damage by axially displacing the input shaft Mak...

Page 76: ...he coupling the same direction as the rotation arrow on the airend Incorrect rotation will greatly decrease the torque carrying capacity of the coupling Rotating machinery can cause personal injury or...

Page 77: ...essed air carrying a nonflammable safety solvent that will not damage aluminum in a direction opposite that of the cooling air flow The cleaning operation will keep the exterior cooling surfaces clean...

Page 78: ...x x x x x x Replace air filter element x x x x x x x x x x x Oil Sample x x x x x x x x x x Replace Air Oil Separator x x x x x x Inspect clean if necessary scavenge line replace check x x x x x Insp...

Page 79: ...x x Replace air filter element x x x x x x x x x x Oil Sample x x x x x x x x x x Replace Air Oil Separator x x x x x Inspect clean if necessary scavenge line replace check x x x x x Inspect service i...

Page 80: ...on 2 Blown fuse in starter 2 Replace fuse investigate control box if fuses continue to blow 3 Motor starter overload 3 Reset and investigate heaters trips cause of overload Compressor does not unload...

Page 81: ...leaks found 5 Aftercooler is frozen 5 Thaw out This machine cannot operate in temperatures below 32 F 0 C 6 Unload pressure adjusted 6 Adjust the unload too low pressure Excessive oil consumption 1 O...

Page 82: ...re valve 7 Operation at elevated discharge temperatures 8 Scavenge line check valve failure 5 Use Gardner Denver AEON lubricating coolants 6 Replace seals in valve 7 Reduce temperature See High Discha...

Page 83: ...ervice personnel for repair or replacement of any product or part which in the Company s sole judgment is proved not to be as warranted Labor shall be limited to the amount specified in the Company s...

Page 84: ...For additional information contact your local representative or visit www contactgd com compressors 2020 Gardner Denver Inc Printed in U S A...

Reviews: