13
Gardencare User Manual GCMT262 1110CA-Vii
HEDGE TRIMMER ATTACHMENT
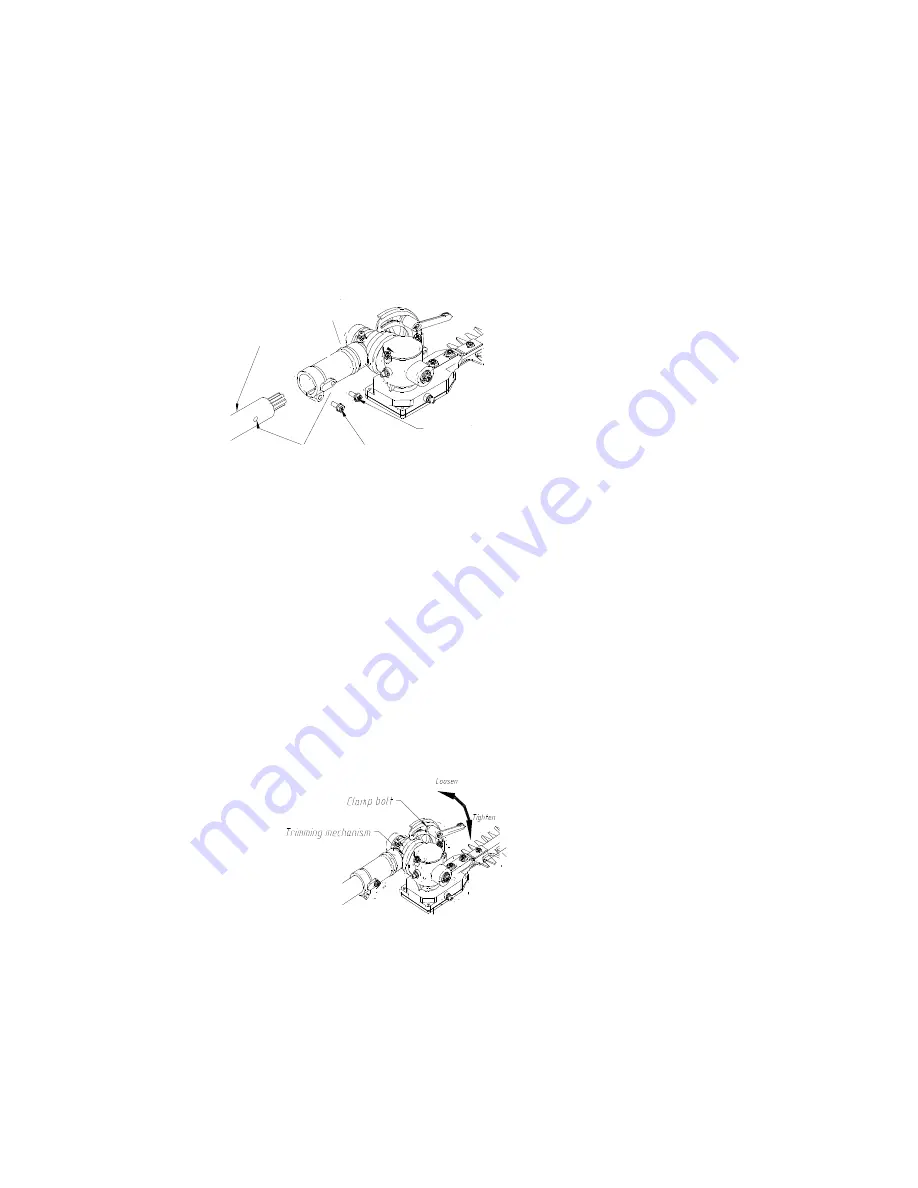
ATTACHING THE HEDGE TRIMMER GEARBOX
1. Remove the locating screw (1).
2. Using a 4mm Allen key, loosen the clamping bolt (2).
3. Slide the drive shaft (4) into the hedge trimmer gearbox (5) until the locating hole (6) in the drive shaft is visible
though the locating hole (6) in the gearbox.
4. Insert the locating screw (1) into the gear box (5) and tighten.
5. Using a 4mm Allen key, tighten the clamping bolt (2).
NOTE
•
The thickness of fresh growth (green branches), which may be cut using this hedge trimmer, is limited to up
to approximately 10mm. Never try to cut branches thicker than this, as doing so may result in damage to the
multi-tool.
Adjusting the angle of the cutting blades
1. Stop the engine.
2. Turn the clamp bolt located on the top of the trimming mechanism counter-clockwise to loosen it.
3. Adjust the angle of the blades to the desired angle, and then tighten the bolt firmly back into place.
4. Always wear gloves when adjusting the blades
Blade information
•
Never cut hedges thicker than 10mm and only fresh growth.
•
If wire is caught by the blades, damage can occur which is not covered by the warranty.
•
When sharpening, removing, or reattaching the blades, be sure to wear thick, sturdy gloves and use only
appropriate tools and equipment to prevent injury.
•
After you have finished using the hedge trimmer, clean the blades and apply clean light grade lubricating oil to
the entire length of the blades, including the blade bolts.
Gearbox (5)
Locating screw (1)
Locating hole (6)
Drive shaft (4)
Clamping bolt (2)


