background image


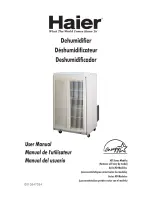
Dehumidifier User Manual 


Summary of Contents for FAI-150-0012

Page 1: ...Dehumidifier User Manual ...

Page 2: ...his manual must be carefully read as they supply important indications about safety and maintenance Keep this manual in order to consult it if necessary The appliance must be installed according to the standards in force by qualified personnel this means by personnel having skills to care of these type of products and heating ...

Page 3: ...l not be held responsible for any failure to comply with safety and maintenance instructions set forth in the manual When unpacking the unit check its state Before connecting the unit make sure that the advice supplied by this manual are in accordance with the installation and its conditions of use ...

Page 4: ...iency of the unit it shall be maintained in accordance with the instructions included in this manual In event of sale or transfer of this unit to another user make sure this manual is supplied as well This unit must be exclusively used for the use it was designed to Any other use shall be considered as improper and hazardous In event of damages due either to an improper installation or use or if t...

Page 5: ...Technical Parameters 4 VIII Overall Dimension 5 IX Installation Guide 6 X LCD Controller Operation 9 XI Test running 12 XII Precautions 12 XIII Repair and maintenance 13 XIV General Troubleshooting 14 XV Maintenance 14 XVI Recycling 15 XVII Fault display 15 Appendix 1 Installation of Heating Element Optional 17 Appendix 3 Explosive Diagram PCB layout 22 ...

Page 6: ...arefully B Set appropriate humidity levels to create a comfortable environment C Dust gauze must be cleaned regularly D Please don t place objects close to the air inlet or outlet which may block the airflows E In case of a power failure during operation the device will stop and shall start automatically after power restoration F Don t put hands sticks or other objects into the air inlet and outle...

Page 7: ... Article 411 1 with rated current less than 12V AC or 30V DC is admitted and being the source of Security outside the packages installed 0 1 and 2 the unit has at least a degree of protection IP X5 In volume 2 see Figures 702A and 702B the devices should be Class II in the case of lighting Class I and protected by a protective device for residual current indicated or equal to 30 mA Fed through an ...

Page 8: ...l personnel Dehumidifiers of this series have been adjusted to the best of its performance and they can work properly after wiring and connection of the drain hose by professionals under the standards VI Features 1 Efficient heat exchanger 2 Sensitive and accurate digital control of humidity 3 Environmental friendly refrigerant R410A 4 Built in high voltage low voltage and overheat protection syst...

Page 9: ...2 5 3 9 5 0 Heat Recovered kW 2 8 4 2 5 5 Rated Power kW 1 1 7 2 Rated Current A 4 58 7 83 9 15 Max Input Power kW 1 2 2 0 2 45 Max Input Current A 5 2 9 15 10 8 Power supply 220 240V 1Ph 50Hz Air flow m h 800 1000 1200 Electric Heating Optional kw 2 0 3 0 3 0 Net Dimension mm 855 242 848 1155 280 848 1155 280 848 Net Weight Gross Weight Kgs 55 67 70 86 75 91 ...

Page 10: ...eries can operate normally at the temperature of 10 38 Effects cannot be guaranteed if not within this range Please notice under different working conditions the technical parameters of the Dehumidifiers may vary 4 Parameters are subject to modification without additional notice in case of technical upgrade Please refer to the nameplate at the side of the machine for more information VIII Overall ...

Page 11: ...pool Distance may vary in each country please verify your region legislation 2 Make two holes in a solid wall and nail two explosion screws ofφ12mm 3 Hang the machine from the screws firmly through two circular holes at the back of the machine 4 Connect drain hose 5 Connect signal lines and power line in accordance with the connection diagram A B C D E F G H FAI 150 0151 286 886 200 126 613 718 36...

Page 12: ... The figure above is an example and the machine installation and arrangement is only for reference 2 Electrical wiring diagram Power Cord Breaker fuse Customer prepare Earthing Power Supply 220 240V 50Hz L N Note The Dehumidifier must have a good grounding ...

Page 13: ...fier must be installed by professional technicians and please do not install it by yourselves otherwise it may cause harm to people or damage the machine A Installation of machine 1 Dehumidifier should be installed in a place with good ventilation 2 The bolt M 12 must be used to fix the machine body during the installation The machine can be fixed on the concrete foundation or support with the con...

Page 14: ...ent set by local region or country the electric leakage protection device must be well set residual operating current should be less than 30 mA 5 Power line and signal line arrangement should be tidy and reasonable without any interference Depending on environmental conditions environmental temperature direct sunlight rainwater grid voltage cable length etc the sectional area can be increased C Wh...

Page 15: ...Dehumidifying mode Ventilation mode Heating mode only available with extra heating element Dehumidifying and Heating b Set Humidity setting range 30 99 In the dehumidifying mode no matter machine s on or off every time you press button or the set humidity will be increased or decreased by 1 It ll flash for 8 seconds and then display the actual humidity again To check the set humidity press or key ...

Page 16: ...Keypad lock setting Press and simultaneously for three seconds so as to open close the keypad lock f Set Heating only available with extra heating element the setting range is from 18 to 32 Under heating mode every time you press or the set temperature can be increased or decreased by 1 To check the set temperature press or and it ll display the set temperature g Set Humidity Heating only availabl...

Page 17: ...arts check whether there is any strange noise during operation XII Precautions 1 Notes A Please don t place any object close to the air inlet or outlet which may block the airflows Otherwise the efficiency may be reduced or the whole operation of the system may even stop B Do not put hands sticks or other objects into the air outlet of Dehumidifier or try to dismantle the grid during operation or ...

Page 18: ...ne Otherwise there might be some accidents C Please cut off the main power in thunderstorm weather or else the lightning may damage the machine D Please cut off the main power and drain water out of the machine if it is not used for a long time XIII Repair and maintenance 1 Before working on the Dehumidifier please make sure it is disconnected from the power supply 2 In seasons when this device is...

Page 19: ...put Regulate the temperature between 10 and 40 If the problems above cannot be solved please contact professional workers and inform them of the product type and details about faults Attention Never dismantle the machine and repair it by yourself so as to avoid any danger XV Maintenance Monthly Check and clean the filter if necessary To do so wash it with water and soap rinse and dry If necessary ...

Page 20: ... to reach a number of environmental protection objectives the following rules must be obeyed These objectives apply to waste from electrical and electronic equipment DEEE Consumers must return the used products to the collection points provided By enabling the products to be recycled consumers contribute to the protection of our environment XVII Fault display No Error Code Diagnosis Solution 1 E1 ...

Page 21: ...k in refrigerant system If pressure normal please check if any defect on high pressure switch 7 E5 Low Pressure protection 1 Check if low pressure normal If low pressure is around 1 0 1 2Mpa at dry bulb30C wet bulb26C That s normal if not please check if any leak Repair the leak and recharge gas 2 If it s normal please check if any defect on low pressure switch 8 E7 Air outlet overheat protection ...

Page 22: ...ied electrician A Component List 1 Heating Element 1 pc 2 Screws 4 pcs B Steps 1 Make sure power supply is cut off before working on the unit Dismantle the front panel from the unit 2 Place the heating element as shown below Signal wire L red N blue E yellow Location of heating A hole for the cord to go Fasten it with 4 screws ...

Page 23: ...wer Cable A Wiring Signal Cable B Wiring Power Cable Please refer to the diagram below for connecting power cable L port can be found on PCB Open the electrical compartment Remove the yellow wire Plug in Signal wire Find Signal Wire ...

Page 24: ...19 4 Re assemble the front panel of the dehumidifier fasten the panel by using screws on both sides Upon completion of installation please reset inner parameter C1 to 1 Default value 0 ...

Page 25: ...n machine s on press button Set for 3 seconds And then press button and to check the code and relative parameter B To set the inner parameters When machine s off press button Set for 3 seconds Press and to check each code parameter press Set and the code will flash you can press and to reset the parameter value After press Set to confirm And press or to exit Warning Non professional is not recomme...

Page 26: ...C5 Defrosting starting temperature 10 10 1 6 C6 Defrosting closing temperature 0 15 8 7 C7 Maximum defrosting time 2Min 12Min 12Min 8 C8 Working state of draught fan 0 reaching the set value and the fan stops 1 reaching the set value and the fan operates with low wind 1 9 C9 Air outlet temperature 20 99 Measured value 10 CA Return gas temperature 20 99 Measured value 11 Cb EXV step number 100 500P...

Page 27: ... 002060020200 16 Drain Hose Inside 004960010000 004960010000 004960010000 17 Back Panel 002060030101 002060020101 002060020101 18 Compressor 031031040000 031031080000 031031100000 19 Electrical box cover 002060022200 002060022200 002060022200 20 Electrical box 002060022100 002060022100 002060022100 21 Electrical heater bracket 002060030300 002060020400 002060020400 22 Electrical heating element z4...

Page 28: ...23 ...

Page 29: ...gh Pressure Switch AC N LED terminal OUT5 Fan Low Speed CN1 Transformer Input P4 Electrical heater OUT4 Fan High Speed CN2 Transformer Output P2 Low Pressure Switch Electrical heater power Compressor output SEN6 SEN1 SEN2 H SEN SEN5 Version H64B 140715 ...

Reviews: