Connecting external links
1 Open one or more of the knock-out panels of the wiring centre box and fit suit-
able cable water-sealing cable grommets, as required.
2 Feed the cables from the external device(s) through the grommet(s) and connect
each cable within the wiring centre as follows:
•
Primary video
- The primary video output from the camera is available at the
BNC socket labelled ‘VIDEO OUT 1’.
Note: If the camera and control system are configured to use coax based telem-
etry, it will pass through this connector.
•
Secondary video
- When used, the output from the thermal imaging camera is
available at the BNC socket labelled ‘VIDEO OUT 2’.
•
RS485 telemetry
- Connect RS485A (RS485+) to the lower terminal marked
DATA 5. Connect RS485B (RS485-) to the lower terminal marked DATA 6.
•
Mains input
- Connect the mains Earth (Yellow/Green) conductor to the middle
contact of the connector block. Connect the mains Live (Brown) conductor to
the contact of the connector block closest to the input fuse. Connect the mains
Neutral (Blue) conductor to the contact of the connector block furthest from the
input fuse.
IMPORTANT: The supplier mains input cable to the wiring centre should
have an isolator fitted and be fused according to its gauge and local elec-
trical regulations. Failure to observe such regulations may result in injury
or death.
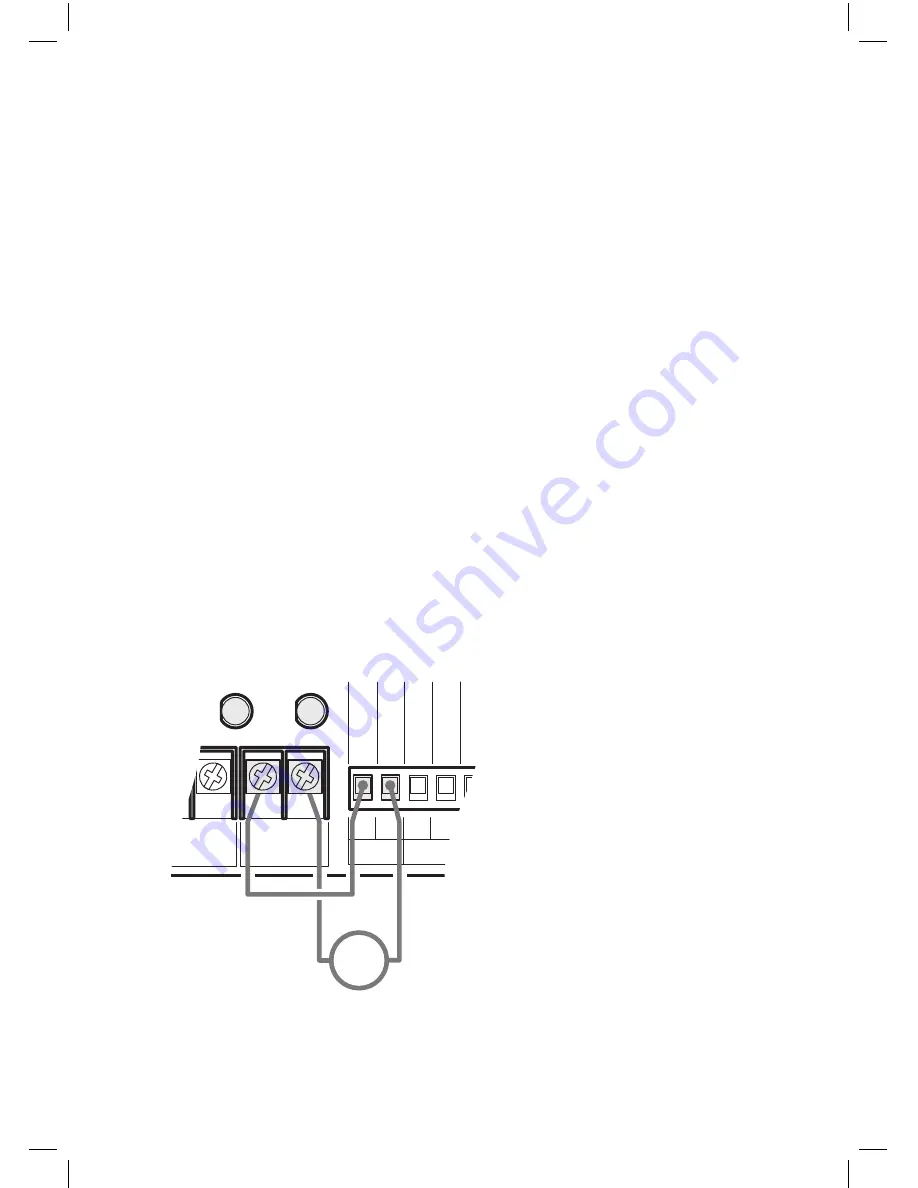
•
Washer (or similar device)
- When a camera lens washer pump is used, make
the following connections within the power supply:
6
5
4
3
AUX POWER
485
-
485
+
AMP
-
AMP
+
R OUTPUT
ER FEED
DATA
2
1
L0
1P
2P
1N
2N
PTZ
WASHER
PUMP
L1
L2
Washer
pump
(VAC)
L
N
The WASHER PUMP 2P and 2N
contacts provide permanent
24VAC Live and Neutral power
output, respectively.
The AUX 1 and 2 contacts
provide volt free relay switching
under software control (via the
camera menu or preset codes).
Link the WASHER PUMP 2P
terminal to the AUX 1 terminal.
Link WASHER PUMP 2N to the
neutral terminal of the pump
and connect the live terminal
of the pump to AUX 2.
Summary of Contents for C-AllView
Page 1: ...C AllView C AllView Ti installer s guide...
Page 2: ......


