background image

Configuration

185

 · Target and user modules (DP-HR-U)

Controller: 

With 

ShuttlePRO v2

 multimedia controllers, you can operate audio and 

video programs. You can use a special USB keymode to operate computers con-

nected to the target module using the controller:

LK463 compatible keyboard: 

You can connect an LK463 compatible keyboard to the 

user modules of the KVM matrix system. The order of the 108 keys of these keyboards 

is the same as the OpenVMS keyboard layout.

A special USB keyboard mode guarantees that the keypress of a special key on this 

keyboard is forwarded to the target computer:

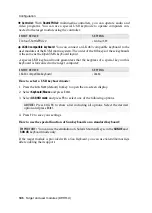
How to select a USB keyboard mode:

1. Press the 

Alt+Num

 (default) hotkey to open the on-screen display.

2. Select 

Keyboard/Mouse

 and press 

Enter

.

3. Select 

USB HID mode

 and press 

F8

 to select one of the following options.

4. Press 

F2

 to save your settings.

How to use the special function of Sun keyboards on a standard keyboard:

If the target module is provided with a 

Sun Keyboard

, you can use 

Solaris Shortcut Keys

after enabling their support.

INPUT DEVICE

SETTING

Contour ShuttlePRO v2

 Contour SP2

INPUT DEVICE

SETTING

LK463 compatible keyboard

 LK463

ADVICE: 

Press 

Ctrl+F8

 to show a list including all options. Select the desired 

option and press 

Enter

.

IMPORTANT: 

You can use the emulation of »Solaris Shortcut Keys« in the 

SUN DE

 and 

SUN US

 keyboard mode only.

Summary of Contents for DP-HR-U

Page 1: ...A9200141 1 30 G D Target and User Modules Installation and Operation DP HR U variants EN ...

Page 2: ...veat Emptor G D will not provide warranty for devices that Are not used as intended Are repaired or modified by unauthorized personnel Show severe external damages that was not reported on the receipt of goods Have been damaged by non G D accessories G D will not be liable for any consequential damages that could occur from using the products Proof of trademark All product and company names mentio...

Page 3: ...is equipment generates uses and can radiate radio frequency energy and if not installed and used in accordance with the instructions may cause harmful inter ference to radio communications However there is no guarantee that interfer ence will not occur in a particular installation If this equipment does cause harmful interference to radio or television reception which can be deter mined by turning...

Page 4: ...iber MC2 UC 47 Target module DP HR U CPU DH 54 Target module DP HR U CPU DH UC 60 Target module DP HR U CPU Fiber DH 66 Target module DP HR U CPU Fiber DH UC 72 Chapter B User modules User module DP HR U CON 78 User module DP HR U CON 2 85 User module DP HR U CON MC2 92 User module DP HR U CON MC4 100 User module DP HR U CON Fiber 110 User module DP HR U CON 2 Fiber 117 User module DP HR U CON Fib...

Page 5: ...DP HR U iv Chapter C Generic HID Enabling disabling the user module s Generic HID mode 175 Enabling disabling the target module s Generic HID mode 176 Chapter D Extender mode Opening the on screen display in extender mode 178 Configuration 179 ...

Page 6: ...été débranché de toutes les sources d alimentation Débranchez toutes les fiches d alimentation et toutes les alimenta tions électrique de l appareil Trennen Sie alle Spannungsversorgungen Stellen Sie vor der Installation sicher dass das Gerät von allen Stromquellen getrennt ist Ziehen Sie alle Netzstecker und alle Spannungsversorgungen am Gerät ab Warning electric shock To avoid the risk of electr...

Page 7: ...e source Only operate this device with an earthed voltage source Use exclusively the G D power pack Only operate this device with the power packs included in delivery or listed in this operating manual Do not make any mechanical or electrical alternations to the device Do not make any mechanical or electrical alternations to this device Guntermann Drunck GmbH is not responsible for compliance with...

Page 8: ...les It is not permitted to use fibre optic modules which do not meet the requirements of laser class 1 in accordance to EN 60825 1 2014 By using such modules the compli ance with regulations and advices for the safe handling of laser technology cannot be guaranteed The guarantee of complying with all relevant instructions can only be given by applying original components Therefore the devices have...

Page 9: ...e data stream of the USB devices connected to the active user module DVI U CON DP U CON and DP HR U CON series only is transmitted to the computer with up to 16 Mbit s Package contents 1 Target module DP HR U CPU 1 DisplayPort video cable DP Cable M M 2 1 USB device cable 2 Audio cable 1 Power pack 12V 2A only with variants incl PowerPack 1 Power cable only with variants incl PowerPack 1 EasyStart...

Page 10: ...n PS 2 cable to connect the computer s PS 2 keyboard interface to this interface Mouse Use the green plug of an optional Twin PS 2 cable to connect the computer s PS 2 mouse interface to this interface Connection to the matrix switch Trans Use a category 5e or better twisted pair cable to connect this interface to a Dynamic Port RJ45 of a matrix switch Power supply Power In Insert the power pack s...

Page 11: ...mple via the web application Off The external power pack is not properly connected LED Colour Status Meaning Left Yellow Off No user module accesses the target module On A user module accesses the target module Blinking The incoming video signal was not detected Flashing No voltage at PS 2 interface or USB bus Right Green Off The target module is turned off On A user module accesses the target mod...

Page 12: ...z 2048 2048 60Hz 1920 1080 50 or 60 Hz 1440 576i 50 Hz 1440 480i 60 Hz Further standardised resolutions within the video bandwith possible Vertical frequency 24 Hz to 120 Hz Horizontal frequency 25 kHz to 135 kHz DDC CI The device supports monitors with a DDC CI function The DDC information are transparently forwarded to the moni tor to support a maximum number of monitors However the support cann...

Page 13: ... socket Power input Max 600 mA Housing Material Anodised aluminium Dimensions W H D 105 26 164 mm Weight Approx 380 g Operating environment Temperature 5 C to 45 C Air humidity 20 to 80 non condensing Storage environment Temperature 20 C to 55 C Air humidity 15 to 85 non condensing Conformity CE EAC FCC Class B RoHS DP HR U CPU ...

Page 14: ...e the connected computer The data stream of the USB devices connected to the active user module DVI U CON DP U CON and DP HR U CON series only is transmitted to the computer with up to 16 Mbit s Package contents 1 DP HR U CPU UC target module 1 DisplayPort video cable DP Cable M M 2 1 USB device cable 2 Audio cable 1 Power pack 12V 2A only with variants incl PowerPack 1 Power cable only with varia...

Page 15: ...mputer s USB ports to this port Keyb Use the purple plug of an optional Twin PS 2 cable to connect the purple PS 2 socket keyboard to this port Mouse Use the green plug of an optional Twin PS 2 cable to connect the green PS 2 socket mouse of the computer to this port Connections to the matrix switches NOTE Both keyboard and mouse signals can be transmitted to the computer using the PS 2 or the USB...

Page 16: ...trix switch Trans 2 Connect this interface to a Dynamic Port RJ45 of another matrix switch Power supply Power In Plug the power cable of the power pack in this interface Then connect the power cable to the power pack and a power outlet ADVICE You can also connect the target module directly to up to two compatible user modules ...

Page 17: ...eb application Off The external power pack is not properly connected LED Colour Status Meaning Left Yellow Off No user module accesses the target module On A user module accesses the target module Blinking The incoming video signal was not detected Flashing No voltage at PS 2 interface or USB bus Right Green Off The target module is turned off On A user module accesses the target module Blinking T...

Page 18: ...0Hz 2048 2048 60Hz 1920 1080 50 or 60 Hz 1440 576i 50 Hz 1440 480i 60 Hz Further standardised resolutions within the video bandwith possible Vertical frequency 24 Hz to 120 Hz Horizontal frequency 25 kHz to 135 kHz DDC CI The device supports monitors with a DDC CI function The DDC information are transparently forwarded to the moni tor to support a maximum number of monitors However the support ca...

Page 19: ...DIN 4 socket Current consumption Max 600mA 12VDC Casing Material Anodised aluminium Dimensions W H D 105 26 164 mm Weight Approx 400 g Operating environment Temperature 5 C to 45 C Air humidity 20 to 80 non condensing Storage environment Temperature 20 C to 55 C Air humidity 15 to 85 non condensing Conformity CE EAC FCC Class B RoHS ...

Page 20: ...N series only is transmitted to the computer with up to 16 Mbit s Package contents 1 Target module DP HR U CPU MC2 2 DisplayPort video cable DP Cable M M 2 1 USB device cable 2 Audio cable 1 Power pack 12V 2A only with variants incl PowerPack 1 Power cable only with variants incl PowerPack 1 EasyStart flyer 1 Safety instructions flyer Required accessories 2 Category 5e or better twisted pair cable...

Page 21: ...computer s Line In inter face to this interface USB K M Use the USB device cable to connect one of the computer s USB interfaces to this interface Keyb Use the purple plug of an optional Twin PS 2 cable to connect the computer s PS 2 keyboard interface to this interface Mouse Use the green plug of an optional Twin PS 2 cable to connect the computer s PS 2 mouse interface to this interface Connecti...

Page 22: ...e starts as soon as it is supplied with power During start up the channels are automatically grouped see below Automatic grouping of channels When operating the target module for the first time the matrix switch recognises the main channel and the target module s additional channel The channels are automat ically added to a channel group NOTE You can also connect the target directly to a compatibl...

Page 23: ...example via the web application Off The external power pack is not properly connected LED Colour Status Meaning Left Yellow Off No user module accesses the target module On A user module accesses the target module Blinking The incoming video signal was not detected Flashing No voltage at PS 2 interface or USB bus Right Green Off The target module is turned off On A user module accesses the target ...

Page 24: ...0 60Hz 2048 2048 60Hz 1920 1080 50 or 60 Hz 1440 576i 50 Hz 1440 480i 60 Hz Further standardised resolutions within the video bandwith possible Vertical frequency 24 Hz to 120 Hz Horizontal frequency 25 kHz to 135 kHz DDC CI The device supports monitors with a DDC CI function The DDC information are transparently forwarded to the moni tor to support a maximum number of monitors However the support...

Page 25: ...ctor 1 Mini DIN 4 socket Power input Max 1 0 A Housing Material Anodised aluminium Dimensions W H D 105 46 164 mm Weight Approx 570 g Operating environment Temperature 5 C to 45 C Air humidity 20 to 80 non condensing Storage environment Temperature 20 C to 55 C Air humidity 15 to 85 non condensing Conformity CE EAC FCC Class B RoHS ...

Page 26: ...nnected to the active user module DVI U CON DP U CON and DP HR U CON series only is transmitted to the computer with up to 16 Mbit s Package contents 1 Target module DP HR U CPU MC2 UC 2 DisplayPort video cable DP Cable M M 2 1 USB device cable 2 Audio cable 1 Power pack 12V 2A only with variants incl PowerPack 1 Power cable only with variants incl PowerPack 1 EasyStart flyer 1 Safety instructions...

Page 27: ...upplied audio cables to connect the computer s Line Out interface to this interface Line Out Use one of the supplied audio cables to connect the computer s Line In inter face to this interface USB K M Use the USB device cable to connect one of the computer s USB interfaces to this interface Keyb Use the purple plug of an optional Twin PS 2 cable to connect the computer s PS 2 keyboard interface to...

Page 28: ...nnect this interface to another Dynamic Port RJ45 of the sec ond matrix switch Power supply Power In Insert the power pack s connection cable to this interface Start up Connect the power cable to the power pack and a power socket The target module starts as soon as it is supplied with power During start up the channels are automatically grouped see below IMPORTANT Connect only one of the target mo...

Page 29: ...e first time the matrix switch recognises the main channel and the target module s additional channel The channels are automat ically added to a channel group NOTE You can adjust any manually or automatically created channel group More information about channel groups is given in the separate manuals of the matrix switch web applications ...

Page 30: ...r example via the web application Off The external power pack is not properly connected LED Colour Status Meaning Left Yellow Off No user module accesses the target module On A user module accesses the target module Blinking The incoming video signal was not detected Flashing No voltage at PS 2 interface or USB bus Right Green Off The target module is turned off On A user module accesses the targe...

Page 31: ...160 60Hz 2048 2048 60Hz 1920 1080 50 or 60 Hz 1440 576i 50 Hz 1440 480i 60 Hz Further standardised resolutions within the video bandwith possible Vertical frequency 24 Hz to 120 Hz Horizontal frequency 25 kHz to 135 kHz DDC CI The device supports monitors with a DDC CI function The DDC information are transparently forwarded to the moni tor to support a maximum number of monitors However the suppo...

Page 32: ...nnector 1 Mini DIN 4 socket Power input Max 1 2 A Housing Material Anodised aluminium Dimensions W H D 105 46 164 mm Weight Approx 580 g Operating environment Temperature 5 C to 45 C Air humidity 20 to 80 non condensing Storage environment Temperature 20 C to 55 C Air humidity 15 to 85 non condensing Conformity CE EAC FCC Class B RoHS ...

Page 33: ...ed to the computer with up to 16 Mbit s Package contents 1 Target module DP HR U CPU Fiber 1 DisplayPort video cable DP Cable M M 2 1 USB device cable 2 Audio cable 1 Power pack 12V 2A only with variants incl PowerPack 1 Power cable only with variants incl PowerPack 1 EasyStart flyer 1 Safety instructions flyer NOTE This target module can be connected to a compatible fiber port of ControlCenter Co...

Page 34: ...terface Line Out Use one of the supplied audio cables to connect the computer s Line In inter face to this interface USB K M Use the USB device cable to connect one of the computer s USB interfaces to this interface Keyb Use the purple plug of an optional Twin PS 2 cable to connect the computer s PS 2 keyboard interface to this interface Mouse Use the green plug of an optional Twin PS 2 cable to c...

Page 35: ...face Now connect the power cable to the power pack and a power socket IMPORTANT The devices use components with laser technology which comply with laser class 1 They meet the requirements in accordance to EN 60825 1 2014 as well as U S CFR 1040 10 and 1040 11 Mind the following instructions when dealing with laser beams Avoid direct eye exposure to beam on page 3 Always connect optical connections...

Page 36: ...or example via the web application Off The external power pack is not properly connected LED Colour Status Meaning Left Yellow Off No user module accesses the target module On A user module accesses the target module Blinking The incoming video signal was not detected Flashing No voltage at PS 2 interface or USB bus Right Green Off The target module is turned off On A user module accesses the targ...

Page 37: ...eo bandwidth 25 to 300 MP s DisplayPort 4 Lanes HBR 2 7 Gbps Max resolution 2560 1600 60Hz 4096 2160 30Hz Examplary resolutions 4096 2160 24 25 or 30 Hz 3840 2160 24 25 or 30Hz 2048 2160 60Hz 2048 2048 60Hz 1920 1080 50 or 60 Hz 1440 576i 50 Hz 1440 480i 60 Hz Further standardised resolutions within the video bandwith possible Vertical frequency 24 Hz to 120 Hz Horizontal frequency 25 kHz to 135 k...

Page 38: ...ission rate Max 16 Mbit s Power supply Type Portable power pack 12V 2A Connector 1 Mini DIN 4 socket Power input Max 600 mA 12 VDC Housing Material Anodised aluminium Dimensions W H D 105 26 164 mm Weight Approx 400 g Operating environment Temperature 5 C to 45 C Air humidity 20 to 80 non condensing Storage environment Temperature 20 C to 55 C Air humidity 15 to 85 non condensing Conformity CE EAC...

Page 39: ...s transmitted to the computer with up to 16 Mbit s Package contents 1 Target module DP HR U CPU Fiber UC 1 DisplayPort video cable DP Cable M M 2 1 USB device cable 2 Audio cable 1 Power pack 12V 2A only with variants incl PowerPack 1 Power cable only with variants incl PowerPack 1 EasyStart flyer 1 Safety instructions flyer NOTE This target module can be connected to a compatible fiber port of Co...

Page 40: ...e computer s PS 2 keyboard interface to this interface Mouse Use the green plug of an optional Twin PS 2 cable to connect the computer s PS 2 mouse interface to this interface Connection to the matrix switch NOTE Keyboard and mouse signals can be transmitted to the computer using either the PS 2 interfaces or the USB interface The devices use components with laser technology which comply with lase...

Page 41: ...tible optical fibre cable Connect the other end of the cable to the Rx interface of a Dynamic Port provided at the second matrix switch Trans 2 Rx Insert the LC plug of a compatible optical fibre cable Connect the other end of the cable to the Tx interface of the same Dynamic Port provided at the second matrix switch Power supply Power In Connect the cable of the power pack to this interface Now c...

Page 42: ... for example via the web application Off The external power pack is not properly connected LED Colour Status Meaning Left Yellow Off No user module accesses the target module On A user module accesses the target module Blinking The incoming video signal was not detected Flashing No voltage at PS 2 interface or USB bus Right Green Off The target module is turned off On A user module accesses the ta...

Page 43: ...bit Video bandwidth 25 to 300 MP s DisplayPort 4 Lanes HBR 2 7 Gbps Max resolution 2560 1600 60Hz 4096 2160 30Hz Examplary resolutions 4096 2160 24 25 or 30 Hz 3840 2160 24 25 or 30Hz 2048 2160 60Hz 2048 2048 60Hz 1920 1080 50 or 60 Hz 1440 576i 50 Hz 1440 480i 60 Hz Further standardised resolutions within the video bandwith possible Vertical frequency 24 Hz to 120 Hz Horizontal frequency 25 kHz t...

Page 44: ...ission rate Max 16 Mbit s Power supply Type Portable power pack 12V 2A Connector 1 Mini DIN 4 socket Power input Max 600 mA 12 VDC Housing Material Anodised aluminium Dimensions W H D 105 26 164 mm Weight Approx 420 g Operating environment Temperature 5 C to 45 C Air humidity 20 to 80 non condensing Storage environment Temperature 20 C to 55 C Air humidity 15 to 85 non condensing Conformity CE EAC...

Page 45: ...nly is transmitted to the computer with up to 16 Mbit s NOTE This target module can be connected to a compatible fiber port of ControlCenter Compact matrix switches or ControlCenter Digital matrix switches requires CCD I O 16 Card Fiber IMPORTANT Both the target module and the fiber ports are available as single mode variants or as multi mode variants Make sure that the port at the target mod ule ...

Page 46: ...play Port video output to this interface DP CPU 2 Use one of the supplied video cables to connect the computer s second Dis play Port video output to this interface Line In Use one of the supplied audio cables to connect the computer s Line Out interface to this interface Line Out Use one of the supplied audio cables to connect the computer s Line In inter face to this interface USB K M Use the US...

Page 47: ...erface of another Dynamic Port provided at the matrix switch Trans Channel 2 Rx Insert the LC plug of a compatible optical fibre cable Connect the other end of the cable to the Tx interface of the same Dynamic Port provided at the matrix switch IMPORTANT The devices use components with laser technology which comply with laser class 1 They meet the requirements in accordance to EN 60825 1 2014 as w...

Page 48: ...During start up the channels are automatically grouped see below Automatic grouping of channels When operating the target module for the first time the matrix switch recognises the main channel and the target module s additional channel The channels are automat ically added to a channel group NOTE You can adjust any channel groups that were created automatically or manually More information about ...

Page 49: ...or example via the web application Off The external power pack is not properly connected LED Colour Status Meaning Left Yellow Off No user module accesses the target module On A user module accesses the target module Blinking The incoming video signal was not detected Flashing No voltage at PS 2 interface or USB bus Right Green Off The target module is turned off On A user module accesses the targ...

Page 50: ...4 bit Video bandwidth 25 to 300 MP s DisplayPort 4 Lanes HBR 2 7 Gbps Max resolution 2560 1600 60Hz 4096 2160 30Hz Examplary resolutions 4096 2160 24 25 or 30 Hz 3840 2160 24 25 or 30Hz 2048 2160 60Hz 2048 2048 60Hz 1920 1080 50 or 60 Hz 1440 576i 50 Hz 1440 480i 60 Hz Further standardised resolutions within the video bandwith possible Vertical frequency 24 Hz to 120 Hz Horizontal frequency 25 kHz...

Page 51: ...ansmission rate Max 16 Mbit s Power supply Type Portable power pack 12V 2A Connector 1 Mini DIN 4 socket Power input Max 1 1 A Housing Material Anodised aluminium Dimensions W H D 105 46 164 mm Weight Approx 600 g Operating environment Temperature 5 C to 45 C Air humidity 20 to 80 non condensing Storage environment Temperature 20 C to 55 C Air humidity 15 to 85 non condensing Conformity CE EAC FCC...

Page 52: ... CON series only is transmitted to the computer with up to 16 Mbit s NOTE This target module can be connected to a compatible fiber port of ControlCenter Compact matrix switches or ControlCenter Digital matrix switches requires CCD I O 16 Card Fiber IMPORTANT Both the target module and the fiber ports are available as single mode variants or as multi mode variants Make sure that the port at the ta...

Page 53: ...Display Port video output to this interface DP CPU 2 Use one of the supplied video cables to connect the computer s second Dis play Port video output to this interface Line In Use one of the supplied audio cables to connect the computer s Line Out interface to this interface Line Out Use one of the supplied audio cables to connect the computer s Line In inter face to this interface USB K M Use the...

Page 54: ...he Rx interface of another Dynamic Port provided at the first matrix switch Trans 1 Channel 2 Rx Insert the LC plug of a compatible optical fibre cable Connect the other end of the cable to the Tx interface of the same Dynamic Port provided at the first matrix switch The devices use components with laser technology which comply with laser class 1 They meet the requirements according to EN 60825 1 ...

Page 55: ... a compatible optical fibre cable Connect the other end of the cable to the Tx interface of the same Dynamic Port provided at the second matrix switch Power supply Power In Insert the power pack s connection cable to this interface Start up Connect the power cable to the power pack and a power socket The target module starts as soon as it is supplied with power During start up the channels are aut...

Page 56: ... for example via the web application Off The external power pack is not properly connected LED Colour Status Meaning Left Yellow Off No user module accesses the target module On A user module accesses the target module Blinking The incoming video signal was not detected Flashing No voltage at PS 2 interface or USB bus Right Green Off The target module is turned off On A user module accesses the ta...

Page 57: ... 24 bit Video bandwidth 25 to 300 MP s DisplayPort 4 Lanes HBR 2 7 Gbps Max resolution 2560 1600 60Hz 4096 2160 30Hz Examplary resolutions 4096 2160 24 25 or 30 Hz 3840 2160 24 25 or 30Hz 2048 2160 60Hz 2048 2048 60Hz 1920 1080 50 or 60 Hz 1440 576i 50 Hz 1440 480i 60 Hz Further standardised resolutions within the video bandwith possible Vertical frequency 24 Hz to 120 Hz Horizontal frequency 25 k...

Page 58: ...ansmission rate Max 16 Mbit s Power supply Type Portable power pack 12V 2A Connector 1 Mini DIN 4 socket Power input Max 1 2 A Housing Material Anodised aluminium Dimensions W H D 105 46 164 mm Weight Approx 660 g Operating environment Temperature 5 C to 45 C Air humidity 20 to 80 non condensing Storage environment Temperature 20 C to 55 C Air humidity 15 to 85 non condensing Conformity CE EAC FCC...

Page 59: ...ter with up to 16 Mbit s Package contents 1 Target module DP HR U CPU DH 2 DisplayPort video cable DP Cable M M 2 1 USB device cable 2 Audio cable 1 Power pack 12V 2A only with variants incl PowerPack 1 Power cable only with variants incl PowerPack 1 EasyStart flyer 1 Safety instructions flyer Required accessories 1 Category 5e or better twisted pair cable to connect the target module to the matri...

Page 60: ...the supplied audio cables to connect the computer s Line Out interface to this interface Line Out Use one of the supplied audio cables to connect the computer s Line In inter face to this interface USB K M Use the USB device cable to connect one of the computer s USB interfaces to this interface PS 2 Keyb Use an optional PS 2 cable to connect the computer s PS 2 keyboard interface to this interfac...

Page 61: ...y Power In Insert the power pack s connection cable to this interface Start up Connect the power cable to the power pack and a power socket The target module starts as soon as it is supplied with power NOTE Only use category 5e or better twisted pair cable to connect the devices NOTE You can also connect the target directly to a compatible user module Power In Service Power Trans ...

Page 62: ...xample via the web application Off The external power pack is not properly connected LED Colour Status Meaning Left Yellow Off No user module accesses the target module On A user module accesses the target module Blinking The incoming video signal was not detected Flashing No voltage at PS 2 interface or USB bus Right Green Off The target module is turned off On A user module accesses the target m...

Page 63: ...0 1600 60Hz 3840 2160 30Hz Ultra HD 4096 2160 30 Hz 4K 1920 1080 50 or 60 Hz 1440 576i 50 Hz 1440 480i 60 Hz Channel 2 1920 1200 60Hz 1280 1024 85Hz 1080p60 Full HD 640 480 60Hz Further VESA and CTA standardised resolutions possible within video bandwidth pixel rate and horizontal vertical frequency Vertical frequency 24 Hz to 120 Hz Horizontal frequency 25 kHz to 135 kHz DDC CI The device support...

Page 64: ...nsparent Transmission rate Max 16 Mbit s Power supply Type Portable power pack 12V 2A Connector 1 Mini DIN 4 socket Power input Max 600 mA Housing Material Anodised aluminium Dimensions W H D 105 26 164 mm Operating environment Temperature 5 C to 45 C Air humidity 20 to 80 non condensing Storage environment Temperature 20 C to 55 C Air humidity 15 to 85 non condensing Conformity CE EAC FCC Class B...

Page 65: ...mputer with up to 16 Mbit s Package contents 1 Target module DP HR U CPU DH UC 2 DisplayPort video cable DP Cable M M 2 1 USB device cable 2 Audio cable 1 Power pack 12V 2A only with variants incl PowerPack 1 Power cable only with variants incl PowerPack 1 EasyStart flyer 1 Safety instructions flyer Required accessories 2 Category 5e or better twisted pair cables to connect the target module to tw...

Page 66: ... the supplied audio cables to connect the computer s Line Out interface to this interface Line Out Use one of the supplied audio cables to connect the computer s Line In inter face to this interface USB K M Use the USB device cable to connect one of the computer s USB interfaces to this interface PS 2 Keyb Use an optional PS 2 cable to connect the computer s PS 2 keyboard interface to this interfa...

Page 67: ...ns 2 Connect this interface to a Dynamic Port RJ45 of the second matrix switch Power supply Power In Insert the power pack s connection cable to this interface IMPORTANT Connect only one of the target module s Trans interfaces for each matrix switch NOTE Only use category 5e or better twisted pair cables to connect the devices ADVICE You can also connect the target module directly to up to two com...

Page 68: ...he Ident LED to quickly identify the device has been activated for example via the web application Off The external power pack is not properly connected LED Colour Status Meaning Left Yellow Off No user module accesses the target module On A user module accesses the target module Blinking The incoming video signal was not detected Flashing No voltage at PS 2 interface or USB bus Right Green Off Th...

Page 69: ...2560 1600 60Hz 3840 2160 30Hz Ultra HD 4096 2160 30 Hz 4K 1920 1080 50 or 60 Hz 1440 576i 50 Hz 1440 480i 60 Hz Channel 2 1920 1200 60Hz 1280 1024 85Hz 1080p60 Full HD 640 480 60Hz Further VESA and CTA standardised resolutions possible within video bandwidth pixel rate and horizontal vertical frequency Vertical frequency 24 Hz to 120 Hz Horizontal frequency 25 kHz to 135 kHz DDC CI The device supp...

Page 70: ...smission type transparent Transmission rate Max 16 Mbit s Power supply Type Portable power pack 12V 2A Connector 1 Mini DIN 4 socket Power input Max 700 mA Housing Material Anodised aluminium Dimensions W H D 105 26 164 mm Operating environment Temperature 5 C to 45 C Air humidity 20 to 80 non condensing Storage environment Temperature 20 C to 55 C Air humidity 15 to 85 non condensing Conformity C...

Page 71: ...ack 1 Power cable only with variants incl PowerPack 1 EasyStart flyer 1 Safety instructions flyer Required accessories 1 Compatible optical fibre cable to connect the target module to the matrix switch NOTE This target module can be connected to a compatible fiber port of ControlCenter Compact matrix switches or ControlCenter Digital matrix switches requires CCD I O 16 Card Fiber IMPORTANT Both th...

Page 72: ...to this interface PS 2 Keyb Use an optional PS 2 cable to connect the computer s PS 2 keyboard interface to this interface Connection to the matrix switch NOTE Keyboard and mouse signals can be transmitted to the computer using either the PS 2 interfaces or the USB interface IMPORTANT The devices use components with laser technology which comply with laser class 1 They meet the requirements in acc...

Page 73: ...onnect the power cable to the power pack and a power socket The target module starts as soon as it is supplied with power Status displays The Power LED on the back panel of the target module shows the status of the external power pack ADVICE You can also connect the target module directly to a compatible user mod ule LED Status Meaning Power Lights up green The external power pack is connected and...

Page 74: ...ing video signal was not detected Flashing No voltage at PS 2 interface or USB bus Right Green Off The target module is turned off On A user module accesses the target module Blinking The connection to the counterpart station could not be established Flashing The connection to the counterpart station is established No user module is accessing Flickering Keyboard and mouse inputs are forwarded by t...

Page 75: ... 50μ 125μ OM2 Max 400 Meter 50μ 125μ OM3 DVI CPU Fiber UC S Max 5 000 Meter 9μ 125μ OS1 DVI CPU Fiber UC S Max 10 000 Meter 9μ 125μ OS1 Audio DisplayPort Digital Transmission type 2 channel LPCM stereo Resolutions 16 20 24 bit Sampling rates up to 48 kHz Audio Transmission type transparent bidirectional Resolution 24 Bit Refresh rate 96 kHz Bandwidth 22 kHz Video Format DisplayPort DP 1 1a Colour ...

Page 76: ...CI The device supports monitors with a DDC CI function The DDC information are transparently forwarded to the moni tor to support a maximum number of monitors However the support cannot be guaranteed for all monitor models USB Specification USB 2 0 Transmission type transparent Transmission rate Max 16 Mbit s Power supply Type Portable power pack 12V 2A Connector 1 Mini DIN 4 socket Power input Ma...

Page 77: ... PowerPack 1 Power cable only with variants incl PowerPack 1 EasyStart flyer 1 Safety instructions flyer Required accessories 2 Compatible optical fibre cable to connect the target module to two different matrix switches NOTE This target module can be connected to a compatible fiber port of ControlCenter Compact matrix switches or ControlCenter Digital matrix switches requires CCD I O 16 Card Fibe...

Page 78: ...onal PS 2 cable to connect the computer s PS 2 keyboard interface to this interface Connections to the matrix switches NOTE Keyboard and mouse signals can be transmitted to the computer using either the PS 2 interfaces or the USB interface The devices use components with laser technology which comply with laser class 1 They meet the requirements in accordance to EN 60825 1 2014 as well as U S CFR ...

Page 79: ...ch Trans 2 Tx Insert the LC plug of a compatible optical fibre cable Connect the other end of the cable to the Rx interface of a Dynamic Port provided at the second matrix switch Trans 2 Rx Insert the LC plug of a compatible optical fibre cable Connect the other end of the cable to the Tx interface of the same Dynamic Port provided at the second matrix switch Power supply Power In Insert the power...

Page 80: ...for example via the web application Off The external power pack is not properly connected LED Colour Status Meaning Left Yellow Off No user module accesses the target module On A user module accesses the target module Blinking The incoming video signal was not detected Flashing No voltage at PS 2 interface or USB bus Right Green Off The target module is turned off On A user module accesses the tar...

Page 81: ...er 50μ 125μ OM2 Max 400 Meter 50μ 125μ OM3 DVI CPU Fiber UC S Max 5 000 Meter 9μ 125μ OS1 DVI CPU Fiber UC S Max 10 000 Meter 9μ 125μ OS1 Audio DisplayPort Digital Transmission type 2 channel LPCM stereo Resolutions 16 20 24 bit Sampling rates up to 48 kHz Audio Transmission type transparent bidirectional Resolution 24 Bit Refresh rate 96 kHz Bandwidth 22 kHz Video Format DisplayPort DP 1 1a Colou...

Page 82: ...s monitors with a DDC CI function The DDC information are transparently forwarded to the moni tor to support a maximum number of monitors However the support cannot be guaranteed for all monitor models USB Specification USB 2 0 Transmission type transparent Transmission rate Max 16 Mbit s Power supply Type Portable power pack 12V 2A Connector 1 Mini DIN 4 socket Power input Max 800 mA Housing Mate...

Page 83: ...At the installed console matrix switch users can access a target module to operate the connected computer The data stream of the connected USB devices is transmitted to the active target module with up to 16 Mbit s DVI U CPU DP U CPU DP HR U CPU and VGA U CPU series only Package contents 1 DP HR U CON user module 1 Power cable 1 EasyStart flyer 1 Safety instructions flyer Required accessories 1 Ca...

Page 84: ... USB input device remains unaltered when transmitted to the active target module USB Devices Connect any USB devices to these interfaces The data stream of the connected USB device is transmitted to a compatible target module with up to 16 Mbit s NOTE Check the monitor s manual if the OSD provides a setting for the mode of the DisplayPort input If so select the mode in which the image data is proc...

Page 85: ...of the matrix switch Power supply Main Power Connect the power cable to the power pack and a power outlet Red Power If required connect the power cable of the optional power pack to this interface This provides a redundant power supply Connect the power cable with the power pack and a power outlet of a different power circuit Start up Start the user module by pressing the Main Power button of the ...

Page 86: ...ot be established Status Trans On The communication to the counterpart station is estab lished successfully Off The communication to the counterpart station could not be established System Flashing System is ready for operation or firmware update is executed Off Internal error Console Video On Strong video signal at video input Off No signal at video input or the signal quality is too weak to be p...

Page 87: ...e user module Interface LED Status Meaning Transmission Yellow Off No data connection to the counterpart station Flashing Data connection to the counterpart station established Green Off No user is logged in at the user module On A user is logged in at the user module NOTE Keyboard and mouse signals can only access another user module or a tar get computer if you activated the TradeSwitch function...

Page 88: ...25 or 30Hz 2048 2160 60Hz 2048 2048 60Hz 1920 1080 50 or 60 Hz 1440 576i 50 Hz 1440 480i 60 Hz Further standardised resolutions within the video bandwith possible Vertical frequency 24 Hz to 120 Hz Horizontal frequency 25 kHz to 135 kHz DDC CI The device supports monitors with a DDC CI function The DDC information are transparently forwarded to the moni tor to support a maximum number of monitors ...

Page 89: ...ptional Type External power pack Connection 1 Mini DIN 4 socket Power In Current consumption 12VDC 2 2A Casing Material Anodised aluminium Dimensions W H D 210 44 210 mm Weight Approx 1 3 kg Operating environment Temperature 5 C to 45 C Air humidity 20 to 80 non condensing Storage environment Temperature 20 C to 55 C Air humidity 15 to 85 non condensing Conformity CE EAC FCC Class B RoHS DP HR U C...

Page 90: ...f the connected USB devices is transmitted to the active target module with up to 16 Mbit s DVI U CPU DP U CPU DP HR U CPU and VGA U CPU series only The buttons on the front panel of the user module or configured key combinations select keys let users switch between the connected matrix switches Package contents 1 DP HR U CON 2 user module 1 Power cable 1 EasyStart flyer 1 Safety instructions flye...

Page 91: ... of the USB input device remains unaltered when transmitted to the active target module USB Devices Connect any USB devices to these interfaces The data stream of the connected USB device is transmitted to a compatible target module with up to 16 Mbit s NOTE Check the monitor s manual if the OSD provides a setting for the mode of the DisplayPort input If so select the mode in which the image data ...

Page 92: ...wer pack and a power outlet of a different power circuit Start up Start the user module by pressing the Main Power button of the power pack Switching The buttons on the front panel of the user module or configured key combinations select keys let users switch between the connected matrix switches How to switch channels via buttons Press the button of the desired channel to activate it How to switc...

Page 93: ...unterpart station could not be established System Flashing System is ready for operation or firmware update is executed Off Internal error Console Video On Strong video signal at video input Off No signal at video input or the signal quality is too weak to be processed by the system K M On A local keyboard was detected Off No power at PS 2 interface or USB bus Flashing The CPU input PS 2 or USB is...

Page 94: ... module Interface LED Status Meaning Transmission Yellow Off No data connection to the counterpart station Flashing Data connection to the counterpart station established Green Off No user is logged in at the user module On A user is logged in at the user module NOTE Keyboard and mouse signals can only access another user module or a tar get computer if you purchased the TradeSwitch feature for th...

Page 95: ...24 25 or 30Hz 2048 2160 60Hz 2048 2048 60Hz 1920 1080 50 or 60 Hz 1440 576i 50 Hz 1440 480i 60 Hz Further standardised resolutions within the video bandwith possible Vertical frequency 24 Hz to 120 Hz Horizontal frequency 25 kHz to 135 kHz DDC CI The device supports monitors with a DDC CI function The DDC information are transparently forwarded to the moni tor to support a maximum number of monito...

Page 96: ...ptional Type Portable power pack Connection 1 Mini DIN 4 socket Power In Power input 12VDC 2 3A Casing Material Anodised aluminium Dimensions W H D 210 44 210 mm Weight Approx 1 3 kg Operating environment Temperature 5 C to 45 C Air humidity 20 to 80 non condensing Storage environment Temperature 20 C to 55 C Air humidity 15 to 85 non condensing Conformity CE EAC FCC Class B RoHS DP HR U CON 2 ...

Page 97: ...tted to the active target module with up to 16 Mbit s DVI U CPU DP U CPU DP HR U CPU and VGA U CPU series only When using the console to access a target module DP HR CPU MC2 connected to a dual head computer the monitors display the separate images of the graphics out puts When accessing a target module with one graphics input only only the first monitor displays an image Package contents 1 User m...

Page 98: ... this mode data of the USB input device remains unaltered when transmitted to the active target module USB Devices Connect any USB devices to these interfaces The data stream of the connected USB device is transmitted to a compatible target module with up to 16 Mbit s LED Out If you purchased and added the TradeSwitch feature to the matrix switch connect the optional TS LED2 here order number A610...

Page 99: ...rtup Turn on the user module after its installation Use the Main Power power pack or a redundant power pack to establish the power supply Turn on the Main Power power pack Use an optional power pack to supply the Red Power socket with power NOTE Use category 5e or better twisted pair cables to connect the devices NOTE You can also connect the target module directly to a compatible target module Ke...

Page 100: ...the matrix switch recognises the main channel and the user module s additional channel The channels are automati cally added to a channel group NOTE You can adjust adjsut any channel groups that were created automatically or manually More information about channel groups is given in the separate manuals of the matrix switch web applications ...

Page 101: ... ready for operation or firmware update is executed Off Internal error Console Video On Strong video signal at video input Off No signal at video input or the signal quality is too weak to be processed by the system K M On A local keyboard was detected Off No power at PS 2 interface or USB bus Flashing The CPU input PS 2 or USB is active and ready A local keyboard was not detected MC2 Video 2 On S...

Page 102: ... Meaning Transmission Yellow Off No data connection to the counterpart station Flashing Data connection to the counterpart station established Green Off No user is logged in at the user module On A user is logged in at the user module NOTE Keyboard and mouse signals can only be switched to another user module or target computer if you purchased the TradeSwitch function for the matrix switch Keyb M...

Page 103: ...esolutions 4096 2160 24 25 or 30 Hz 3840 2160 24 25 or 30Hz 2048 2160 60Hz 2048 2048 60Hz 1920 1080 50 or 60 Hz 1440 576i 50 Hz 1440 480i 60 Hz Further standardised resolutions within the video bandwith possible Vertical frequency 24 Hz to 120 Hz Horizontal frequency 25 kHz to 135 kHz DDC CI The device supports monitors with a DDC CI function The DDC information are transparently forwarded to the ...

Page 104: ... 100 240 VAC 0 6 A 0 3 A Redundant power supply optional Type External power pack Connector 1 Mini DIN 4 socket Power input 12 VDC 2 6A Housing Material Anodised aluminium Dimensions W H D 270 44 210 mm Weight Approx 1 6 kg Operating environment Temperature 5 C to 45 C Air humidity 20 to 80 non condensing Storage environment Temperature 20 C to 55 C Air humidity 15 to 85 non condensing Conformity ...

Page 105: ...VI U CPU DP U CPU DP HR U CPU and VGA U CPU series only When using the console to access a multi monitor computer with four graphics out puts the separate images of the graphics outputs are displayed on the console moni tors When accessing the system with a target module with only one graphics input only the first monitor shows an image NOTE Connecting a multi monitor computer with four video outp...

Page 106: ...d user modules DP HR U Package contents 1 User module DP HR U CON MC4 1 Power cable 1 EasyStart flyer 1 Safety instructions flyer Required accessories 4 Category 5e or better twisted pair cables to connect the user module to the matrix switch ...

Page 107: ...hen transmitted to the active target module USB Devices Connect any USB devices to these interfaces The data stream of the connected USB device is transmitted to a compatible target module with up to 16 Mbit s LED Out If you purchased and added the TradeSwitch feature to the matrix switch con nect the optional TS LED2 here order number A6100041 NOTE Check the monitor s manuals if the OSDs provide ...

Page 108: ...t this interface to another Dynamic Port RJ45 of the matrix switch NOTE Use category 5e or better twisted pair cables to connect the devices ADVICE You can also connect the target module directly to a compatible target module NOTE Use category 5e or better twisted pair cables to connect the devices Transmission 4 DisplayPort Out 4 Transmission 3 DisplayPort Out 3 Transmission 2 DisplayPort Out 2 T...

Page 109: ...Power power pack Use an optional power pack to supply the Red Power socket with power Automatic channel grouping When operating the user module for the first time the matrix switch recognises the main channel and the user module s additional channel The channels are automati cally added to a channel group NOTE You can adjust adjsut any channel groups that were created automatically or manually Mor...

Page 110: ...stem is ready for operation or firmware update is executed Off Internal error Console Video On Strong video signal at video input Off No signal at video input or the signal quality is too weak to be processed by the system K M On A local keyboard was detected Off No power at PS 2 interface or USB bus Flashing The CPU input PS 2 or USB is active and ready A local keyboard was not detected MC2 Video...

Page 111: ...lished successfully Off The communication to the counterpart station could not be established MC4 Video 4 On Strong video signal at fourth video input Off No signal at fourth video input or the signal quality is too weak to be processed by the system Trans 4 On The communication to the counterpart station is established successfully Off The communication to the counterpart station could not be est...

Page 112: ... module On A user is logged in at the user module p Interface LED Status Meaning Transmission Yellow Off No data connection to the counterpart station Flashing Data connection to the counterpart station established Green Off No user is logged in at the user module On A user is logged in at the user module NOTE Keyboard and mouse signals can only be switched to another user module or target compute...

Page 113: ...0 24 25 or 30Hz 2048 2160 60Hz 2048 2048 60Hz 1920 1080 50 or 60 Hz 1440 576i 50 Hz 1440 480i 60 Hz Further standardised resolutions within the video bandwith possible Vertical frequency 24 Hz to 120 Hz Horizontal frequency 25 kHz to 135 kHz DDC CI The device supports monitors with a DDC CI function The DDC information are transparently forwarded to the moni tor to support a maximum number of moni...

Page 114: ...r supply Type External power pack Connector 1 Mini DIN 4 Buchse Power input 12 VDC 3 5A Housing Material Anodised aluminium Dimensions W H D 435 44 210 mm Weight Approx 2 3 kg Operating environment Temperature 5 C to 45 C Air humidity 20 to 80 non condensing Storage environment Temperature 20 C to 55 C Air humidity 15 to 85 non condensing Conformity CE EAC FCC Class B RoHS DP HR U CON MC4 ...

Page 115: ... with up to 16 Mbit s DVI U CPU DP U CPU DP HR U CPU and VGA U CPU series only Package contents 1 DP HR U CON Fiber user module 1 Power cable 1 EasyStart flyer 1 Safety instructions flyer Required accessories 1 Compatible optical fibre cable to connect the user module to the matrix switch NOTE This user module can be connected to a compatible fiber port of ControlCenter Compact matrix switches or ...

Page 116: ... the USB input device remains unaltered when transmitted to the active target module USB Devices Connect any USB devices to these interfaces The data stream of the connected USB device is transmitted to a compatible target module with up to 16 Mbit s NOTE Check the monitor s manual if the OSD provides a setting for the mode of the DisplayPort input If so select the mode in which the image data is ...

Page 117: ...he optional power pack to this interface This provides a redundant power supply Connect the power cable with the power pack and a power outlet of a different power circuit Start up Start the user module by pressing the Main Power button of the power pack IMPORTANT The devices use components with laser technology which comply with laser class 1 They meet the requirements in accordance to EN 60825 1...

Page 118: ...ld not be established Status Trans On The communication to the counterpart station is estab lished successfully Off The communication to the counterpart station could not be established System Flashing System is ready for operation or firmware update is executed Off Internal error Console Video On Strong video signal at video input Off No signal at video input or the signal quality is too weak to ...

Page 119: ...g the user module Interface LED Status Meaning Transmission Yellow Off No data connection to the counterpart station Flashing Data connection to the counterpart station established Green Off No user is logged in at the user module On A user is logged in at the user module NOTE Keyboard and mouse signals can only access another user module or a tar get computer if you activated the TradeSwitch func...

Page 120: ...1 1a Colour depth 24 bit Video bandwidth 25 to 300 MP s DisplayPort 4 Lanes HBR 2 7 Gbps Max resolution 2560 1600 60Hz 4096 2160 30Hz Examplary resolutions 4096 2160 24 25 or 30 Hz 3840 2160 24 25 or 30Hz 2048 2160 60Hz 2048 2048 60Hz 1920 1080 50 or 60 Hz 1440 576i 50 Hz 1440 480i 60 Hz Further standardised resolutions within the video bandwith possible Vertical frequency 24 Hz to 120 Hz Horizont...

Page 121: ... Internal power pack Connection 1 IEC plug IEC 320 C14 Current consumption 100 240VAC 0 6A 0 3A Redundant power supply Type External power pack Connection 1 Mini DIN 4 socket Power In Current consumption 12VDC 2 3A Casing Material Anodised aluminium Dimensions W H D 210 44 210 mm Weight Approx 1 3 kg Operating environment Temperature 5 C to 45 C Air humidity 20 to 80 non condensing Storage environ...

Page 122: ...VI U CPU DP U CPU DP HR U CPU and VGA U CPU series only The buttons on the front panel of the user module or configured key combinations select keys let users switch between the connected matrix switches NOTE This user module can be connected to a compatible fiber port of ControlCenter Compact matrix switches or ControlCenter Digital matrix switches requires CCD I O 16 Card Fiber IMPORTANT Both th...

Page 123: ... Connect the PS 2 mouse of the local console Keyb Mouse Connect the USB keyboard and or the USB mouse of the local console Generic By default Keyb Mouse mode you can use this interface to connect another USB input device or supported displays or tablets NOTE Check the monitor s manual if the OSD provides a setting for the mode of the DisplayPort input If so select the mode in which the image data ...

Page 124: ... the first matrix switch Trans 2 Tx Insert the LC plug of a compatible optical fibre cable Connect the other end of the cable to the Rx interface of a Dynamic Port provided at the second matrix switch Trans 2 Rx Insert the LC plug of a compatible optical fibre cable Connect the other end of the cable to the Tx interface of the same Dynamic Port provided at the second matrix switch IMPORTANT With e...

Page 125: ...odule by pressing the Main Power button of the power pack Switching The buttons on the front panel of the user module or configured key combinations select keys let users switch between the connected matrix switches How to switch channels via buttons Press the button of the desired channel to activate it How to switch channels via key combinations On the console keyboard press local Hotkey Select ...

Page 126: ...e counterpart station could not be established System Flashing System is ready for operation or firmware update is executed Off Internal error Console Video On Strong video signal at video input Off No signal at video input or the signal quality is too weak to be processed by the system K M On A local keyboard was detected Off No power at PS 2 interface or USB bus Flashing The CPU input PS 2 or US...

Page 127: ...ng the user module Interface LED Status Meaning Transmission Yellow Off No data connection to the counterpart station Flashing Data connection to the counterpart station established Green Off No user is logged in at the user module On A user is logged in at the user module NOTE Keyboard and mouse signals can only access another user module or a tar get computer if you purchased the TradeSwitch fea...

Page 128: ...DP 1 1a Colour depth 24 bit Video bandwidth 25 to 300 MP s DisplayPort 4 Lanes HBR 2 7 Gbps Max resolution 2560 1600 60Hz 4096 2160 30Hz Examplary resolutions 4096 2160 24 25 or 30 Hz 3840 2160 24 25 or 30Hz 2048 2160 60Hz 2048 2048 60Hz 1920 1080 50 or 60 Hz 1440 576i 50 Hz 1440 480i 60 Hz Further standardised resolutions within the video bandwith possible Vertical frequency 24 Hz to 120 Hz Horiz...

Page 129: ...y Type Internal power pack Connection 1 IEC plug IEC 320 C14 Power input 100 240VAC 0 6A 0 3A Redundant power supply optional Type Portable power pack Connection 1 Mini DIN 4 socket Power In Power input 12VDC 2 4A Casing Material Anodised aluminium Dimensions W H D 210 44 210 mm Weight Approx 1 3 kg Operating environment Temperature 5 C to 45 C Air humidity 20 to 80 non condensing Storage environm...

Page 130: ...get module DP HR U CPU MC2 connected to a dual head computer the monitors display the separate images of the graphics out puts When accessing a target module with one graphics input only only the first monitor displays an image NOTE This user module can be connected to a compatible fiber port of ControlCenter Compact matrix switches or ControlCenter Digital matrix switches requires CCD I O 16 Card...

Page 131: ...peakers optional Keyb Connect the console s PS 2 keyboard Mouse Connect the console s PS 2 mouse Keyb Mouse Connect the console s USB keyboard and or USB mouse Generic By default Keyb Mouse mode you can use this interface to connect another USB input device or supported displays or tablets NOTE Check the monitor s manuals if the OSDs provide a setting for the mode of the DisplayPort input If so se...

Page 132: ...sion 1 Rx Insert the LC plug of a compatible optical fibre cable Connect the other end of the cable to the Tx interface of the same Dynamic Port provided at the matrix switch IMPORTANT With enabled Generic HID mode it is not possible to operate the OSD with a keyboard connected to the Generic socket IMPORTANT The devices use components with laser technology which comply with laser class 1 They mee...

Page 133: ...n the user module after its installation Use the Main Power power pack or a redundant power pack to establish the power supply Turn on the Main Power power pack Use an optional power pack to supply the Red Power socket with power Automatic channel grouping When operating the user module for the first time the matrix switch recognises the main channel and the user module s additional channel The ch...

Page 134: ...m is ready for operation or firmware update is executed Off Internal error Console Video On Strong video signal at video input Off No signal at video input or the signal quality is too weak to be processed by the system K M On A local keyboard was detected Off No power at PS 2 interface or USB bus Flashing The CPU input PS 2 or USB is active and ready A local keyboard was not detected MC2 Video 2 ...

Page 135: ...atus Meaning Transmission Yellow Off No data connection to the counterpart station Flashing Data connection to the counterpart station established Green Off No user is logged in at the user module On A user is logged in at the user module NOTE Keyboard and mouse signals can only be switched to another user module or target computer if you purchased the TradeSwitch function for the matrix switch Tr...

Page 136: ...Port DP 1 1a Colour depth 24 bit Video bandwidth 25 to 300 MP s DisplayPort 4 Lanes HBR 2 7 Gbps Max resolution 2560 1600 60Hz 4096 2160 30Hz Examplary resolutions 4096 2160 24 25 or 30 Hz 3840 2160 24 25 or 30Hz 2048 2160 60Hz 2048 2048 60Hz 1920 1080 50 or 60 Hz 1440 576i 50 Hz 1440 480i 60 Hz Further standardised resolutions within the video bandwith possible Vertical frequency 24 Hz to 120 Hz ...

Page 137: ...wer supply Type Internal power pack Connector 1 IEC plug IEC 320 C14 Power input 100 240 VAC 0 7 A 0 3 A Redundant power supply Type External power pack Connector 1 Mini DIN 4 socket Power input 12 VDC 2 8A Housing Material Anodised aluminium Dimensions W H D 270 44 210 mm Weight Approx 1 6 kg Operating environment Temperature 5 C to 45 C Air humidity 20 to 80 non condensing Storage environment Te...

Page 138: ...the console moni tors When accessing the system with a target module with only one graphics input only the first monitor shows an image NOTE This user module can be connected to a compatible fiber port of ControlCenter Compact matrix switches or ControlCenter Digital matrix switches requires CCD I O 16 Card Fiber IMPORTANT Both the user module and the fiber ports are available as single mode varia...

Page 139: ...ole speakers optional Keyb Connect the console PS 2 keyboard Mouse Connect the console PS 2 mouse Keyb Mouse Connect the console USB keyboard and or USB mouse Generic By default Keyb Mouse mode you can use this interface to connect another USB input device or supported displays or tablets NOTE Check the monitor s manuals if the OSDs provide a setting for the mode of the DisplayPort input If so sel...

Page 140: ...th enabled Generic HID mode it is not possible to operate the OSD with a keyboard connected to the Generic socket IMPORTANT The devices use components with laser technology which comply with laser class 1 They meet the requirements in accordance to EN 60825 1 2014 as well as U S CFR 1040 10 and 1040 11 Mind the following instructions when dealing with laser beams Avoid direct eye exposure to beam ...

Page 141: ...terface of a Dynamic Port provided at the matrix switch Transmission 3 Rx Insert the LC plug of a compatible optical fibre cable Connect the other end of the cable to the Tx interface of the same Dynamic Port provided at the matrix switch Transmission 4 Tx Insert the LC plug of a compatible optical fibre cable Connect the other end of the cable to the Rx interface of another Dynamic Port provided ...

Page 142: ... pack to supply the Red Power socket with power Automatic channel grouping When operating the user module for the first time the matrix switch recognises the main channel and the user module s additional channel The channels are automati cally added to a channel group NOTE You can adjust adjsut any channel groups that were created automatically or manually More information about channel groups is ...

Page 143: ...m is ready for operation or firmware update is executed Off Internal error Console Video On Strong video signal at video input Off No signal at video input or the signal quality is too weak to be processed by the system K M On A local keyboard was detected Off No power at PS 2 interface or USB bus Flashing The CPU input PS 2 or USB is active and ready A local keyboard was not detected MC2 Video 2 ...

Page 144: ...t Off No signal at second video input or the signal quality is too weak to be processed by the system Trans 4 On The communication to the counterpart station is established successfully Off The communication to the counterpart station could not be established Interface LED Status Meaning Transmission Yellow Off No data connection to the counterpart station Flashing Data connection to the counterpa...

Page 145: ...ff No data connection to the counterpart station Flashing Data connection to the counterpart station established Green Off No user is logged in at the user module On A user is logged in at the user module NOTE Keyboard and mouse signals can only be switched to another user module or target computer if you purchased the TradeSwitch function for the matrix switch Transmission 4 Transmission 3 Displa...

Page 146: ...ort DP 1 1a Colour depth 24 bit Video bandwidth 25 to 300 MP s DisplayPort 4 Lanes HBR 2 7 Gbps Max resolution 2560 1600 60Hz 4096 2160 30Hz Examplary resolutions 4096 2160 24 25 or 30 Hz 3840 2160 24 25 or 30Hz 2048 2160 60Hz 2048 2048 60Hz 1920 1080 50 or 60 Hz 1440 576i 50 Hz 1440 480i 60 Hz Further standardised resolutions within the video bandwith possible Vertical frequency 24 Hz to 120 Hz H...

Page 147: ...wer supply Type Internal power pack Connector 1 IEC plug IEC 320 C14 Power input 100 240 VAC 0 6 A 0 4 A Redundant power supply Type External power pack Connector 1 Mini DIN 4 Buchse Power input 12 VDC 3 8A Housing Material Anodised aluminium Dimensions W H D 435 44 210 mm Weight Approx 2 3 kg Operating environment Temperature 5 C to 45 C Air humidity 20 to 80 non condensing Storage environment Te...

Page 148: ...uter the monitors display the separate images of the graphics outputs When accessing a target module with one graphics input only only the first monitor dis plays an image Package contents 1 User module DP HR U CON DH 1 Power cable 1 EasyStart flyer 1 Safety instructions flyer Required accessories 1 Category 5e or better twisted pair cable to connect the user module to a KVM matrix switch ADVICE I...

Page 149: ...other USB input device In this mode data of the USB input device remains unaltered when transmitted to the active target module USB Devices Connect any USB devices to these interfaces The data stream of the connected USB device is transmitted to a compatible target module with up to 16 Mbit s NOTE Check the monitor s manuals if the OSDs provide a setting for the mode of the DisplayPort input If so...

Page 150: ...user module with a second redundant power supply Startup Turn on the user module after its installation Use the Main Power power pack or a redundant power pack to establish the power supply Turn on the Main Power power pack Use an optional power pack to supply the Red Power socket with power NOTE Use category 5e or better twisted pair cables to connect the devices NOTE You can also connect the tar...

Page 151: ...ommunication to the counterpart station is estab lished successfully Off The communication to the counterpart station could not be established System Flashing System is ready for operation or firmware update is executed Off Internal error Console Video On Strong video signal at video input Off No signal at video input or the signal quality is too weak to be processed by the system K M On A local k...

Page 152: ...face LED Status Meaning Transmission Yellow Off No data connection to the counterpart station Flashing Data connection to the counterpart station established Green Off No user is logged in at the user module On A user is logged in at the user module NOTE Keyboard and mouse signals can only be switched to another user module or target computer if you purchased the TradeSwitch function for the matri...

Page 153: ... Interfaces 1 RJ45 socket Transmission distance Max 140 metres Audio DisplayPort Digital Transmission type 2 channel LPCM stereo Resolutions 16 20 24 bit Sampling rates up to 48 kHz Audio Transmission type transparent bidirectional Resolution 24 bits Refresh rate 96 kHz Bandwidth 22 kHz Video Format DisplayPort DP 1 1a Colour depth 24 Bit Video bandwidth 25 to 300 MP s Channel 1 25 to 165 MP s Cha...

Page 154: ...transparently forwarded to the monitor to support a maximum number of monitors However the support cannot be guaranteed for all monitor models USB Specification USB 2 0 Transmission type transparent Transmission rate Max 16 Mbit s Main power supply Type Internal power pack Connector 1 IEC plug IEC 320 C14 Power input 100 240 VAC 0 6 A 0 3 A Redundant power supply Type External power pack Connector...

Page 155: ... to a dual head com puter the monitors display the separate images of the graphics outputs When accessing a target module with one graphics input only only the first monitor dis plays an image Package contents 1 DP HR U CON 2 DH user module 1 Power cable 1 EasyStart flyer 1 Safety instructions flyer Required accessories 2 Category 5e or better twisted pair cables to connect the user module to two ...

Page 156: ...In this mode data of the USB input device remains unaltered when transmitted to the active target module USB Devices Connect any USB devices to these interfaces The data stream of the connected USB device is transmitted to a compatible target module with up to 16 Mbit s NOTE Check the monitor s manual if the OSD provides a setting for the mode of the DisplayPort input If so select the mode in whic...

Page 157: ...r outlet Red Power If required connect the power cable of the optional power pack to this interface This provides a redundant power supply Connect the power cable with the power pack and a power outlet of a different power circuit NOTE Use category 5e or better twisted pair cables to connect the devices ADVICE You can also connect the Transmission interface directly to a compatible target module M...

Page 158: ... buttons on the front panel of the user module or configured key combinations select keys let users switch between the connected matrix switches How to switch channels via buttons Press the button of the desired channel to activate it How to switch channels via key combinations On the console keyboard press Hotkey Select key In the default settings the select keys are Alt 1 channel 1 and Alt 2 cha...

Page 159: ... could not be established System Flashing System is ready for operation or firmware update is executed Off Internal error Console Video On Strong video signal at video input Off No signal at video input or the signal quality is too weak to be processed by the system K M On A local keyboard was detected Off No power at PS 2 interface or USB bus Flashing The CPU input PS 2 or USB is active and ready...

Page 160: ...odule Interface LED Status Meaning Transmission Yellow Off No data connection to the counterpart station Flashing Data connection to the counterpart station established Green Off No user is logged in at the user module On A user is logged in at the user module NOTE Keyboard and mouse signals can only access another user module or a tar get computer if you purchased the TradeSwitch feature for the ...

Page 161: ...itches Interface 2 RJ45 socket Transmission length Max 140 meters Audio DisplayPort Digital Transmission type 2 channel LPCM stereo Resolutions 16 20 24 bit Sampling rates up to 48 kHz Audio Transmission type transparent bidirectional Resolution 24 Bit Sampling rate 96 kHz Bandwidth 22 kHz Video Format DisplayPort DP 1 1a Colour depth 24 Bit Video bandwidth 25 to 300 MP s Channel 1 25 to 165 MP s ...

Page 162: ...y forwarded to the moni tor to support a maximum number of monitors However the support cannot be guaranteed for all monitor models USB Specification USB 2 0 Transmission type transparent Transmission rate Max 16 Mbit s Main power supply Type Internal power pack Connection 1 IEC plug IEC 320 C14 Power input 100 240VAC 0 6A 0 3A Redundant power supply optional Type Portable power pack 12V 2A Connec...

Page 163: ...nitor dis plays an image Package contents 1 User module DP HR U CON Fiber DH 1 Power cable 1 EasyStart flyer 1 Safety instructions flyer NOTE This user module can be connected to a compatible fiber port of ControlCenter Compact matrix switches or ControlCenter Digital matrix switches requires CCD I O 16 Card Fiber IMPORTANT Both the user module and the fiber ports are available as single mode vari...

Page 164: ...lets Enable the Generic HID mode see page 175 f if you want to connect another USB input device In this mode data of the USB input device remains unaltered when transmitted to the active target module USB Devices Connect any USB devices to these interfaces The data stream of the connected USB device is transmitted to a compatible target module with up to 16 Mbit s NOTE Check the monitor s manuals ...

Page 165: ...ovided at the matrix switch IMPORTANT The devices use components with laser technology which comply with laser class 1 They meet the requirements in accordance to EN 60825 1 2014 as well as U S CFR 1040 10 and 1040 11 Mind the following instructions when dealing with laser beams Avoid direct eye exposure to beam on page 3 Always connect optical connections or cover them with protection caps on pag...

Page 166: ...pack to provide the user module with a second redundant power supply Startup Turn on the user module after its installation Use the Main Power power pack or a redundant power pack to establish the power supply Turn on the Main Power power pack Use an optional power pack to supply the Red Power socket with power Micro In Speaker Keyb Mouse Generic LED Out Mouse Keyb DisplayPort Out 1 Out 2 USB Devi...

Page 167: ...e communication to the counterpart station is estab lished successfully Off The communication to the counterpart station could not be established System Flashing System is ready for operation or firmware update is executed Off Internal error Console Video On Strong video signal at video input Off No signal at video input or the signal quality is too weak to be processed by the system K M On A loca...

Page 168: ...o an end device Right Green On A user module is accessing the target module Blinking No communication with the counterpart station Flashing Connection to the counterpart station established No user module is accessing Flickering Keyboard and mouse inputs are forwarded by the accessing user module The flickering is defined by the user s entries NOTE Keyboard and mouse signals can only be switched t...

Page 169: ...400 Meter 50μ 125μ OM3 DVI CPU Fiber UC S Max 5 000 Meter 9μ 125μ OS1 DVI CPU Fiber UC S Max 10 000 Meter 9μ 125μ OS1 Audio DisplayPort Digital Transmission type 2 channel LPCM stereo Resolutions 16 20 24 bit Sampling rates up to 48 kHz Audio Transmission type transparent bidirectional Resolution 24 bits Refresh rate 96 kHz Bandwidth 22 kHz USB Specification USB 2 0 Transmission type transparent T...

Page 170: ...h a DDC CI function The DDC information are transparently forwarded to the monitor to support a maximum number of monitors However the support cannot be guaranteed for all monitor models Main power supply Type Internal power pack Connector 1 IEC plug IEC 320 C14 Power input 100 240 VAC 0 6 A 0 3 A Redundant power supply Type External power pack Connector 1 Mini DIN 4 socket Power input 12 VDC 2 4A...

Page 171: ...ts When accessing a target module with one graphics input only only the first monitor dis plays an image NOTE This user module can be connected to a compatible fiber port of ControlCenter Compact matrix switches or ControlCenter Digital matrix switches requires CCD I O 16 Card Fiber IMPORTANT Both the user module and the fiber ports are available as single mode variants or as multi mode variants M...

Page 172: ...nnect the console speakers optional Keyb Connect the console PS 2 keyboard Mouse Connect the console PS 2 mouse Keyb Mouse Connect the console USB keyboard and or USB mouse Generic By default Keyb Mouse mode you can use this interface to connect another USB input device or supported displays or tablets NOTE Check the monitor s manuals if the OSDs provide a setting for the mode of the DisplayPort i...

Page 173: ...ct the other end of the cable to the Rx interface of a Dynamic Port provided at the matrix switch IMPORTANT With enabled Generic HID mode it is not possible to operate the OSD with a keyboard connected to the Generic socket IMPORTANT The devices use components with laser technology which comply with laser class 1 They meet the requirements in accordance to EN 60825 1 2014 as well as U S CFR 1040 1...

Page 174: ...patible optical fibre cable Connect the other end of the cable to the Tx interface of the same Dynamic Port provided at the matrix switch Power supply Main Power Connect the supplied power cable Insert the cable s Schuko plug in a power socket Red Power Connect the connection cable of a compatible power pack to provide the user module with a second redundant power supply Startup Start the user mod...

Page 175: ... key combinations select keys let users switch between the connected matrix switches How to switch channels via buttons Press the button of the desired channel to activate it How to switch channels via key combinations On the console keyboard press Hotkey Select key In the default settings the select keys are Alt 1 channel 1 and Alt 2 channel 2 ...

Page 176: ...ing System is ready for operation or firmware update is executed Off Internal error Console Video On Strong video signal at video input Off No signal at video input or the signal quality is too weak to be processed by the system K M On A local keyboard was detected Off No power at PS 2 interface or USB bus Flashing The CPU input PS 2 or USB is active and ready A local keyboard was not detected Tra...

Page 177: ... rechts grün an Ein Arbeitsplatzmodul ist auf das Target Modul aufgeschaltet blinkt Kommunikation mit dem Matrixswitch nicht möglich blitzt Verbindung zum Matrixswitch erfolgreich aufgebaut Es ist kein Arbeitsplatzmodul aufgeschaltet flackert Tastatur und Mauseingaben werden vom aufgeschalteten Arbeitsplatzmodul übertragen Der Rhythmus des Flackerns wird durch die Eingaben des Anwenders bestimmt N...

Page 178: ...x 400 Meter 50μ 125μ OM3 DVI CPU Fiber UC S Max 5 000 Meter 9μ 125μ OS1 DVI CPU Fiber UC S Max 10 000 Meter 9μ 125μ OS1 Audio DisplayPort Digital Transmission type 2 channel LPCM stereo Resolutions 16 20 24 bit Sampling rates up to 48 kHz Audio Transmission type transparent bidirectional Resolution 24 bits Refresh rate 96 kHz Bandwidth 22 kHz USB Specification USB 2 0 Transmission type transparent...

Page 179: ... a DDC CI function The DDC information are transparently forwarded to the moni tor to support a maximum number of monitors However the support cannot be guaranteed for all monitor models Main power supply Type Internal power pack Connector 1 IEC plug IEC 320 C14 Power input 100 240 VAC 0 6 A 0 3 A Redundant power supply Type External power pack Connector 1 Mini DIN 4 Buchse Power input 12 VDC 2 5A...

Page 180: ...ub or a USB composite device containing multiple USB devices only the first of the connected HID devices can be used in Generic HID mode The OSD informs you if other HID devices of the composite device or the hub are detected Enabling disabling the user module s Generic HID mode How to enable disable the user module s Generic HID mode 1 Press Ctrl Num default to open the on screen display 2 Press ...

Page 181: ... to the active target module How to select a USB keyboard mode 1 Press Ctrl Num default to open the on screen display 2 Press F11 to open the Configuration menu 3 Select Target and press Enter 4 Select the target module whose settings you want to change and press F5 off Connect either a USB keyboard or a USB mouse to the user module s Generic interface on The data of any USB input device connected...

Page 182: ... Click OK to save your changes Multimedia PC keyboard with additional multimedia keys default Standard PC keyboard with standard keyboard layout Generic Any USB input device NOTE USB target modules additionally support certain USB input devices After selecting the specific USB keyboard mode of such a device you can use the special features of these USB input devices ...

Page 183: ...de you can change the user module settings in the module s OSD You can use the configured hotkey to open the on screen display at the console How to open the on screen display 1 Press Alt Num default to open the on screen display NOTE The modules can also be used with products from other product series in mixed operation If you have questions about compatibility please contact the support team NOT...

Page 184: ...lt hotkey modifier key and the Num hotkey can be changed How to change the hotkey to open the on screen display 1 Press the Alt Num default hotkey to open the on screen display 2 Select Hotkey and press Enter 3 Use the arrow keys to select at least one of the hotkey modifiers listed under Modifier Then press F8 NOTE The hotkey consists of at least one hotkey modifier key and an additional hotkey w...

Page 185: ...to open the OSD via double keypress 1 Press the Alt Num default hotkey to open the on screen display 2 Select Hotkey and press Enter 3 Select OSD via 2x keypress and press F8 repeatedly to select one of the following options Num Num key Pause Pause key Insert Insert key Delete Delete key Home Home key End End key PgUp Page Up key PgDn Page Down key Space Space key off Opening OSD via double keypre...

Page 186: ...out various technical features of the device The EDID profile of the monitor that is connected to the user module is not avail able at the target module Therefore the target module transmits a standard profile to the computer The EDID information of the profile are optimised for the majority of available graphics cards ADVICE Press Ctrl F8 to show a list inclduing all options Select the desired op...

Page 187: ...eyboards The user module supports the additional keys of the follwoing PS 2 keyboards PixelPower Rapid Action PixelPower Clarity blue and SKIDATA1 How to activate the support of special PS 2 keyboards 1 Press the Alt Num default hotkey to open the on screen display 2 Select Keyboard Mouse and press Enter 3 Select PS 2 Enh keyboard and press F8 to select one of the following options 4 Press F2 to s...

Page 188: ...ings 5 Restart the user module to apply your changes Reinitialising USB input devices After connecting a USB keyboard or mouse to the user module the input devices are initialised and can be used immediately Some USB input devices require a reinitialisation of the USB connection Enable the automatic reinitialisation of USB devices if a USB keyboard or mouse does not respond to your inputs during o...

Page 189: ...lays and tablets You can operate computers connected to the target module with one of the supported displays or tablets NOTE This setting has only an impact if a USB cable connects the target module to the target INPUT DEVICE SETTING PC keyboard with additional multimedia keys PC Multimedia PC keyboard with standard keyboard layout PC Standard Apple Keyboard with numeric keypad A1243 Apple A1243 S...

Page 190: ...he target computer How to select a USB keyboard mode 1 Press the Alt Num default hotkey to open the on screen display 2 Select Keyboard Mouse and press Enter 3 Select USB HID mode and press F8 to select one of the following options 4 Press F2 to save your settings How to use the special function of Sun keyboards on a standard keyboard If the target module is provided with a Sun Keyboard you can us...

Page 191: ...ct Keyboard Mouse and press Enter 3 Select IBM RS 6000 support and press F8 to select one of the following options 4 Press F2 to save your settings KEY COMBINATIONS SOLARIS SHORTCUT KEY OF SUN KEY BOARDS Ctrl Alt F2 Again Ctrl Alt F3 Props Ctrl Alt F4 Undo Ctrl Alt F5 Front Ctrl Alt F6 Copy Ctrl Alt F7 Open Ctrl Alt F8 Paste Ctrl Alt F9 Find Ctrl Alt F10 Cut Ctrl Alt F11 Help Ctrl Alt F12 Mute Ctr...

Page 192: ...g functions and press Enter Resetting the default settings This setting resets the default settings of the extender mode All settings that have been changed by the user are reset How to reset the default settings of the matrix switch 1 Press the Alt Num default hotkey to open the on screen display 2 Select Console utility and press Enter 3 Select Set system defaults and press Enter NOTE Since the ...

Page 193: ... item see above 4 Press Enter to show the desired information 5 Press Esc to leave the menu FIRMWARE INFO This menu shows information about the user module console and the target module target ID Device ID Version Installed firmware version Device Type name Firmware Name of installed firmware HOTKEY Local Hotkey Modifier Key Modifier Modifier key of key combination Key Hotkey of key combination Lo...

Page 194: ... ...

Page 195: ... ...

Page 196: ...n Drunck GmbH Systementwicklung Obere Leimbach 9 D 57074 Siegen Phone 49 271 23872 0 sales gdsys com www gdsys com US Büro US Office G D North America Inc 4001 W Alemada Avenue Suite 100 Burbank CA 91505 Phone 1 818 748 3383 sales us gdsys com www gdsys com ...

Reviews: