background image

14     


Program Edit 

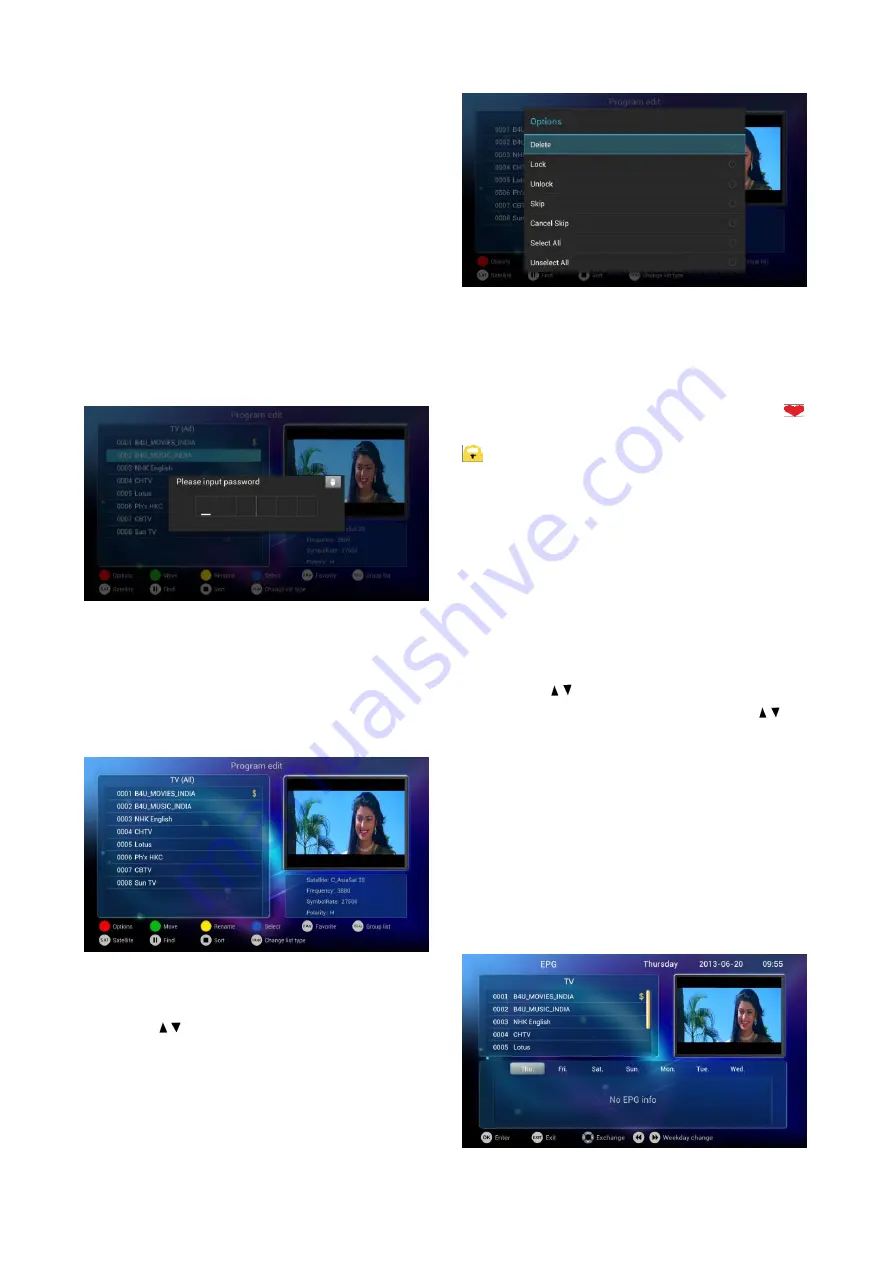
Program edit function includes lock, favourite, 

sequencing, move and delete.   


Program lock and FAV 

1) Move  the  cursor  to  "Program  Edit"  option, 

press 

OK

to confirm into. It reminds you to input 

password.  When  first  entering,  the  user  can  set 

up an initial password. If you want to change the 

password, please refer to the parent lock settings 

part.   


Figure    5-3-10


2) After  inputing  the  correct  password,  press 

OK

to  enter  the  program  editor  interface,  as 

shown in figure 5-3-11: 


Figure    5-3-11 


3) Press

/

to move the cursor to the program 

to  be  edited.  Then  press 

RED

and  editing 

options pops up as shown in the    figure 5-3-12.   


Figure    5-3-12 

4)  Choose  "favourite"  will  pop  a  list  of  the 

favourite  groups  and  press 

OK

to  choose  a 

group that you want which group that the program 

belongs  to,  then  the  program  is  highlighted 

While choosing "lock", the program is locked with 

  mark.  If  selecting  "favorite"  and  "lock"  at  the 

same time, the program is both locked and set to 

be  favorite  program.  (Note:  When  you  want  to 

watch the locked programs, you need to input the 

password same to the one settled.) 

5) Directly pressing

YELLOW

key can also set 

programs to be locked. Similarly, pressing

FAV


key can set the programs to be favourite. 


Program Move 

Press

/

to move cursor to the program; 

press

GREEN

to choose. Then press

/

to 

move  the  program  to  the  desired  place.  Press 

EXIT

to quit without saving. 


EPG 

The box provides 7 days EPG, convenient for 

you  to  get  the  details  of  all  the  programs  from 

Monday to Sunday.   

1

Press 

EPG

  to enter into EPG main menu 

as figure 5-3-13


Figure    5-3-13


Summary of Contents for Gi FLY T2

Page 1: ...0...

Page 2: ...6 Parent Lock 11 5 2 7 Audio Settings 11 5 2 8 Video Aspect Ratio 11 5 2 9 Program Info 12 5 3 Main UI 12 5 3 1Program Management 12 5 3 2 Internet 16 5 3 3 Multimedia 18 5 3 4 More Applications 19 5...

Page 3: ...n horizontal 7 When move machine into another place where the temperature varies a lot please don t turn on at once until 1 2 hours later 8 Please pay attention to putting the machine in certain place...

Page 4: ...sure you can fully enjoy every feature of this machine please read this manual carefully before using Disclaimer The company reserves the right to improve the content If there has discrepancy between...

Page 5: ...4 2 Hardware 2 1 Front panel STANDBY Standby Button INDICATOR Run Green Standby Red 2 2 Side panel SD CARD SD Card Slot USB USB Slot...

Page 6: ...5 2 3 Rear panel LNB IN Signal Input ETHERNET Ethernet Slot USB USB Slot HDMI HDMI Output AV AV Output RS 232 Serial Port DC 12V DC 12V Input...

Page 7: ...program 11 SUBT Switch turn off subtitle 12 AUDIO Audio settings 13 TEXT Teletext 14 SAT Their functions depend on certain application 15 MENU Menu shortcut key 16 EXIT Exit key 17 Left and right key...

Page 8: ...3 System Connection Please connect with your power TV set and other related devices according to the picture shows below if you need to connect with more devices please contact with your local operato...

Page 9: ...ndby and Standby Recovery When machines in turned on press standby button machine will in standby mode and Standby indicator light will on the box will in low power consumption status Press standby bu...

Page 10: ...uage the region country city and time zone of your place Besides you can set the display position to adjust the video output with your TV Set What s more you can setup the configuration of the network...

Page 11: ...program lists 3 Press to select the program on the list Press OK to enter in the selected program Figure 5 2 4 5 2 4 Program Search 1 Press OK or FAV program list pops up 2 Press RED key to search th...

Page 12: ...choose language or sound track then press OK Figure 5 2 9 2 When setting up sound track press to select track types and OK to confirm Press EXIT to quit setting without saving 3 Figure 5 2 10 4 When s...

Page 13: ...e Televising contractible window press EXIT to back to the full screen televising state Main menu on the bottom of main UI as shown in 5 3 2 There are six options TV Internet Multimedia Applications G...

Page 14: ...antenna configuration interface press to choose option need to be set up press to change the parameters press EXIT to turn back Figure 5 3 7 5 According to the caption below at the selected frequency...

Page 15: ...the favourite groups and press OK to choose a group that you want which group that the program belongs to then the program is highlighted While choosing lock the program is locked with mark If selecti...

Page 16: ...ecording function You can press PVR key or select PVR on the main menu to jump to PVR interface 1 Time shift Press PAUSE to suspend the real time broadcasting program Press PAUSE again to replay from...

Page 17: ...o quit without saving Figure 5 3 20 Daylight Saving Time DST Press and OK to enter in DST option Press EXIT to quit without saving Programs sort Use up down button to sort programs press OK button to...

Page 18: ...ings On TV settings interface press and to enter in record settings Figure 5 3 27 Recorded file save path Set the position of recorded files Divide record by EPG event Open or close Divide record by E...

Page 19: ...n option press OK to enter in Figure 5 3 32 Browser IE Browser connecting Google by default If you want to log in other website please use remote control or fly mouse to input the website address you...

Page 20: ...gure 5 4 1 IE Browser connecting Google by default If you want to log in other website please use remote control or fly mouse to type the website address you want for detailed information please take...

Page 21: ...e whether to use Static state IP mode If choose static state IP mode the IP address Gateway Netmask and DNS become available you need to setup this parameter correctly If not all these settings are in...

Page 22: ...hoose Apps and press OK to enter in like Picture 5 5 8 shows Figure 5 5 8 Downloaded Display users personal downloaded and installed applications Running Examine currentlyrunning service visit and man...

Page 23: ...then a confirmation dialogue pops up as shown in picture 5 5 11 Figure 5 5 11 4 Click OK to upgrade system will reboot then into the uploading interface as picture 5 5 12 Figure 5 5 12 5 The machine s...

Page 24: ...S Support USB PVR YES Support 7 days EPG YES Support timing playing YES Support program playback YES Support multi screen interactive function with DLNA and Airplay protocols OPTIONAL Support using th...

Page 25: ...es TV images without Voice Audio wire has no connection Re connect the Audio lines Play Box in quiet state Please press mute button to restore volume Audio setting is abnormal Please enter the audio a...

Page 26: ...ildren Set top box STB A kind of equipment that can decode and tune digital signal and turn these signals into formats TV can accept In addition to decoding signal it can also verify viewers access ri...

Reviews: