background image

User Guide continued. 

Guide to using the different cot-bed positions. 
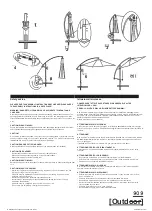
Position Maxi Cot - When you first assemble the cot you have two choices of 

mattress height, upper position designed for new born and lower position for 

toddler onwards ( fr

o

m Step 

8

 in the assembly instructions )

WARNING:  TO  PREVENT  FALLS,  THE  MATTRESS  BASE  OF  THIS  COT 

SHOULD  BE  ADJUSTED  TO  THE  LOWEST  POSITION  BEFORE  THE 

CHILD CAN SIT UP. 

Position  Toddler  bed  -  To  allow  your  child  to  get  in  or  out  of  the  cot  by 

themselves  you  can  simply  remove  one  of  the  side  panels.  This  is  usually 
when the child starts to try and get out of the cot by themselves and helps to 
avoid  injuries  from  falling.  To  use  the  cot  in  this  position  you  must  always 

keep  one  of  the  side  panels  in  place.  Please  refer  to  instructions  to  see 

conversion. 

Position  First bed- When the baby has developed further,  you may convert 

the cot to create a 'first-bed' suitable up until the age of  5 years.  This can be 
extended  further  with  the  use  of  the  'Gaia  Baby  Junior  Bed 

Ex

tens

i

on

Kit'  (sold separately) 

Safety notice 

• Make  sure  that  medicines,  strings,  small  toys,  small  objects  such  as  coins,

etc. are out of the baby's reach from any position in the bed.

• Never place the child's bed by an open fire or source of strong heat such as

electric heaters, gas heaters,  power points etc. due to the risk of fire.

• Do not use the child's bed if any parts are damaged or missing and only use

replacement parts that are approved by Gaia.

• Never leave anything in the child's bed and never place the child's bed close

to something the child can stand on,  or which may pose a risk of suffocation

or strangulation,  such as light fittings,  electrical equipment,  strings on blinds/
curtains, etc.

• Never place more than one mattress in the child's cot/bed. It is recommended

that you use the original Gaia mattress, as it is designed to perfectly fit the cot

in  all  positions.  Please  consult  our  customer  services  team  or  local

store/expert for additional guidance.

11 

Summary of Contents for Complete Mini

Page 1: ...Ct Gaia Baby Complete Sleep Mini 6AIA 1 Mini Cot Assembly Instructions 2 Maxi Cot 3 Toddler bed baby 4 First bed...

Page 2: ...Ax14 Barrel Nut mrm mrrmmmmrmr Dx8 Bolt Fx6 Metal Dowel Bx14 Barrel Bolt rnmmnmmm Cx60 Bolt ill Ex1 Allen Key r I Gx4 Foot Hx6 Plastic Screw ATTENTION NOTICE Please save all un used parts for future...

Page 3: ...assembly WAX1pc CDs X1pc x4pcs X4pcs X2pcs X2pcs J x4pcs X2pcs 1 B ATTENTION NOTICE Parts WA use for Co Sleeper Adapter conversion kit sold separately Additional parts Maxi Cot assembly x2pcs x2pcs x...

Page 4: ...are assembled You need hardware C fil illillillfi E G 12pcs 4pcs 3 E G You need hardware 8pcs B C 1111111111mm 8pcs E Step 2 Mini Cot Assembly Newborn Position Using bolt C X 4pcs assemble Part 3 to...

Page 5: ...g bolt B X6pcs assemble 2pcs Part 4 by Phillips Screwdriver You need hardware B I I 6pcs Step 4 Mini Cot Assembly Newborn Position Using Barrel nut A X6pcs assemble by Phillips Screwdriver You need ha...

Page 6: ...eed hardware C Cillilllilll 4pcs E Step 6 Mini Cot Assembly Newborn Position Using Barrel nut A X8pcs assemble Side pan el by Phillips Screwdriver Using bolt C X4pcs and bolt D X 8pcs assemble Side pa...

Page 7: ...Remove Parts 7 x 4 Step 8 Mini Cot Assembly Newborn Position Safety notice Height selection new born or lower position Using Bolt C X8pcs assemble Parts 8x2pcs by Allen Key E You need hardware C i1111...

Page 8: ...ce Height selection new born or lower position Using the Mattress put down into the First Cot Use with Gaia Serena Maxi Cot Mattress sold separately Recommended Mattress Size MINI COT 925mm long x 650...

Page 9: ...emble by Allen Key E You need hardware C llllllllllllmm 4pcs E Step 11 Maxi Cot Assembly Using Barrel nut A X8pcs assemble by Phillips Screwdriver Using bolt C X4pcs assemble by Allen Key E You need h...

Page 10: ...Dowel X6pcs into the holes of the side panels by hand hammer You need hardware F 6pcs Step 13 Maxi Cot Assembly Newborn Using bolt CX4pcs assemble 2pcs Part 12 to 2pcs Part 11 by Allen Key E 6 You nee...

Page 11: ...cot ensuring metal dowels are in place 14 ii Using bolt D X4pcs assemble by Allen Key Do not tighten Bolts sho uld be f ully tightened after both side panels are fitted 14 iii Using bolt C X8pcs assem...

Page 12: ...urelyfasten all8XboltD You need hardware C 1111111111111111111 6pcs E Note If your baby is able to kneel stand please use the lower position see Step 17 Step 16 Maxi Cot Assembly Newborn Safety notice...

Page 13: ...ition To allow conversion to Toddler bed Simply remove panel as shown 9 At 6mths remove parts 2x2 7x2 12x2 Repeat Step 11 and 12 in Lower Position Note If your baby is able to kneel stand please use t...

Page 14: ...olt of the side panel and using the Philips Screwdriver unscrew the Barrel nut of headboard You need hardware E I H llmm6 6pcs b Put the mattress into the First bed C Using the Plastic Screw H into th...

Page 15: ...first bed suitable up until the age of 5 years This can be extended further with the use of the Gaia Baby Junior Bed Extension Kit sold separately Safety notice Make sure that medicines strings small...

Page 16: ...applies to product presented with an original receipt or proof of purchase The warranty applies to the territory in which the product was purchased During the warranty period Gaia Baby will repair or...

Reviews: