

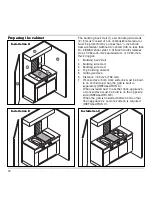
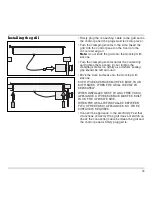


Installing the grill
• Firmly plug the connecting cable in the grill and in
the control panel (the plugs must lock into place).
• Turn the clamping screws to the side. Insert the
grill with the control panel on the front into the
cut-out and align it.
Note:
do not stick the grill onto the worktop with
silicone.
• Turn the clamping screws under the countertop
and tighten them evenly. Do not tighten the
clamping screws too tightly, as a uniform sealing
gap should be left all round.
• Stick the work surfaces onto the worktop with
silicone.
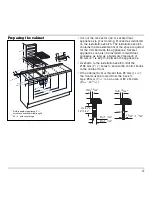
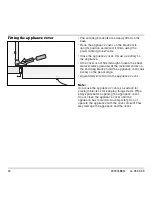
BOTH WORK SURFACES MUST BE BUILT-IN ON
BOTH SIDES, WHEN THE GRILL IS BUILT IN
SEPARATELY.
WHEN INSTALLED NEXT TO ANOTHER VARIO
APPLIANCE A WORK SURFACE MUST BE BUILT
IN ON THE OPPOSITE SIDE.
WHEN THE GRILL IST INSTALLED BETWEEN
TWO OTHER VARIO APPLIANCES, NO WORK
SURFACE IS REQUIRED.
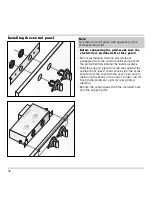
• Connect the appliance to the electricity. Test that
it functions correctly. If the grill does not switch on,
check the connecting cable between the grill and
the control panel is firmly plugged in.
19
Summary of Contents for VR 421-611
Page 1: ...Operating and Assembly Instructions VR 421 611 Electric Grill...
Page 2: ......
Page 23: ......


