9
Prepare Installation Space
en-us
Prepare Installation Space
Prepare Installation Space
The kitchen unit must be heat-resistant to at least
200° F (90°C). The stability of the unit must be
maintained after producing the cut-out.
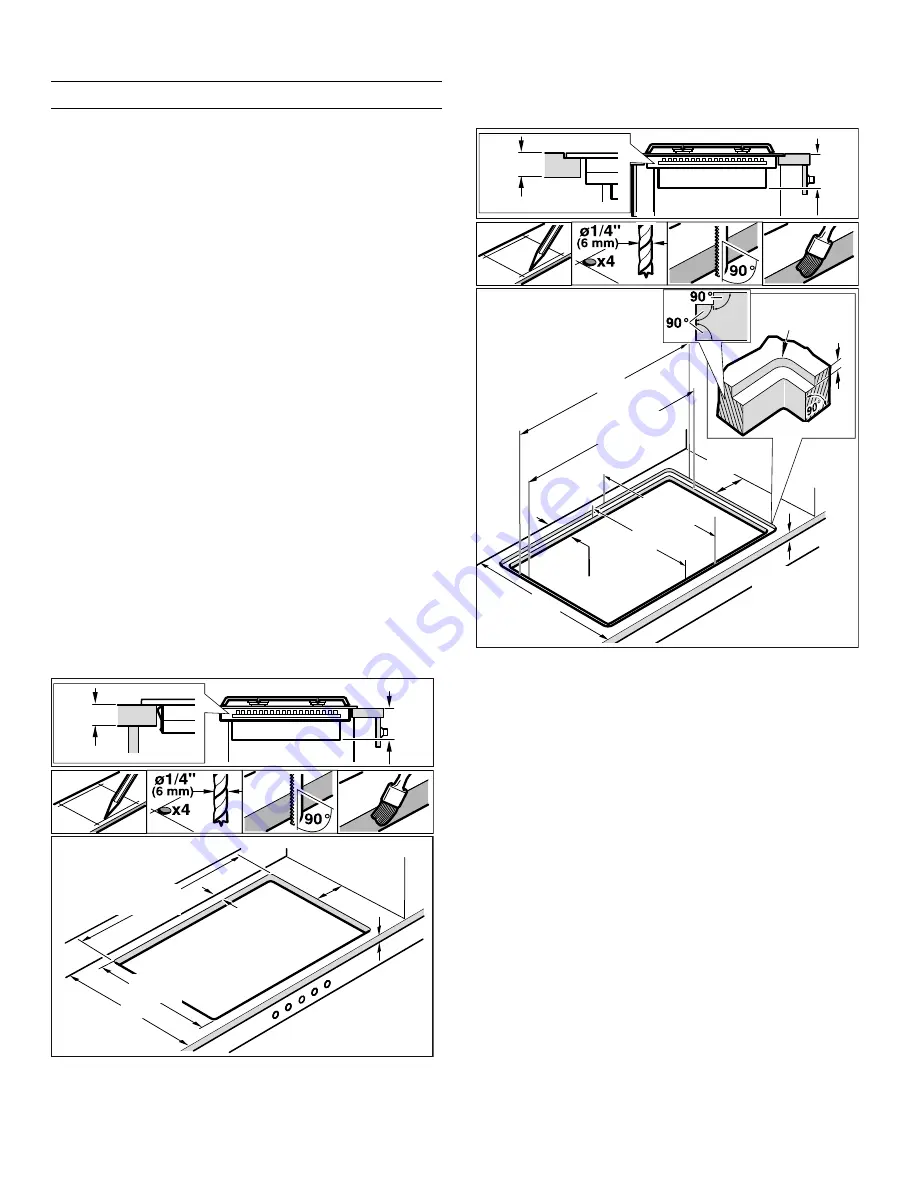
Produce the cut-out in the countertop for one or more
Vario appliances as shown in the installation sketch. The
angle between the cut surface and the countertop must
be 90°.
The cut edges at the sides must be flat to ensure a good
fit of the retaining springs on the appliance. In laminated
worktops, it may be necessary to fit strips at the sides of
the cut-out.
Remove shavings after cutting. Seal cut surfaces for
resistance to heat and so they are watertight.
Pay attention to a minimum gap of 3/8“ (10 mm) from the
underside of the appliance to kitchen units.
Use suitable base constructions to ensure load-carrying
capacity and stability, especially in the case of thin
countertops. Pay attention to the weight of the appliance,
including any payload. Reinforcement material used must
be resistant to heat and moisture.
Note:
Wait until the appliance has been installed in the
installation opening before checking that it is level.
Cutting out countertop
Flush mounting:
Flush mounting into a countertop is
possible.
Flush installation:
The appliance can be installed in the
following temperature- and water-resistant countertops:
▯
Stone countertops
▯
Plastic countertops (such as Corian®)
▯
Solid wood countertops: Only in consultation with the
manufacturer of the countertop (seal cut-out edges)
▯
Installation in other countertops only in consultation
with the manufacturer of the countertop.
Installation in countertops made of particleboard is not
possible.
Note:
Any cut-out work on the countertop must be
performed in a workshop according to the installation
diagram. The cut-out must be made cleanly and precisely
since the cut-out edge is visible on the surface. Clean
and degrease the cut-out edges with a suitable cleaning
agent (bear in mind silicone manufacturer's processing
instructions).
PLQ
PLQ
PLQ
PLQ
PLQ
PP
34
15/16
"
±1/16
PLQ
U
PLQ
PLQ
35
15/16
"
PLQ
±1/16
34
15/16
"
PP
±1/16
PLQ
Summary of Contents for VG491211CA
Page 51: ......


