background image

Installation and connection

 en

9

¡

User manual

¡

Customer service directory

¡

Warranty enclosure

1

¡

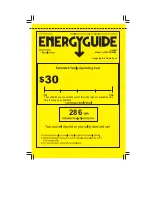
Energy label

¡

Information on energy consump-
tion and noises

4.2 Criteria for the installation

location

WARNING

Risk of explosion!

If the appliance is in a space that is
too small, a leak in the refrigeration
circuit may result in a flammable mix-
ture of gas and air.

Only install the appliance in a
space with a volume of at least
1 m

3

 per 8 g refrigerant. The

volume of refrigerant is indicated
on the rating plate. 

→ "Appliance",

Fig. 

1

/

4

Page 11

The weight of the appliance ex works
may be up to 70 kg depending on
the model.
The subfloor must be sufficiently
stable to bear the weight of the appli-
ance.

Permitted room temperature

The permitted room temperature de-
pends on the appliance's climate
class.
The climate class can be found on
the rating plate. 

→ "Appliance", Fig.

1

/

4

Page 11

Climate
class

Permitted room tem-
perature

SN

10 °C to 32 °C

N

16 °C to 32 °C

ST

16 °C to 38 °C

T

16 °C to 43 °C

The appliance is fully functional within
the permitted room temperature.
If an appliance with climate class SN
is operated at colder room temperat-
ures, the appliance will not be dam-
aged up to a room temperature of
5 °C.

Niche dimensions

Observe the niche dimensions if you
install your appliance in the niche. If
this is not the case, problems may
occur when installing the appliance.

Niche depth

Install the appliance in the recom-
mended niche depth of 560 mm.
If the niche depth is smaller, the en-
ergy consumption increases slightly.
The niche depth must be a minimum
550 mm.

Niche width

An inside niche width of at least
560 mm is required for the appli-
ance.

Side-by-side installation

If, in addition to this appliance, you
want to operate another appliance
featuring a freezer compartment, you
must maintain a distance of at least
150 mm between the appliances.
If you do not observe the minimum
distance, you can only set up this ap-
pliance next to 556 mm wide appli-
ances without a freezer compartment.

4.3 Installing the appliance

Install the appliance in accordance
with the enclosed installation in-
structions.

1

Not in all countries

Summary of Contents for RF 282

Page 1: ...User manual RF 222 RF 282 Freezer Gaggenau...

Page 2: ...e appliance 13 7 2 Operating tips 13 7 3 Switching off the appliance 13 7 4 Setting the temperature 13 8 Additional functions 13 8 1 Automatic Fast freezing 13 8 2 Manual Fast freezing 14 9 Alarm 14 9...

Page 3: ...e sea level 1 3 Restriction on user group This appliance may be used by children aged 8 or over and by people who have reduced physical sensory or mental abilities or inadequate experience and or know...

Page 4: ...tallation regulations When installing the appliance check that the power cable is not trapped or damaged If the insulation of the power cord is damaged this is dangerous Never let the power cord come...

Page 5: ...small parts away from children Do not let children play with small parts WARNING Risk of explosion Mechanical devices e g sharp or pointed objects or other devices may damage the refrigeration circuit...

Page 6: ...ood from being contaminated you must observe the following instructions If the door is open for an extended period of time this may lead to a considerable temperature increase in the compartments of t...

Page 7: ...re placed by the manufacturer the manufacturer s Customer Ser vice or a similarly qualified person in order to prevent any risk WARNING Risk of fire If the tubes are damaged flammable refrigerant and...

Page 8: ...kers Maintain a 300 mm clearance to oil or solid fuel cookers Use a niche depth of 560 mm Never cover or block the exterior ventilation grilles Saving energy during use Note The arrangement of the fit...

Page 9: ...38 C T 16 C to 43 C The appliance is fully functional within the permitted room temperature If an appliance with climate class SN is operated at colder room temperat ures the appliance will not be dam...

Page 10: ...esive strips and carton 3 Clean the appliance for the first time Page 17 4 5 Connecting the appliance to the electricity supply 1 Insert the mains plug of the appli ance s power cable in a socket near...

Page 11: ...liarising yourself with your appliance 5 1 Appliance You can find an overview of the parts of your appliance here 1 2 3 4 1 1 Control panel Page 12 2 Freezer compartment shelf 3 Freezer compartment fl...

Page 12: ...s Fast freezing on or off 5 switches the appliance on or off Features 6 Features Features The features of your appliance de pend on the model 6 1 Freezer compartment flap Store food that is used frequ...

Page 13: ...ot put any food in the appli ance until the set temperature has been reached The front panels of the housing are temporarily heated slightly This prevents condensation in the area of the door seal Whe...

Page 14: ...s open for a longer period the door alarm switches on Switching off the door alarm Close the appliance door or press a The warning tone is switched off 9 2 Temperature alarm If the freezer compartment...

Page 15: ...Approx 24 hours before placing fresh food in the appliance switch on Fast freezing Switching on manual Fast freez ing Page 14 2 Fill the upper compartment with food first This is where the food freez...

Page 16: ...2 months The imprinted freezer calendar indic ates the maximum storage duration in months at a constant temperature of 18 C 10 6 Defrosting methods for frozen food CAUTION Risk of harm to health Durin...

Page 17: ...cleaning products may damage the surfaces of the appli ance Do not use hard scouring pads or cleaning sponges Do not use harsh or abrasive de tergents Do not use cleaning products with a high alcohol...

Page 18: ...the freezer compartment shelf Pull out the freezer compartment shelf and remove it Removing the frozen food container 1 Take out the frozen food container as far as it will go 2 Lift the frozen food...

Page 19: ...on Carry out the appliance self test Page 21 a Once the appliance self test has ended the appli ance switches to normal operation or appears in the temperature display The electronics have detected a...

Page 20: ...ppliance back on after five minutes Page 13 If the temperature is too warm check the temper ature again after a couple of hours If the temperature is too cold check the temper ature again on the follo...

Page 21: ...unds a If at the end of the appliance self test two audible signals sound and the temperature display indic ates the set temperature your ap pliance is OK The appliance switches to normal operation a...

Page 22: ...ance was placed on the market within the European Eco nomic Area Note Under the terms of the manu facturer s warranty applicable to the location the use of Customer Service is free of charge The minim...

Page 23: ...time of printing its web address had not yet been published Please then fol low the instructions on searching for models The model identifier is made up of the characters before the slash in the prod...

Page 24: ...e 34 81739 M nchen GERMANY www gaggenau com 9001592501 9001592501 en 010310 Valid within Great Britain Imported to Great Britain by BSH Home Appliances Ltd Grand Union House Old Wolverton Road Wolvert...

Reviews: