background image

17

Individual beverages

You can define and save instructions for up to eight 
individual beverages.

1

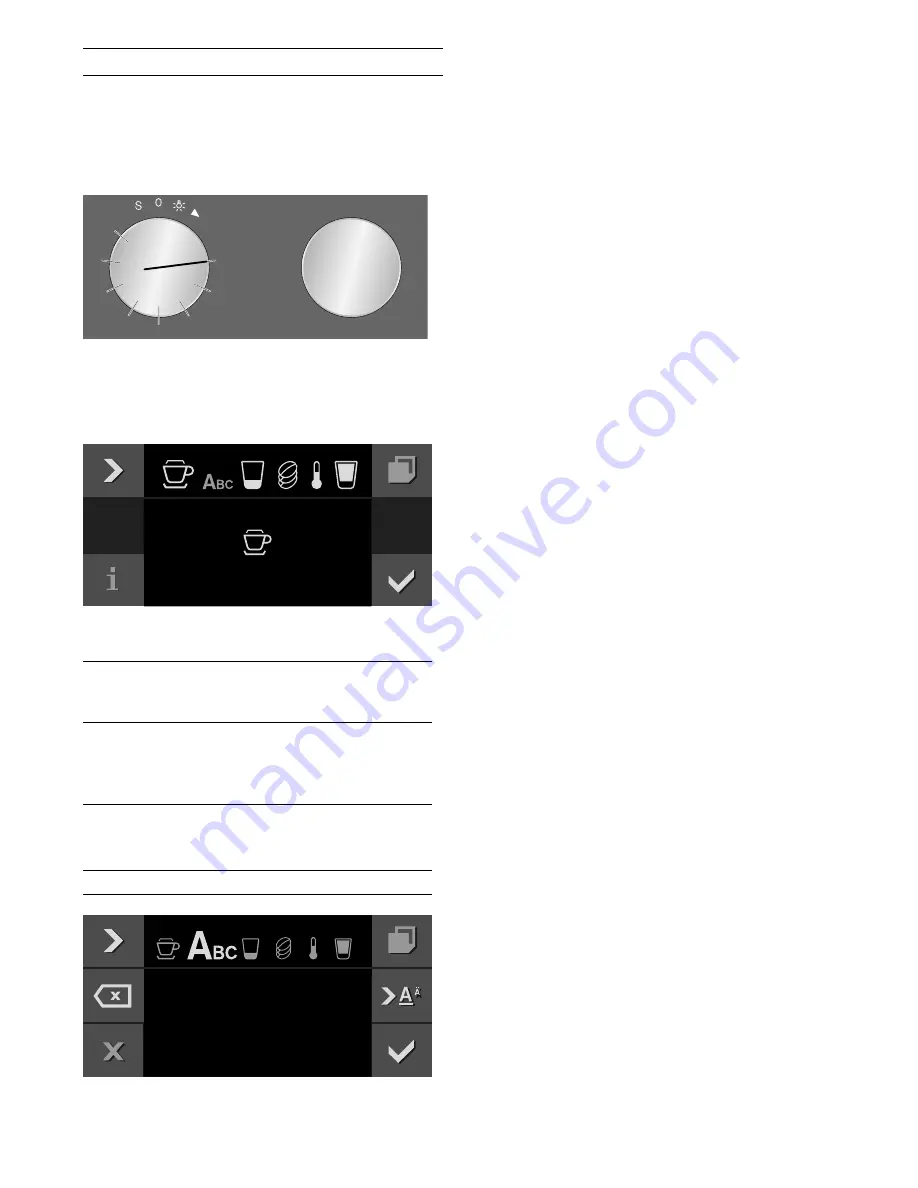
Turn the function selector to one of the 8 memory 
locations.

2

Touch the 

%

 symbol. 

3

Use the 

C

 symbol to select the desired beverage, 

size, strength, temperature and coffee-milk ratio 
and use the rotary selector to save the settings.

4

Enter the name of the beverage in "ABC".

5

Save with 

 or cancel with 

'

 and exit the menu.

6

Press 

I

 to start.

Depending on the beverage selected, the beans will be 
ground first, then the milk prepared and finally the 
coffee brewed.

Notes

While the beverage is dispensed, the 

&

 symbol is 

displayed. Touch this symbol to stop the beverage 
being prepared.

For entering a name, Latin characters, certain 
special characters and numbers are available.

Rotary selec-
tor

Selects letters

A new word always begins with a capital 
letter.

4

Press briefly: moves the cursor right

Press and hold: shifts to umlauts and 
special characters

Press twice: adds a line break

5

Press briefly: moves the cursor right

Press and hold: shifts to normal characters

Press twice: adds a line break

l

Deletes letters

&DSSXFFLQR

7RPV

&DSSXFFLQB

Summary of Contents for CMP 250

Page 1: ...Gaggenau Instruction manual CMP 250 Fully Automatic Espresso Machine ...

Page 2: ...filter 11 Filling the water tank and the bean container 12 Preparing beverages 13 Beverage selection 13 Preparing coffee using freshly ground beans 13 Preparing two cups at the same time 14 Preparing coffee using ground coffee 14 Preparing a coffee with milk 15 Preparing milk froth and warm milk 15 Preparing hot water 16 Setting the grinding level 16 Individual beverages 17 Child lock 18 Activatin...

Page 3: ...et with earthing Ensure that the protective conductor system of the domestic electricity supply has been correctly installed Risk of electric shock Connect and operate the appliance only in accordance with the specifications on the rating plate If the power cord of this appliance is damaged it must be replaced with a special connecting line which is available from our after sales service Risk of e...

Page 4: ...iendly manner This appliance is labelled in accordance with European Directive 2012 19 EU concerning used electrical and electronic appliances waste electrical and electronic equipment WEEE The guideline determines the framework for the return and recycling of used appliances as applicable throughout the EU ...

Page 5: ...ce Use this section to familiarise yourself with your new appliance The control panel and the individual controls are explained here You will also find information about the pull out system and the accessories Included in delivery ...

Page 6: ...n container 4 Ground coffee drawer 5 Grinding level adjustment 6 Storage compartment for measuring spoon 7 Brewing unit access door 8 Storage compartment for quick reference guide 9 Storage compartment for milk hose 10 Coffee dispenser and milk frother height adjustable 11 Shelf ...

Page 7: ...ons 3 Rotary selector You can select the desired bever age and other settings using the rotary selector 4 Function selector You can use the function selector to call up your saved favourite bev erages or the basic settings VSUHVVR Position Function 0 Zero setting Light 2 Beverage selection 3 10 Memory locations for individual beverages S Service programmes basic settings Symbol Function I Start Ø ...

Page 8: ...atic espresso machine has trays to store accessories and the quick reference guide in the appliance These are on the right hand side and are accessible when the appliance is in pull out position 1 see section Pulling out the appliance The appliance includes the following accessories as standard The following accessories can be reordered by contacting after sales service Water filter order no 00467...

Page 9: ...ck is activated The brightness of the display is dimmed in hibernation mode Notes In the basic settings you can set whether the Gaggenau logo is to be displayed during hibernation mode see section Basic settings The brightness of the display depends on the vertical viewing angle You can adjust the display using the Brightness setting in the basic settings Activating the appliance To exit hibernati...

Page 10: ...irm with The appliance enters hibernation mode and the hibernation mode display appears The appliance is now ready for operation Setting the water hardness It is important to set the water hardness correctly so that the appliance indicates accurately when the descaling programme should be run The default water hardness is level 4 If a water softener is installed in the house please set the water h...

Page 11: ...er Operation with or without a water filter You can use the appliance with or without a water filter To ensure that the descaling display of the appliance functions correctly you must state in the basic settings whether a water filter is used 1 Turn the function selector to S 2 Select Basic settings using the rotary selector 3 Touch the symbol 4 Select Water filter using the rotary selector 5 Touc...

Page 12: ...illing the water tank and the bean container Using your appliance you can prepare coffee using freshly ground coffee beans or ground coffee Coffee beans can be stored in the bean container for several days without losing their aroma Only fill up the ground coffee shortly before preparing the beverage see section Preparing coffee using ground coffee 1 Switch on the appliance at the main switch 2 Tu...

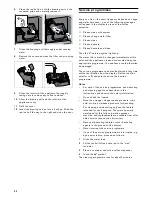
Page 13: ...e switched on The water tank and bean container must be filled 1 Turn the function selector to position 2 2 Use the rotary selector to select the desired beverage e g coffee 3 Place a cup under the coffee dispenser 4 Touch the C symbol 5 Set the quantity using the rotary selector 6 Touch the C symbol Espresso Concentrated coffee Serve in small thick walled cups Preheat cups with hot water ƒ 2x esp...

Page 14: ...water tank must be filled 1 Turn the function selector to position 2 2 Pull out the appliance from the built in unit see section Pulling out the appliance 3 Using the measuring spoon fill the ground coffee drawer with a maximum of two level spoons of ground coffee Close the ground coffee drawer Note Do not fill the drawer with beans or instant coffee 4 Slide the appliance into the built in unit as...

Page 15: ...fter which the coffee is brewed Notes While the beverage is dispensed the symbol is displayed Touch this symbol to stop the beverage being prepared Using the symbol you can save the current beverage touch the symbol turn the function selector to a free memory location save the entry see section Individual beverages Dried on milk residues are difficult to remove so always clean the milk system afte...

Page 16: ...s displayed Touch this symbol to stop the beverage being prepared Using the symbol you can save the current beverage touch the symbol turn the function selector to a free memory location save the entry see section Individual beverages Setting the grinding level m Risk of injury Do not reach into the grinding unit Using the rotary selector for the grinding level you can set your preferred fineness ...

Page 17: ...selected the beans will be ground first then the milk prepared and finally the coffee brewed Notes While the beverage is dispensed the symbol is displayed Touch this symbol to stop the beverage being prepared For entering a name Latin characters certain special characters and numbers are available Rotary selec tor Selects letters A new word always begins with a capital letter 4 Press briefly moves...

Page 18: ... activated the childproof lock may be off when the power comes back on again Activating the child lock Prerequisite The function selector is set to 0 Touch and hold the 0 symbol for at least 6 seconds The child lock is activated The 0 symbol is shown at the top of the display Deactivating the child lock Prerequisite The function selector is set to 0 Touch and hold the 1 symbol for at least 6 secon...

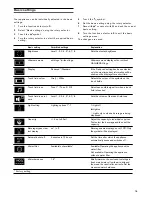
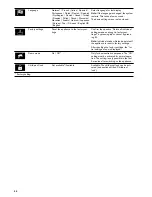
Page 19: ...ey White Selects the colour of the symbols on the touch fields Touch field tone Tone 1 Tone 2 Off Selects an audible signal for when a touch field is touched Touch field tone vol ume Level 1 2 3 4 5 6 7 8 Sets the volume of the touch field tone Light setting Lighting options 1 7 Û Light off Ú Light on Light only on when a beverage is being dispensed Capacity 5 up to 50 ml Adjust the capacity to in...

Page 20: ... Confirm the question Delete all individual settings made and reset to factory set tings by pressing or cancel by press ing Note Individual drinks will also be deleted if the appliance is reset to factory settings After resetting the factory settings the Ini tial settings menu is displayed Demo mode On Off Only for demonstration purposes The Off setting must be activated for normal opera tion The ...

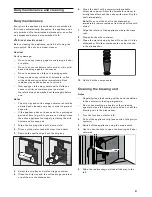
Page 21: ...milk system and brewing unit 1 Wipe the housing with a soft damp cloth 2 Rinse out the water tank with clear fresh water 3 Remove the shelf and pull out the drip tray 4 Empty the drip tray and coffee dregs container 5 Clean the drip tray and the coffee dregs container or put them in the dishwasher 6 Clean the shelf with a commercially available limescale remover Allow the limescale remover to brie...

Page 22: ...he appropriate programme The appliance could otherwise be damaged The service programmes can also be started at any time without notification from the display Set the function selector to S and select and run the desired programme Notes For each of the service programmes use descaling and cleaning agents as described in the instructions and observe the safety information Do not drink the liquids N...

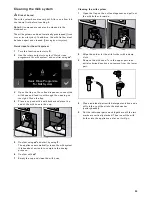
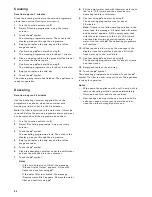
Page 23: ...lace a cup under the milk frother and place the end of the milk hose in the cup 5 Confirm using and start by using I The appliance automatically cleans the milk system It takes about a minute to complete the rinsing process 6 Confirm with 7 Empty the cup and clean the milk hose Cleaning the milk system 1 Open the flap on the coffee dispenser and pull out the milk frother forwards 2 Wipe the holder...

Page 24: ...the symbol 6 Place the descaling container under the milk frother and put the milk hose into the container 7 Touch the symbol Notes If the milk frother is not fitted the message Please fit milk frother appears Fit the milk frother and confirm using If the water filter is activated the message Remove water filter appears Remove the water filter and confirm using 8 Fill the empty water tank with luk...

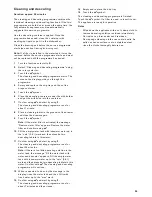
Page 25: ...r and close the drawer again 9 Touch the symbol Note If the water filter is activated the message Remove water filter appears Remove the water filter and confirm using 10 Fill the empty water tank with lukewarm water up to the calc 0 5 l mark and then dissolve two descaling tablets in this water 11 Confirm using and start by using I The cleaning and descaling programme runs for about 24 minutes No...

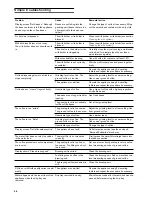
Page 26: ...higher proportion of robusta beans The beans are no longer fresh for roasting Use fresh beans The grinding level is not suitable for the coffee beans Set a finer grinding level The coffee is too acidic The grinding level is too coarse The ground coffee is too coarse Adjust the grinding level to a finer setting Use finer ground coffee Unsuitable type of coffee Use a darker roast The coffee is too b...

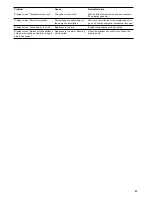
Page 27: ...on Wait for a few minutes If the display does not go out have the domestic installation checked Display screen Leave device to cool Appliance is too hot Switch off appliance for 30 minutes Display screen Switch off the appliance at the mains switch and switch on again after 30 seconds Appliance is too warm Brewing unit is soiled Allow the appliance to cool down Clean the brewing unit Problem Cause...

Page 28: ...Gaggenau Hausgeräte GmbH Carl Wery Straße 34 81739 München GERMANY www gaggenau com 9001140684 9001140684 en 951201 ...

Reviews: