background image

Timer operation

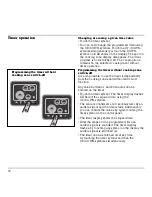
Changing or erasing a given time value

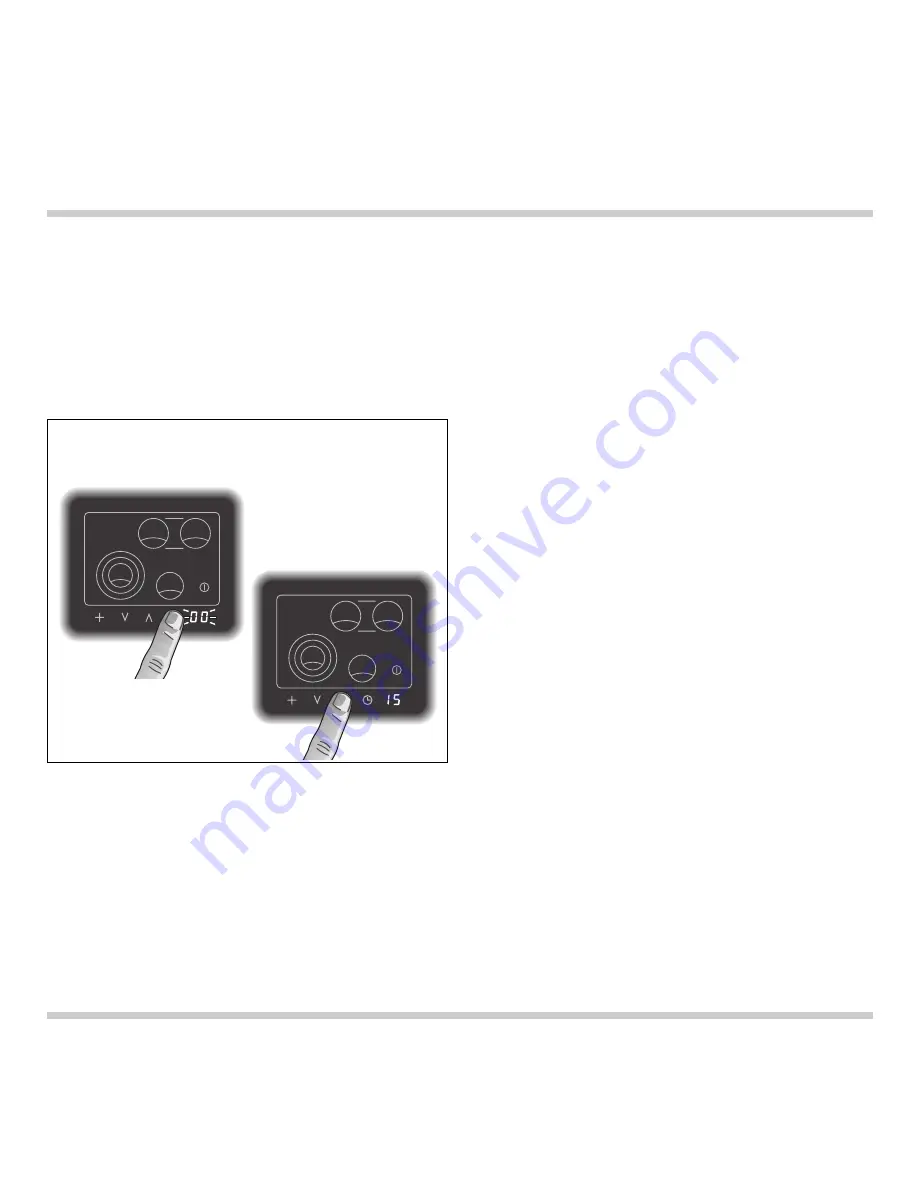
• Touch the timer symbol.

• You can now change the programmed time using

the UP-/DOWN-symbols. Touch the UP-/DOWN-
symbols simultaneously or touch the DOWN-
symbol, until

00

shows on the display. The spot on

the cooking zone display disappears. The timer
program is now switched off. The cooking zone
remains on the selected cooking level without
timer operation. 

Programming the timer without cooking zone
switch-off

It is also possible to use the timer independently
from the cooking zones and without switch-off
function.

Any value between 1 and 90 minutes can be
entered on the timer. 

• Touch the timer symbol. The timer display flashes

00

. Select the required time using the 

UP-/DOWN-symbols. 

• The value is confirmed a few seconds later by an

audible signal and the timer starts. Alternatively
you can confirm the values by again touching the
timer symbol in the control panel. 

• The timer display shows the elapsed time.

• After the elapse of the programmed time an

audible signal is sounded. The timer display
flashes. By touching any symbol on the display the
audible signal is switched off.

• The timer can be switched off at any time 

by touching the timer symbol and then the
UP-/DOWN-symbols simultaneously.

16

Programming the timer without 
cooking zone switch-off

Summary of Contents for CK 481

Page 1: ...Operating and Assembly Instructions CK 481 CK 482 Electronic Glass Ceramic Hob ...

Page 2: ...ing tips Page 10 Settings table Page 11 5 Additional functions Page 12 17 Cooking zone extension front left Page 12 Cooking zone extension rear Page 13 Automatic quick boil function Page 14 Timer operation Page 15 16 Overheating protection Page 17 Holiday safeguard Page 17 Child lock Page 17 6 Options menu Page 18 21 7 Cleaning and care Page 22 8 Maintenance Page 23 9 Remedying slight malfunctions...

Page 3: ...he first time The instructions contain important notes on use installation and maintenance of the appliance In the following pages you will find important notes on safety and operation These will serve to ensure your personal safety and the lasting value of your appliance You will find notes on page 4 that you ought to observe before operating the appliance for the first time The chapters entitled...

Page 4: ... of the appliance do not use high pressure or steam jet cleaning devices Do not store any substances that are sensitive to high temperatures or which pose a fire hazard e g cleaning agents or spray cans in drawers or cupboards under the appliance Operation of the appliance must be discontinued immediately if improper use produces cracks breaks or flaws on the cooking surface with the result that l...

Page 5: ...ee chapter Cleaning and care About use The appliance is intended solely for household use and must not be put to any other uses Use the appliance to prepare meals only Do not use the appliance to heat up the room in which it is installed Do not use the cooking surface as space to store items Do not place any hot pots on the display panel Place a cooking vessel on the corresponding cooking zone bef...

Page 6: ...1800 W 3 SuperQuick cooking zone Ø 180 mm 1800 W cooking zones 2 and 3 plus additional zone 800 W convert to oval roasting zone 180 x 415 mm 4400 W 4 SuperQuick cooking zone Ø 145 mm 1200 W 5 Display panel 6 Cooking level display 7 Cooking zone selection 8 Main switch 9 Timer display 10 Timer switch 11 UP DOWN symbols to select cooking level and timer 12 Cooking zone extension switch You can order...

Page 7: ... sensor pads the appliance registers this as an error No input is registered and several short tones are sounded When the appliance is switched on a spot lights up on the main switch symbol The given cooking level is shown on the display of each cooking zone A flashing display shows that a value has not yet been confirmed The residual heat display appears on the display of the relevant cooking zon...

Page 8: ...ll the previous values should you switch it off accidentally Timer page 15 16 It is possible to program an automatic switch off time for one or several of the cooking zones It is also possible to use the timer independently Overheating protection page 17 The electronics of the cooking range are equipped with an overheating protection Holiday safeguard page 17 If you should ever forget to switch of...

Page 9: ...o on the display of the selected cooking zone flashes Select the required cooking level within 5 seconds using the UP DOWN symbols You can immediately select level 9 8 etc using the DOWN symbol The display of the cooking zone flashes the chosen level Note if no input is given within 5 seconds the cooking zone must be re activated The selected cooking level is confirmed after a few seconds by an au...

Page 10: ...ouch the the DOWN symbol until the display of the cooking zone shows a zero The cooking zone is now switched off The residual heat symbol lights in the display of the cooking zone Note if you want to switch off the whole hob i e when something is boiling over then simply touch the main switch Residual heat display Once you have switched off a cooking zone residual heat is shown on the display as a...

Page 11: ...e above procedure exactly results in the stored values being lost Pots and saucepans should always be covered by a matching lid The cooking time is shortened and the energy use reduced Pay attention to the right size when choosing pots and pans The diameters of pots and pans should correspond to that of the hotplate When buying pots pay attention to the fact that the manufacturer frequently specif...

Page 12: ...sta soup sauces Steaming Vegetables potatoes fish Stewing Vegetables fruit fish Braising Goulash rolled beef steaks roasts vegetables Thawing Frozen foods 3 1 Slow cooking Rice pulses Reheating keeping warm Soup casserole vegetables in a sauce Melting Butter chocolate Thickening Egg dishes Switch to the highest cooking level in order to reach the required temperature quickly Then always switch bac...

Page 13: ...OWN symbols The display of the cooking zone flashes the chosen level The selected cooking level is confirmed after a few seconds by an audible signal and the display lights constantly Alternatively you can confirm the values by again touching the cooking zone in the control panel De activating extension front left cooking zone Touch the front left cooking zone in the control panel The cooking leve...

Page 14: ...e extension symbol flashes on the display Now select the required cooking level using the UP DOWN symbols The display of both cooking zones flashes the chosen level The selected cooking level is confirmed after a few seconds by an audible signal and the display lights constantly Alternatively you can confirm the values by again touching the cooking zone in the control panel De activating extension...

Page 15: ... on the display of the selected cooking zone flashes Now select the required cooking level using the UP DOWN symbols The display of the cooking zone flashes the chosen level The selected cooking level is confirmed after a few seconds by an audible signal and the display lights constantly Alternatively you can confirm the values by again touching the cooking zone in the control panel Re touch the c...

Page 16: ...alue is confirmed a few seconds later by an audible signal and the timer starts Alternatively you can confirm the values by again touching the timer symbol in the control panel Touch the cooking zone in the display panel which you would like to timer operate The display flashes the selected cooking level Touch the timer symbol A spot appears next to the cooking level on the cooking zone display Th...

Page 17: ...witch off function Any value between 1 and 90 minutes can be entered on the timer Touch the timer symbol The timer display flashes 00 Select the required time using the UP DOWN symbols The value is confirmed a few seconds later by an audible signal and the timer starts Alternatively you can confirm the values by again touching the timer symbol in the control panel The timer display shows the elaps...

Page 18: ...el 8 or 9 again if required The appliance is set to automatically switch off a cooking zone 4 hours after the last operation The cooking zone can be switched on again as normal Switching on the child lock The appliance must be switched on by the main switch and all cooking zones should be on 0 Touch the rear left cooking zone on the display panel and keep the finger pressed Simultaneously touch th...

Page 19: ...g zones should be on 0 Touch symbols UP and DOWN when the hob is switched on You will hear a signal Keep your fingers pressed down until a second signal sounds after a few seconds and P1 lights on the timer display panel Remove fingers immediately A 04 appears on the cooking zone display panel i e a quick boil time of 4 minutes is stored You can now touch symbols UP or DOWN and select a quick boil...

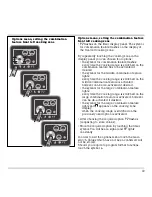
Page 20: ...ivated if desired the symbol for the large combination feature lights every time the cooking range is switched on the large combination feature is activated however can be de activated if desired the symbol for the large combination feature lights and appears on the cooking zone display when the cooking range is switched on the previously used option is activated After choosing the required option...

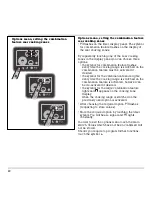
Page 21: ...ooking range is switched on the combination feature is activated however can be de activated if desired the symbol for the large combination feature lights and appears on the cooking zone display when the cooking range is switched on the previously used option is activated After choosing the required option P3 flashes requesting to store values Store the required option by touching the timer symbo...

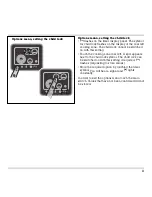
Page 22: ...e cooking zone rear left A spot appears next to the child lock symbol The child lock can be switched on with this setting if required P4 flashes requesting to store values Store the required option by touching the timer symbol You will hear a signal and P4 lights constantly In order to exit the options menu touch the main switch Values that have not been confirmed will not be stored Options menu s...

Page 23: ...cleaner while the hob is still hot as this may cause stains Do not use scouring agents abrasives or chemically aggressive cleaners for example oven cleaner Do not use any nitro polishing agents for cleaning Do not use any abrasive sponges either Food with a high sugar content e g boiled over milk jam can damage the surface of your hob Immediately remove such food using the glass scraper Iridiscent...

Page 24: ... Specify the appliance type The serial number and type of the appliance can be found on the quality control slip which is included with these instructions Repairs may only be carried out by authorised electricians in order to guarantee the safety of the appliance Unauthorised tampering with the appliance will invalidate any warranty claims 23 8 Maintenance The appliance must always be disconnected...

Page 25: ...witches off The holiday safeguard is set to Switch the cooking zone on after operating for a longer automatically switch off a cooking zone again as usual period of time 4 hours after the last operation No reaction from the hob Extremely excessive voltage in the Isolate the appliance from mains e g caused by lightning the for 30 sec by switching off the domestic fuse Control panel is soiled Clean ...

Page 26: ...ty claims can be lodged for any damage resulting from failure to observe these instructions Subject to technical change without notice Electrical connection The appliance must only be connected by an authorised specialist All corresponding regulations must be observed The mains connecting cable must at least correspond to type H 05 VV F Note for single phase connection This device is intended for ...

Page 27: ...native fixing points if required by the installation conditions Note During installation be careful that the front right clamping screw is fitted to the worktop front side as fitting the clamping screw to the side can damage the appliance base Do not tighten the clamping screws too tightly as a uniform sealing gap should be left all round Connect the appliance to the electricity Check the applianc...

Page 28: ... control panel front right into the cut out and align it Make sure to leave an even space all round Secure the appliance to the worktop with the clamping screws included Make sure the appliance is flush with the worktop 27 CK 482 is suitable for flush mounting into stone or tiled worktops Other worksurfaces i e wood plastic Corian etc are unsuitable min 60 793 513 490 2 5 780 2 5 min 30 46 min 50 ...

Page 29: ...r Follow the manufacturer s instructions Note Unsuitable silicone can permanently discolour natural stone work surfaces Do not use the appliance until the silicone is completely dry Removal of the hob Disconnect the appliance from the electricity Undo all the clamping screws Using a sharp knife cut the silicone along the edge of the glass ceramic plate From below push the hob carefully up until it...

Page 30: ...GAGGENAU HAUSGERÄTE GMBH CARL WERY STR 34 D 81739 MÜNCHEN Y 089 45 90 03 FAX 089 45 90 23 47 www gaggenau com ...

Reviews: