background image

damaged, it must be replaced immediately by the manufacturer, an 

authorised service centre or similarly qualified persons in order to 

avoid a hazard. 6 - Keep the appliance and its electric cord away 

from sources of heat and from heat-sensitive surfaces (plastic, 

vinyl, etc.). 7- Do not hold or handle the appliance by the electric 

cord. Do not wind the electric cord around the appliance, bend it or 

twist it so as not to impair its correct functioning and thus 

damage the appliance. Lack of compliance with the above 

warnings and instructions could cause a short circuit and thus 

irreparable damage to the appliance, as well as put the user’s 

safety at risk. 8- Unplug the appliance when not in use and allow it 

to cool down before storing it in a safe place. To disconnect the 

appliance, unplug the electric cord from the wall power outlet. 

9- To clean the appliance, always disconnect it from the power 

outlet first and let it cool completely. When cleaning, do not use 

aggressive products containing phenylphenol. 10- This appliance 

should only be used for its intended purpose. 11- This appliance 

has especially sharp professional blades, so use it carefully to avoid 

injuries or lesions. 12- Always turn this appliance off before 

changing one of its accessories. 13- For additional protection the

12

Summary of Contents for Barber Series

Page 1: ...MANUALE D USO LEGGERE E CONSERVARE PER CONSULTAZIONI FUTURE USER S MANUAL READANDKEEPFORFUTURENEEDS ABSOLUTE STAGE info gama eu www gamaprofessional com...

Page 2: ...INDICE INDEX ITA ITALIANO EN ENGLISH FR FRAN AIS ESP ESPA OL PT PORTUGU S RU PL POLSKI SWE SVENSKA DE DEUTSCH 03 11 18 26 33 40 48 56 63 70 77...

Page 3: ...RE ATTENTAMENTE PRIMA DI UTILIZZARE L APPARECCHIO CONSERVARE QUESTE ISTRUZIONI 1 Non utilizzare l apparecchio con le mani bagnate in luoghi umidi o su superfici bagnate Non immergerlo in acqua o in al...

Page 4: ...il cavo attorno all apparecchio di piegarlo e di sottoporlo a torsioni che possano comprometterne il corretto funzionamento e quindi danneggiare l apparecchio La mancata osservanza delle suddette avv...

Page 5: ...iginale dicitura in lingua inglese con un limite di interruzione che non superi i 30 mA Consultare il proprio elettricista Questo prodotto non deve essere utilizzato da persone con ridotte capacit fis...

Page 6: ...e sul riciclaggio di questo prodotto contattare l ufficio comunale il servizio locale di smaltimento rifiuti o il negozio in cui stato acquistato il prodotto PERIODO DI GARANZIA LIMITATA Durata de per...

Page 7: ...e alla frequenza ed ai tempi di utilizzo Per aumentare la vita delle batterie questo procedimento deve essere effettuato almeno due volte ogni 12 mesi scaricando completamente la batteria e ricaricand...

Page 8: ...astro vicino ai denti del pettine sulla lama del tagliacapelli per poi spingere la base del pettine contro la base della testina della lama fino a sentire un lieve scatto l inserimento sar cos complet...

Page 9: ...mite l apposito pennellino in dotazione rimuovere eventuali residui di peluria fra le lamelle e il retro testina della lama NON SMONTARE MAI LA TESTINA DELLA LAMA PER NON PERDERE IL DIRITTO DI GARANZI...

Page 10: ...ed ai tempi di utilizzo Sebbene si applichi una corretta manutenzione se l efficienza di taglio risultasse compromessa rivolgersi al produttore per la sostituzione dell intera testina Sul sito www ga...

Page 11: ...e reference IMPORTANT READ CAREFULLY BEFORE USING THE APPLIANCE SAVE THESE INSTRUCTIONS 1 Do not use the appliance with wet hands in a damp environment or on wet surfaces Do not immerse the appliance...

Page 12: ...cause a short circuit and thus irreparable damage to the appliance as well as put the user s safety at risk 8 Unplug the appliance when not in use and allow it to cool down before storing it in a safe...

Page 13: ...t be used by people with reduced physical motor or mental capacity including children or with limited knowledge of the appliance itself unless such people have been trained for its use or are under ad...

Page 14: ...ED WARRANTY Duration of warranty period 1 or 2 years depending on customer category in compliance with Directive 1999 44 EC For support service under warranty please take the original purchase ticket...

Page 15: ...to prolong battery life the first charge should be much longer even if the LED changes colour The first charge takes 12 hours Subsequent charges take about 90 minutes When fully charged the battery w...

Page 16: ...25 mm CLEANING AND MAINTENANCE A clean and properly lubricated hair clipper considerably improves its capacity and cutting precision DO NOT CLEAN ANY PART OF THE APPLIANCE UNDER RUNNING WATER ADJUSTAB...

Page 17: ...ppliance Lubricate the blade with a few drops of oil Turn the appliance on for a few seconds so that the oil is distributed evenly along the entire blade Then using a dry cloth eliminate any excess oi...

Page 18: ...t le conserver AVERTISSEMENTS LIRE ATTENTIVEMENT AVANT D UTILISER L APPAREIL CONSERVER CES INSTRUCTIONS 1 Ne pas utiliser l appareil avec les mains mouill es dans des lieux humides ou sur des surfaces...

Page 19: ...r de l appareil de le plier et de le soumettre des torsions susceptibles de compromettre son bon fonctionnement et d endommager l appareil Le non respect de ces avertissements et indications pourrait...

Page 20: ...ite de coupure ne d passe 30mA S adresser son lectricien Ce produit ne doit pas tre utilis par des personnes ayant des capacit s physiques y compris les enfants motrices ou mentales r duites ou encore...

Page 21: ...traitement inadapt du produit Pour de plus amples pr cisions sur le recyclage de ce produit contacter le service communal le centre local de collecte des d chets ou le magasin o on a achet le produit...

Page 22: ...ux tondeuse peut tre utilis e en le branchant directement sur la prise d alimentation lectrique si la batterie est d charg e L appareil doit tre charg lorsque la DEL de couleur rouge de chargement com...

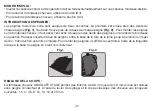
Page 23: ...r les peignes sur la tondeuse cheveux il faut poser l encoche situ e pr s des dents des peignes sur la lame de la tondeuse en question Pousser ensuite la base du peigne contre la base de la t te de la...

Page 24: ...oupe sur 0 8 mm s il est vers le haut c est dire vers la partie sup rieure du corps de l appareil ou 3 8 mm s il est maintenu vers le bas c est dire vers la partie post rieure du corps de l appareil C...

Page 25: ...utilisation Si l efficacit de la coupe semble compromise en d pit d un entretien correct s adresser au fabricant pour obtenir le remplacement de toute la t te Rendez vous sur le site www gamaprofessio...

Page 26: ...VERTENCIAS LEER ATENTAMENTE ANTES DE USAR EL PRODUCTO GUARDAR ESTAS INSTRUCCIONES 1 No utilizar el aparato con las manos mojadas en lugares h medos o sobre superficies mojadas No sumergirlo en agua o...

Page 27: ...uedan comprometer su correcto funcionamiento da ando as el aparato No seguir las indicaciones y advertencias precedentes puede causar un cortocircuito y por lo tanto da os irreparables al aparato adem...

Page 28: ...to el ctrico que alimenta el ba o Consultar con un electricista Este producto no debe ser utilizado por personas con capacidades f sicas ni os incluidos motoras o mentales reducidas o con poco conocim...

Page 29: ...A Duraci n del per odo de garant a 1 o 2 a os seg n el tipo de consumidor final conforme a lo establecido en la Directiva 1999 44 CE Para acceder al servicio de asistencia en garant a es necesario pre...

Page 30: ...la bater a se encuentre agotada Ser necesario cargar el aparato si el LED rojo de carga comenzara a parpadear La duraci n de la bater a var a seg n la frecuencia y el tiempo de uso Para aumentar la v...

Page 31: ...ario apoyar la base de encastre cercana a los dientes del peine sobre la cuchilla del cortapelos y luego empujar la base del peine contra la base del cabezal de la cuchilla hasta sentir un leve chasqu...

Page 32: ...correcto mante nimiento si la eficiencia del corte resultara comprometida dirigirse al fabricante para la sustituci n del cabezal completo En el sitio web www gamaprofessional com puedes encontrar los...

Page 33: ...as guarde ADVERT NCIAS LEIA COM ATEN O ANTES DE UTILIZAR O APARELHO GUARDE ESTAS INSTRU ES 1 N o utilize o aparelho com as m os molhadas em lugares h midos ou sobre superf cies com gua N o o mergulhe...

Page 34: ...ho bem como dobr lo ou submet lo a tor es que poderiam prejudicar o seu funcionamento adequado e portanto danificar o aparelho O incumprimento destas advert ncias e indica es poderia causar um curto c...

Page 35: ...um limite de interrup o que n o ultrapassa os 30 mA Consulte o seu eletricista Este produto n o deve ser utilizado por pessoas com capacidade f sica incluindo crian as motora ou mental reduzida ou co...

Page 36: ...liza o do cortador de cabelos aconselh vel cortar de tempos em tempos pequenas quantidades de cabelo regulando pouco a pouco o comprimento de corte at encontrar o desejado As l minas s o suscet veis a...

Page 37: ...pilha se sobrecarregue e portanto se danifique ADVERT NCIA N o tente substituir a pilha interna do cortador de cabelos Isto pode constituir um risco de inc ndio ou descargas el tricas A adultera o ir...

Page 38: ...13 19 e 25 mm LIMPEZA E MANUTEN O Um cortador de cabelos limpo e bem lubrificado melhora consideravelmente a sua capacidade e precis o de corte N O LIMPE QUALQUER PARTE DO APARELHO SOB GUA CORRENTE AL...

Page 39: ...e para a substitui o de todo o cabe ote Na website www gamaprofessional com poder encontrar os manuais de produto e as advert ncias COMO E QUANDO LUBRIFICAR A L MINA Antes da primeira utiliza o aconse...

Page 40: ...RU GAMA GAMA 1 2 3 4 40...

Page 41: ...5 6 7 8 41...

Page 42: ...9 10 11 12 13 RCD 30 42...

Page 43: ...43...

Page 44: ...24 12 60 44 ABSOLUTE STAGE 5300 RPM 1 2 12 90 120...

Page 45: ...45 3 4 O I O I 1 2 2 1...

Page 46: ...46 ABSOLUTE STAGE 0 8 3 8 1 5 3 4 5 6 10 13 19 25 3 0 8 3 8...

Page 47: ...47 4 www gamaprofessional ru XXX XX...

Page 48: ...GAMA BARBER SERIES 1 2 3 4 48...

Page 49: ...5 6 7 8 9 10 11 49...

Page 50: ...12 13 RCD 30mA 50...

Page 51: ...1 2 1999 44 51...

Page 52: ...ABSOLUTE STAGE 5300 RPM 1 2 LED LED LED 12 90 120 3 4 LED 12 52...

Page 53: ...O I O I 1 2 ABSOLUTE STAGE 0 8 mm 3 8 mm 1 5 3 4 5 6 10 13 19 25 mm 53 1 2...

Page 54: ...4 54 3 0 8 mm 3 8 mm...

Page 55: ...55 www gamaprofessional com...

Page 56: ...salonie jak i we w asnym domu Przed u yciem nale y uwa nie przeczyta instrukcj obs ugi i zachowa j ZASADY BEZPIECZE STWA UWA NIE PRZECZYTA PRZED ROZPOCZ CIEM U YTKOWANIA URZ DZENIA ZACHOWA NINIEJSZ IN...

Page 57: ...a ciep o tworzywa sztuczne tkaniny winylowe itd 7 Nie trzyma ani nie ci gn urz dzenia za kabel Nie owija kabla wok urz dzenia nie zgina go ani nie skr ca poniewa mo e to prowadzi do niew a ciwego dzia...

Page 58: ...ie dodatkowego zabezpieczenia w obwodzie elektrycznym zasilania azienki w postaci wy cznika r nicowo pr dowego ang RCD o pr dzie r nicowym nie wi kszym ni 30 mA Zasi gn porady u zaufanego elektryka Pr...

Page 59: ...iego punktu zbi rki urz dze elektrycznych i elektronicznych w celu recyklingu W a ciwa utylizacja tego produktu pozwala unikn potencjalnych negatywnych konsekwencji dla rodowiska i zdrowia jakie mog w...

Page 60: ...owania Po ca kowitym na adowaniu baterii dioda LED zmieni kolor Uwaga aby zapewni d u sz ywotno baterii za pierwszym razem nale y adowa j znacznie d u ej nawet po dioda LED zmieni kolor Czas potrzebny...

Page 61: ...za a do wyczucia zatrza ni cia nasadka jest teraz za o ona W celu zdj cia nasadki wystarczy j zsun poci gaj c j zyczek znajduj cy si u podstawy grzebienia na zewn trz REGULACJA CI CIA Maszynka do w os...

Page 62: ...jakimkolwiek innym p ynnym smarem nale y zwr ci uwag aby smar nie by zbyt lepki Odwr ci maszynk do w os w Rys 4 aby olejek na ni nie kapa Nasmarowa ostrze kilkoma kroplami olejku Aby zapewni jednorodn...

Page 63: ...araten med v ta h nder p fuktiga st llen eller v ta ytor Doppa inte i vatten eller andra v tskor 2 Anv nd inte denna apparat i n rheten av badkar eller andra vattenfyllda beh llare 3 Koppla ur apparat...

Page 64: ...e anv nds och v nta tills den svalnat innan du s tter undan den p s ker plats Det g r du genom att dra ut kontakten ur v gguttaget 9 Om du vill reng ra apparaten m ste du f rst dra ut den ur eluttaget...

Page 65: ...badkar eller andra vatt enfyllda beh llare Denna symbol p produkten eller dess f rpackning inneb r att produkten inte b r sl ngas tillsammans med vanliga hush llssopor D produkten inte ska anv ndas me...

Page 66: ...t apparaten r avst ngd 2 S tt i kontakten i str muttaget och koppla d refter apparaten till adaptern LED lad dingsindikatorn t nds och lyser med r d f rg under hela laddningsproceduren N r produkten r...

Page 67: ...ittet N R OCH HUR BLADET SKA SM RJAS BRUKSANVISNING Koppla in nskat tillbeh r Detta moment ska alltid utf ras med h rklipparen avst ngd F r att s tta ig ng h rklipparen trycker man p knappen O I F r a...

Page 68: ...n Ta bort tillbeh ret om s dant installerats Anv nd den till syftet avsedda medf ljande borsten f r att avl gsna eventuellt h r som fastnat mellan lameller och baksidan av bladets huvud MONTERA ALDRIG...

Page 69: ...att ett korrekt underh llsarbete utf rts ber vi att ni kontaktar tillverkaren f r att byta ut hela huvudet P www gamaprofessional com finner du manualer och s kerhetsvarningar Om h rklipparen anv nds...

Page 70: ...Ger t nicht mit nassen H nden in feuchter Umgebung oder auf nassen Oberfl chen Tauchen Sie das Ger t nicht in Wasser oder andere Fl ssigkeiten ein 2 Verwenden Sie dieses Ger t nicht in der N he von B...

Page 71: ...assen Sie es abk hlen bevor Sie es an einem sicheren Ort aufbewahren Um das Ger t vom Stromnetz zu trennen ziehen Sie den Netzstecker aus der Steckdose 9 Um das Ger t zu reinigen trennen Sie es immer...

Page 72: ...Sie dieses Ger t nicht in der N he von Badewannen oder anderen Beh ltern die Wasser enthalten Das Symbol auf dem Produkt oder auf der Verpackung weist darauf hin dass das Produkt nicht als normaler Ha...

Page 73: ...erie vollst ndig zu entladen und dann vollst ndig aufzuladen 1 Stellen Sie sicher dass das Ger t ausgeschaltet ist 2 Stecken Sie den Stecker in die Steckdose und verbinden Sie dann das Ger t mit seine...

Page 74: ...m ersten Gebrauch schmieren Die Angaben im Absatz WIE UND WANN DIE KLINGE ZU SCHMIEREN IST in der Gebrauchsanweisung lesen GEBRAUCHSANWEISUNGEN Setzen Sie das gew nschte Zubeh r ein Dies muss immer be...

Page 75: ...einem anderen Schmier l zu len achten Sie darauf dass es nicht zu z hfl ssig ist Drehen Sie die Schneidemaschine auf den Kopf Abb 4 so dass kein l ber die Maschine l uft Die Klinge mit ein paar Tropf...

Page 76: ...H ufigkeit und Dauer des Einsatzes Obwohl eine ordnungsgem e Wartung erforderlich ist wenden Sie sich bei Beeintr chtigung der Schneidleistung an den Hersteller um den gesamten Kopf auszutauschen Auf...

Page 77: ...77 GAMA 1 2 3 4 5 6 7 8 SERIES BARBER GAMA...

Page 78: ...78 9 10 11 12 13 RCD 30...

Page 79: ...79 1999 44 EC ABSOLUTE STAGE 5300 1 2 LED LED LED...

Page 80: ...80 12 90 120 3 4 LED 12 O I O I...

Page 81: ...81 1 2 1 2...

Page 82: ...82 ABSOLUTE STAGE 1 5 3 4 5 6 10 13 19 25 3...

Page 83: ...83 3 www gamaprofessional com...

Page 84: ...ENTRA NELLA NUOVA COMMUNITY GAMA ENTER THE NEW GAMA COMMUNITY Seguici su Follow us on MPAKM0000003661 REV04...

Reviews: