G-Technology 909112-01 Installation Manual Download Page 6


Page 6 

G-DRIVE mini Product Guide  

6.  INSTALLING G-DRIVE mini


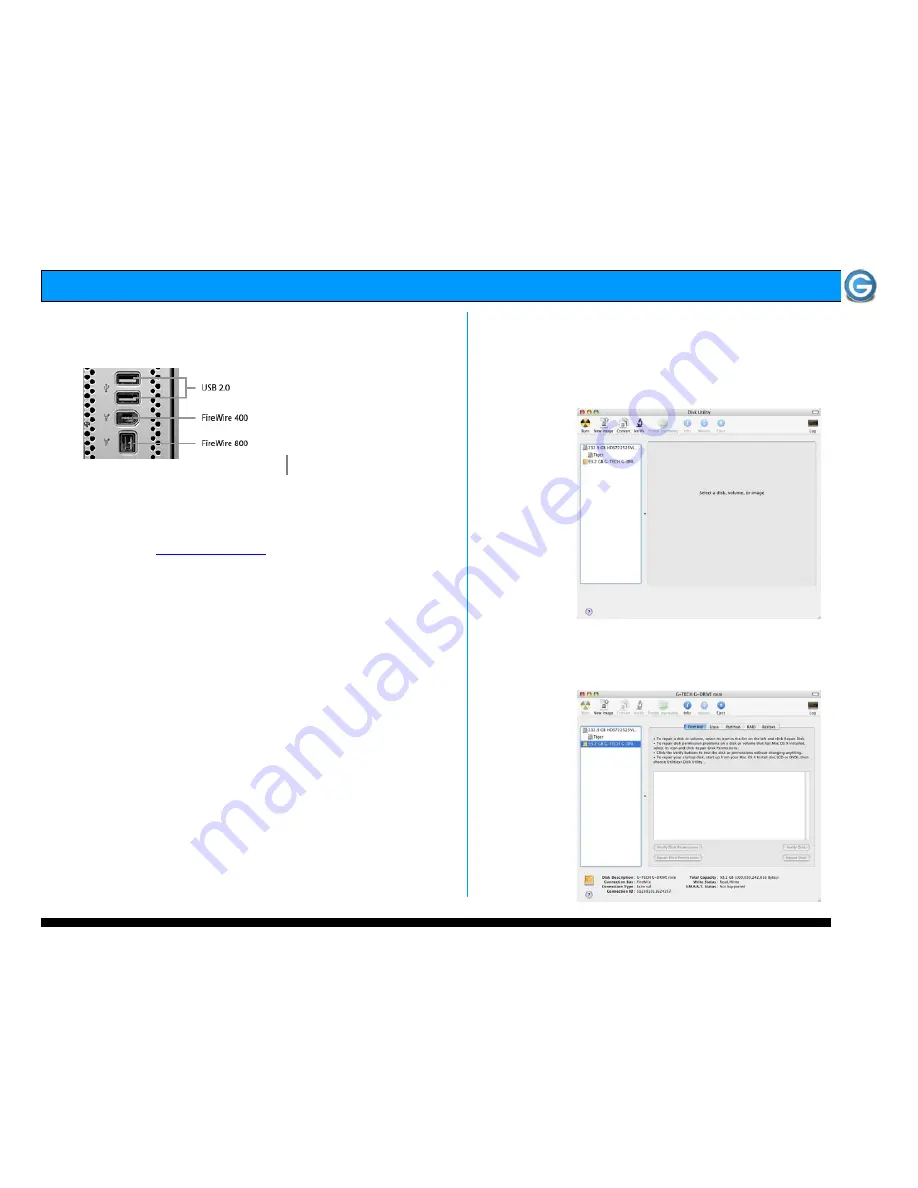
G-DRIVE mini attaches to your computer via a USB 2.0 or 

FireWire 400 or FireWire 800 port.   


6.2 Connecting the Optional Power Adapter  

1. If your computer system does not supply adequate bus 
power, plug the optional power adapter in to G-DRIVE mini.  

Attach the other end to a surge protector or wall outlet.    


Visit G-Tech at 

www.g-technology.com

 for more information or to purchase 

the optional power adapter for G-DRIVE mini.


7.  INITIALIZING G-DRIVE mini 

G-DRIVE mini is set up at the factory for use with Mac OS X 

systems.  If you are running Mac OS X, G-DRIVE mini will 
mount on the OS X desktop right out of the box. If it becomes 
necessary to re-format G-DRIVE mini, follow the instructions 

below. 


For Mac OS X installations, proceed to Section 7.1 


For Windows 2000/XP installations, proceed to Section 7.2 


For Cross-Platform use see section 7.3  


7.1 Mac OS X (10.4) 


1. Open the Apple Disk Utility. The Apple Disk Utility is in 

the Utilities Folder located in the Applications Folder on 
the Macintosh HD. A window like the following will appear.  

G-DRIVE mini will be displayed in the left-hand column. 


2. Select G-DRIVE mini by clicking on the entry in the  

left-hand column as shown below. Information about  
G-DRIVE mini will be displayed at the bottom. 


Summary of Contents for 909112-01

Page 1: ... 4 WHAT S IN THE BOX 5 G DRIVE mini OVERVIEW 6 INSTALLING G DRIVE mini 6 1 Attaching the Interface Cable to G DRIVE mini 6 2 Connecting the Optional Power Adapter 6 3 Connecting G DRIVE mini to your Computer 7 INITIALIZING G DRIVE mini 7 1 Mac OSX 7 2 Windows 2000 XP 7 3 Cross Platform use 8 UNMOUNTING DISCONNECTING G DRIVE mini 8 1 Mac OS X 10 3 x 8 2 Windows 200 XP 9 OPTIMIZING DATA TRANSFER RAT...

Page 2: ...Page 2 G DRIVE mini Product Guide ...

Page 3: ...Page 3 G DRIVE mini Product Guide ...

Page 4: ...ase handle the unit with care Do not open the case Doing so will void the warranty If the product is returned with damage caused by improper handling the warranty will be void and liability will rest with the user 3 SYSTEM REQUIREMENTS FireWire 800 USB 2 0 operation Mac OS X 10 2 4 or higher Windows 2000 or Windows XP FireWire 400 operation Mac OS 9 x or OS X Windows 2000 or Windows XP 4 WHAT S IN...

Page 5: ...Windows Users G DRIVE mini must be formatted for the Windows Operating System before use on a PC Please see section 7 2 for more information Attention Cross Platform Users G DRIVE mini can be used on both MAC and PC systems by formatting the drive FAT32 There are some limitations when using FAT 32 see section 7 3 for details Alternatively you can install software on the Windows machine such as Mac...

Page 6: ...for use with Mac OS X systems If you are running Mac OS X G DRIVE mini will mount on the OS X desktop right out of the box If it becomes necessary to re format G DRIVE mini follow the instructions below For Mac OS X installations proceed to Section 7 1 For Windows 2000 XP installations proceed to Section 7 2 For Cross Platform use see section 7 3 7 1 Mac OS X 10 4 1 Open the Apple Disk Utility The...

Page 7: ...mat to Mac OS Extended as shown below Note Alternatively G DRIVE mini can be set up in multiple volumes by selecting the desired number of partitions from the Volume Scheme pull down menu 5 Click on the Partition button The dialog box shown below will appear Click on the Partition button to continue 6 When partitioning is complete G DRIVE mini will be displayed in the left hand panel as shown belo...

Page 8: ...n power on your computer 2 Open the Disk Management utility by right clicking on the My Computer icon on the desktop and selecting Manage from the drop down menu as shown below 3 The Computer Management console will appear as shown below Click on Disk Management in the left hand panel G DRIVE mini is identified as Disk 1 in this example Right click on Disk 1 and select Initialize Disk from the pul...

Page 9: ...now identified as Basic and Online 6 Right click on the Disk 1 Unallocated bar entry and select New Partition from the pull down menu as shown below 7 The window shown below will appear Click on the Next button to continue 8 The following window will appear Click on the Next button to continue ...

Page 10: ... DRIVE mini Consult your Windows documentation for instructions on setting up multiple partitions 10 Windows will automatically assign a drive letter in this example E Accept this assignment and click on the Next button to continue 11 Enter a Volume Label in this example G DRIVE mini check the Perform a quick format box and click on the Next button to continue 12 The following window will appear C...

Page 11: ...our G DRIVE mini for use on both Windows and Macintosh systems use the Apple Disk utility and format G DRIVE mini FAT32 1 Open the Apple Disk Utility The Apple Disk Utility is in the Utilities Folder located in the Applications Folder on your system drive A window like the one below will appear 2 Select the G DRIVE mini from the left hand column then select the Erase button at the top as shown Sel...

Page 12: ...e com 8 UNMOUNTING DISCONNECTING G DRIVE mini A great feature of G DRIVE mini is its ability to be connected and disconnected while your computer is running To prevent failures and or data loss it is important to follow the steps below when unmounting disconnecting G DRIVE mini from your computer 8 1 Mac OS X Computers 1 Before powering down and disconnecting G DRIVE mini you must unmount the syst...

Page 13: ...uct should become defective within the warranty period G Tech will at its discretion repair or replace the product Repair or replacement parts or products will be furnished on an exchange basis and will be either new or reconditioned All replaced parts or products shall become the property of G Tech This warranty shall not apply if the product has been damaged by accident misuse abuse or as a resu...

Reviews: