


Page 11
G-DRIVE mini Product Guide
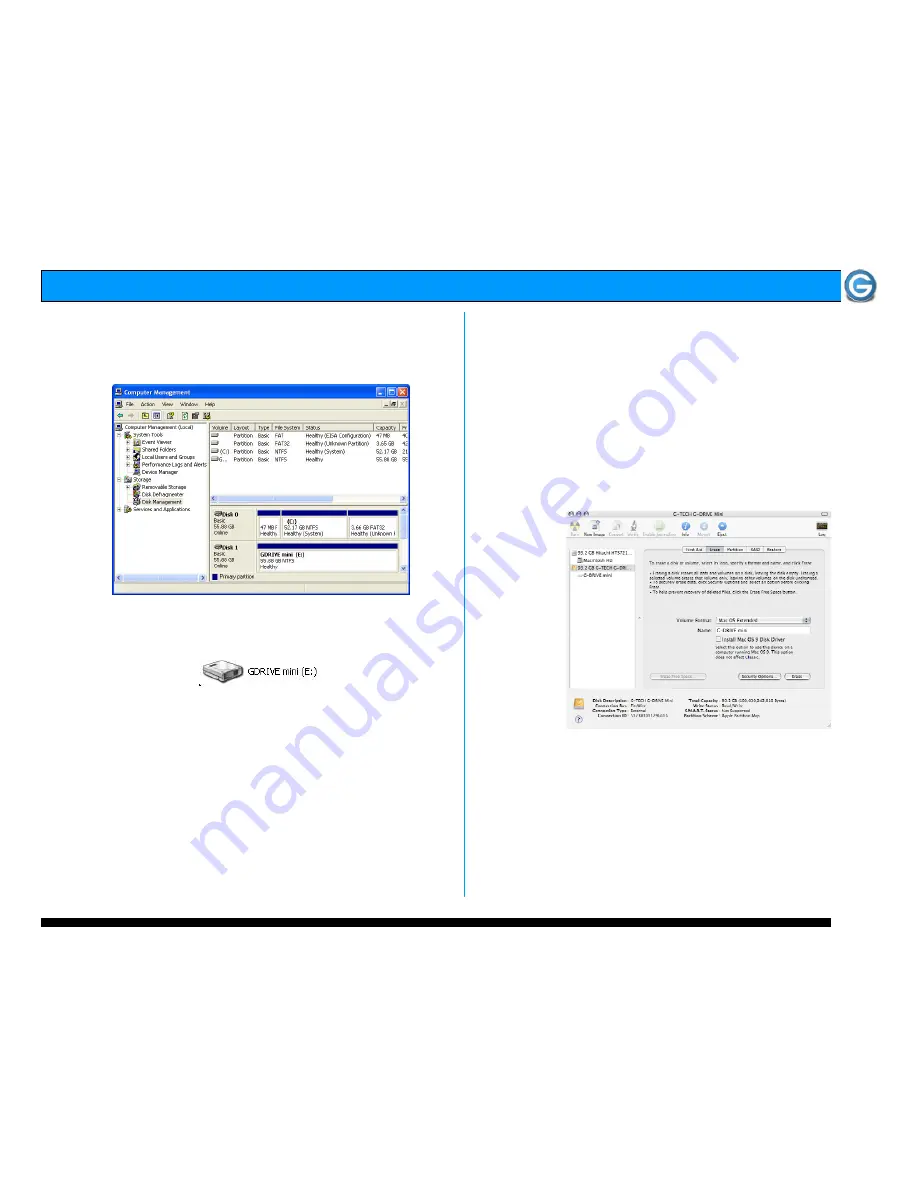
13. Windows will format the volume and then display the
following window. Disk 1 is now identified as G-DRIVE mini
(E:). Exit the Computer Management console.
14. G-DRIVE mini will now be displayed as an available
hard disk drive under My Computer as shown below.
G-DRIVE mini is now set up for use!!
7.3. Cross Platform Use
To setup your G-DRIVE mini for use on both Windows and
Macintosh systems, use the Apple Disk utility and format
G-DRIVE mini FAT32.
1.
Open the Apple Disk Utility. (The Apple Disk Utility is in
the Utilities Folder located in the Applications Folder
on your system drive). A window like the one below will
appear.
2.
Select the G-DRIVE mini from the left-hand column,
then select the “Erase” button at the top as shown.
Select MS-DOS File System from the drop down menu
and Enter “G-DRIVE mini” in the Name field.
3.
Click on the erase button and the screen on the next
page will appear.


