
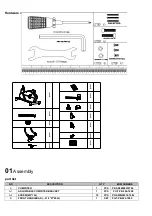

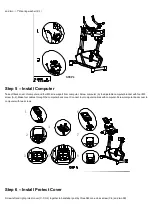

Insert the Right Pedal (F-R) into the right arm of the Crank
assembly (D-14R) and finger tighten in a clockwise direction
until the thread is fully inserted in the crank.
Repeat for the Left Pedal (F-L) finger tighten in an anticlockwise
direction to the crank assembly ( D-14L). Tighten both with the
wrench.
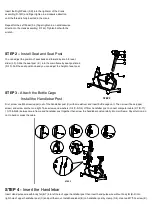
STEP 2
–
Install Seat and Seat Post
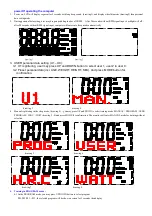
You can adjust the position of seat back and forward by knob for seat
slider (J-3). Slide the seat post ( E ) into the main frame by seat post knob
(D-10). Pull the seat post knob and you can adjust the height of seat post..
STEP 3 -
Attach the Bottle Cage
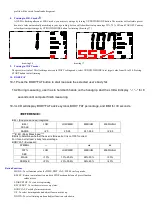
Install the Handlebar Post
First, screw one M5 screw (upper) out of the handlebar post (C) with screwdriver and insert bottle cage on it. Then screw it back (upper
screw) and screw another one tight. Take screws and washers (C-4/C-5/C-6) off from handlebar post. Connect computer cable (C-7/D-17)
( C-10& D-28) between main frame and handlebar post together then screw the handlebar post carefully into main frame. Pay attention, do
not to bend or press the cable.
STEP 3
STEP 4 -
Insert the Handlebar
Insert Hand pulse wire with body fat (B-7) into left hole of upper handlebar post then insert hand pulse wire without body fat (B-2) into
right hole of upper handlebar post (C) and pull them out. Install handlebar (B) on handlebar post by clamp (C-4). Use two M7*30L screw (K).
STEP 2
Summary of Contents for TZ-7016
Page 1: ...TZ 7016...