background image

- 7 -

Step 1

Fixed auxiliary pedal
Assembly instructions:
(1) Remove the left and right auxiliary pedal packaging materials
(2) Fix the auxiliary pedal in the position shown in the figure, pay attention to
distinguish between left and right pedals.

Summary of Contents for TZ-2040B

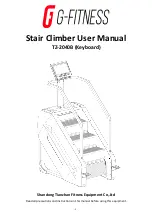
Page 1: ...1 Stair Climber User Manual TZ 2040B Keyboard Shandong Tianzhan Fitness Equipment Co Ltd Read all precautions and instructions in this manual before using this equipment...

Page 2: ...2 Catalogue Caution 3 Technical Standards 4 The Whole Machine Diagram 5 The Installation Process 6 Stair climber operating instructions 11 Routine maintenance 13...

Page 3: ...ure to adjust slowly adjustment as far as possible D People walk down the stair climber in case of confirming safety 7 Any part of treadmill can not be in loose status 8 Incorrect or overload training...

Page 4: ...ator to maintain the voltage in the demand voltage 17 This machine is confirmed to the type of CS in EN 957 6 Technical Standards Input power supply voltage AC220V 10 Time display range 0 00 99 59 Hei...

Page 5: ...5 The Whole Machine Diagram Head TZ 7037B is 13 3 inch LED meter Armrests Screen support Cyclic steps Auxiliary pedal External shell Photoelectric switch...

Page 6: ...ine will be placed and ensure there is enough space around the stair machine Place all parts of the stair machine in the empty area and remove all packing materials Do not discard the packing material...

Page 7: ...iliary pedal Assembly instructions 1 Remove the left and right auxiliary pedal packaging materials 2 Fix the auxiliary pedal in the position shown in the figure pay attention to distinguish between le...

Page 8: ...mbly instructions 1 docking the screen support tube communication line with the stair plane main frame communication line 2 Fix the screen support tube to the corresponding position on the main frame...

Page 9: ...tion line Assemble details 1 Connect the screen support tube communication line to the display communication line 2 After docking the communication line place the meter on the joint with the support f...

Page 10: ...the wires are fixed in place and it is judged that there is no obstruction in operation Then the back cover of the stair machine is inserted into the inner side from the bottom up so that the two side...

Page 11: ...splay the movement time and climb height The time is positive from 0 00 99 59 When it is timed to 99 59 it will be cleared and restarted The climb height is from 0 0 to 999 9 counting Cleared to 999 9...

Page 12: ...le 2 Turn on the power energize the machine step on the stair machine press all the buttons on the electronic watch observe whether each button corresponds to the function it indicates whether the but...

Page 13: ...day for the following problems Belt slip Loose fasteners Abnormal noise Any other signs that the equipment may need to be repaired 3 weekly maintenance Perform the following maintenance tasks weekly 1...

Reviews: