4. INCORPORATION OF DGPS BEACON RECEIVER KIT (for GP-1650WF)
4-5
Beacon receiver
GR-7000A
J1
J3
Cable assy.
S.FL2-2LP0.7-D-WHT (121)
Notch
Cable assy.
S.FL2-2LP0.7-D-WHT (175)
Beacon receiver
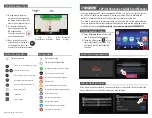
8. Connect cable assy. S.FL2-2LP0.7-D-WHT (121) (supplied) to J3 of the GR-7000A.
9. Close the lid of the GR-7000A.
10. Connect connector assy. PH6P-W-L240 to J2 of GR-7000A (Refer to the figure below).
11. Fasten the GR-7000A (Beacon receiver) to the heat sink with four M3X10 screws
(supplied) as shown in the figure below.
Connect to
J2 on GN-8091.
Connect to
J106 on
MAIN Board.
GN-8091
Heat sink
S.FL2-2LPO.7-D-WHT (121)
Cover of GR-7000A
Cable assy.
PH6P-W-L240
Beacon receiver board
GR-7000A
J2
Pan-head screw B
M3X10, 4 pcs.
Notch
Connect to J107
on MAIN Board
Connect to
J8 on ANLG
Board.
Installation of DGPS beacon receiver
Summary of Contents for GP-1650WDF
Page 1: ...PRINTED IN JAPAN COLOR GPS PLOTTER SOUNDER COLOR DGPS PLOTTER SOUNDER GP 1650WF GP 1650WDF...
Page 8: ...EQUIPMENT LISTS vi This page is intentionally left blank...
Page 30: ...1 INSTALLATION 1 22 This page is intentionally left blank...
Page 36: ...2 WIRING 2 6 This page is intentionally left blank...
Page 54: ...This page is intentionally left blank...
Page 58: ......
Page 59: ......
Page 60: ......
Page 61: ......
Page 62: ......
Page 63: ......
Page 64: ......
Page 65: ......
Page 66: ......
Page 67: ......
Page 68: ......
Page 69: ......
Page 70: ......
Page 71: ......
Page 72: ......
Page 73: ......
Page 74: ......


