36
Reco
rdin
g
EN
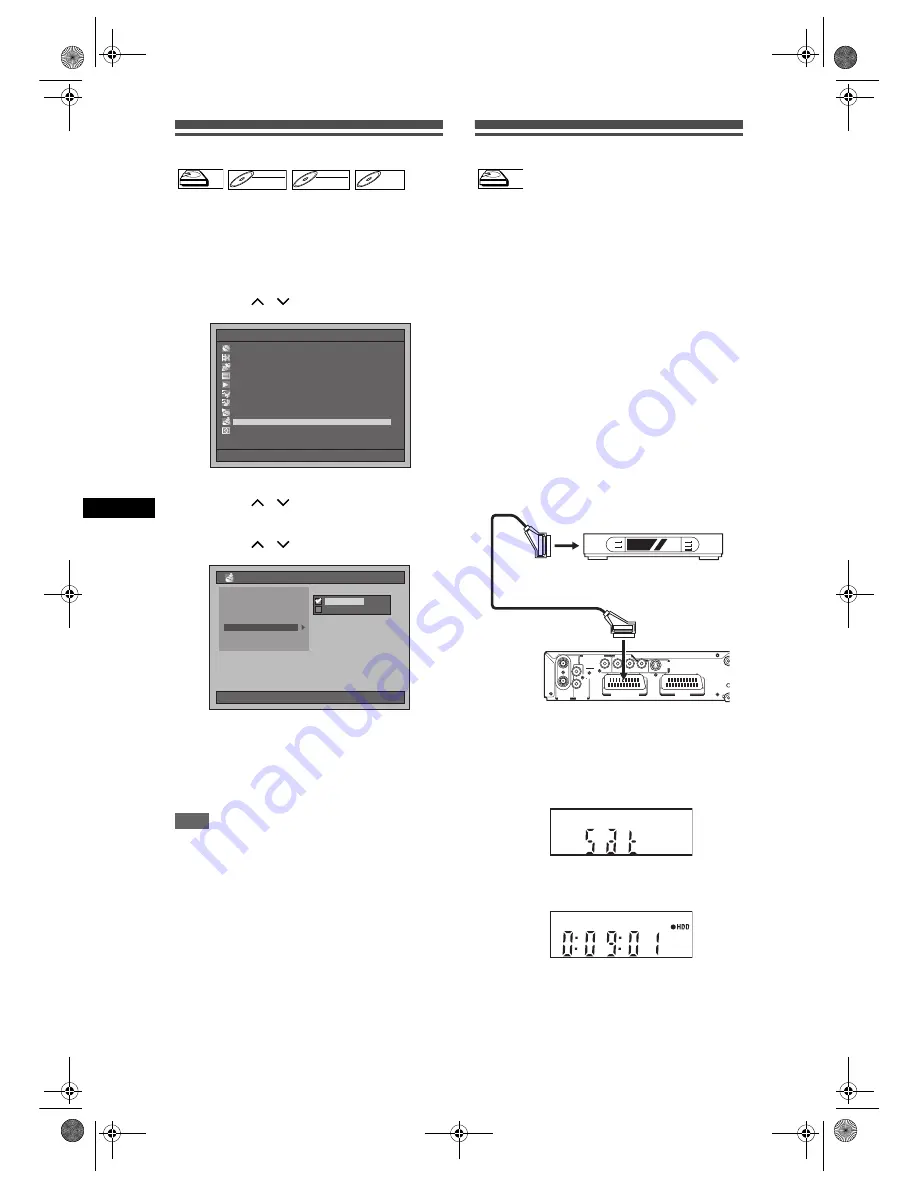
Setting External Input Audio
When recording from the external equipment, select
“Stereo” or “Bilingual” to match the audio type of what
you are recording.
1
Press [SETUP] in stop mode.
Setup Menu will appear.
2
Select “Recording” using
[Cursor
/
], then press [ENTER].
3
Select “External Input Audio” using
[Cursor
/
], then press [ENTER].
4
Select the desired setting using
[Cursor
/
], then press [ENTER].
• Stereo : Stereophonic sound
• Bilingual : Main and Sub audio
The selected setting will be checked and
activated.
• The default setting is “Stereo”.
5
Press [SETUP] to exit.
Hint
• If you try to record bilingual audio onto a Video
mode DVD-RW / R disc and when “Bilingual” is
selected, only either one of main or sub audio will be
recorded. (See “Setting Bilingual Recording Audio”
on page 30 for more detail.)
• When recording the bilingual audio from the external
equipment, make sure to select “Bilingual”. If you
select “Stereo”, a mixture of main and sub audio will
be heard when playing back.
Satellite Link
You can set the unit to start recording whenever it
detects the scart control signal from the external
tuner.
Preparing for the Satellite Link Timer Recording:
[Preparation of the external tuner]
• The external tuner should be equipped with
some kind of timer function. Using timer function
of the tuner, set it to be turned on when it comes
to the time you want to start recording, and off
when it comes to the time you want to finish
recording. (Refer to the tuner’s manual on how
to set the timer.)
• Make sure to turn off the external tuner when
you finish setting.
[Preparation of this unit]
• Make sure to select the desired Recording
mode beforehand.
• Make sure to set “Bilingual Recording Audio”,
“Fast Dubbing Audio (Video Mode)” and
“External Input Audio” in the “Recording” setting
correctly.
1
Press [SATELLITE LINK].
The unit will be turned off automatically as it goes
into the Satellite Link standby mode.
• “sat” will appear on the front panel display when
you press
[SATELLITE LINK].
• When the Satellite Link Recording starts,
counter and “
I
HDD” will appear on the front
panel display.
• When the Satellite Link Timer Recording is over,
the unit returns to the Satellite Link standby
mode unless you cancel the Satellite Link
function.
HDD
HDD
DVD-RW
DVD-RW
VR
DVD-RW
DVD-RW
Video
DVD-R
DVD-R
Setup Menu
10/04/06(Mon)
19:34
Disc Management
Editing
Dubbing
Timer Programme
Title List
Initial Setting
Digital Audio Setting
Playback
Recording
Display
10/04/06(Mon)
19:34
Recording
Noise Reduction
Fast Dubbing Audio (Video Mode)
Recording Audio Select [XP]
Initialise
Auto Chapter [HDD]
External Input Audio
Bilingual Recording Audio
Bilingual
Stereo
HDD
HDD
IN
AV2 (DECODER)
AV1 (TV)
Y
P
B
/C
B
P
R
/C
R
L
OUT
R
ANALOG
AUDIO OUT
ANTENNA
IN
COAXIAL
Y
P
B
/C
B
P
R
/C
R
S-VIDEO
OUT
DIGITAL AUDIO OUTPUT
PCM/BITSTREAM
COMPONENT
VIDEO OUTPUT
AV1 (TV)
AV2 (DECODER)
OPTICAL
Scart cable (not supplied)
External tuner
(not supplied)
E2B21BD_E2B28BD_EN.book Page 36 Monday, August 21, 2006 5:05 PM


