background image

CX122 S1

Operating Manual

27

Installing / replacing a PRIMERGY CX122 S1 server

4.2

Installing / replacing a PRIMERGY CX122 
S1 server

V

CAUTION!

Follow the safety instructions in the chapter 

"Important information" on 

page 17

.

4.2.1

Removing a PRIMERGY CX122 S1 server

I

A defective PRIMERGY CX122 S1 server is maintained by Fujitsu 
service technicians. The warranty is void if the server is damaged during 
installation or replacement of system expansions.

Ê

Shut down the server.

For information on controls and indicators, please refer to 

section "Front 

panel" on page 41

.

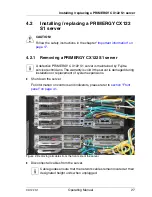
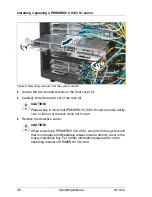
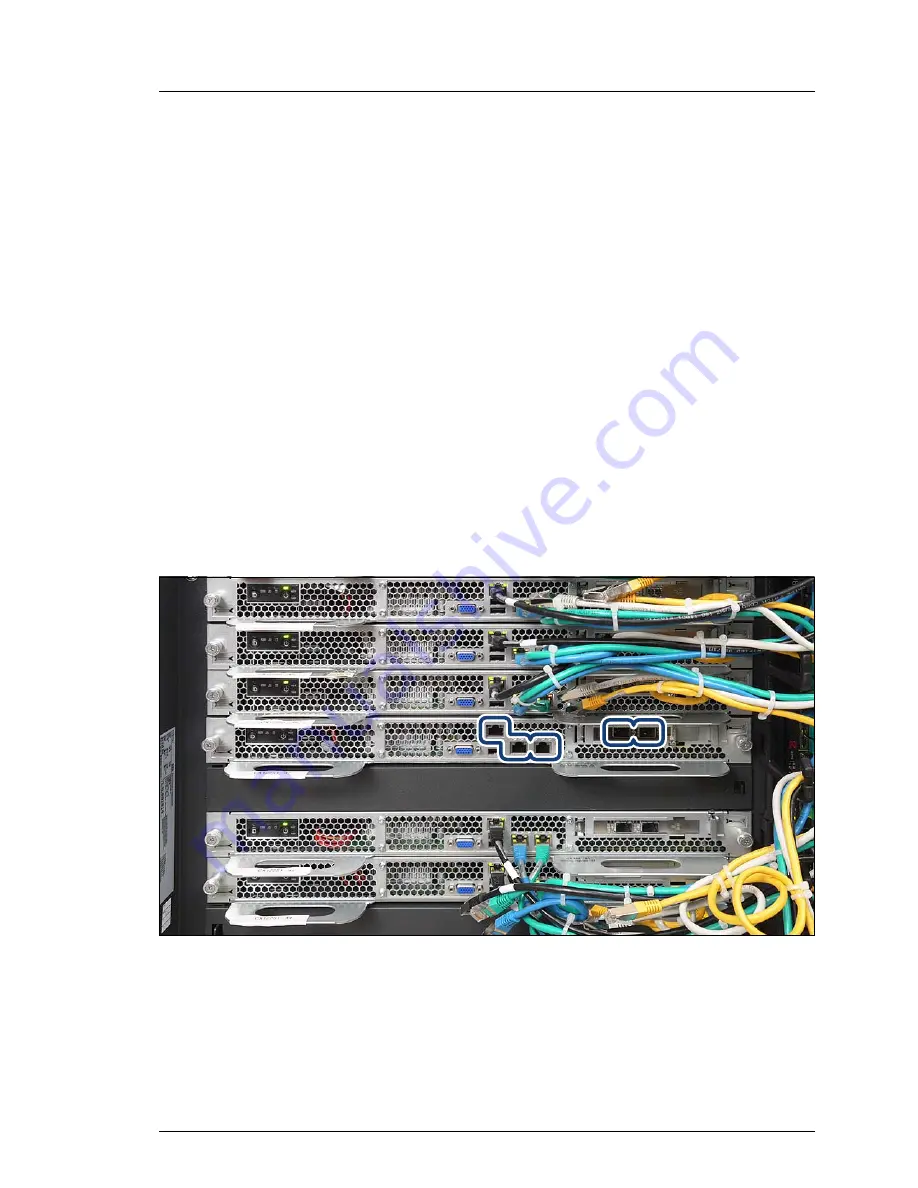
Figure 2: Removing all cables from the front side of the server

Ê

Disconnect all cables from the server.

I

Cable guides ensure that the network cables remain located at their 
designated height units when unplugged.

Summary of Contents for PRIMERGY CX122 S1

Page 1: ...Operating Manual English PRIMERGY CX122 S1 Server Operating Manual Edition November 2010 ...

Page 2: ... Copyright and Trademarks Copyright 2010 Fujitsu Technology Solutions GmbH All rights reserved Delivery subject to availability right of technical modifications reserved All hardware and software names used are trademarks of their respective manufacturers The contents of this manual may be revised without prior notice Fujitsu assumes no liability for damages to third party copyrights or other righ...

Page 3: ...n the mouse and keyboard are limited life components Use of these components beyond their operating life may result in electrolyte leakage or depletion potentially causing emission of foul odor or smoke As a guideline in a normal office environment 25 C operating life is not expected to be reached within the maintenance support period 5 years However operating life may be reached more quickly if f...

Page 4: ...mputer issued by JEITA the Japan Electronics and Information Technology Industries Association Technology controlled by the Foreign Exchange and Foreign Trade Control Law of Japan Documents produced by Fujitsu may contain technology controlled by the Foreign Exchange and Foreign Trade Control Law of Japan Documents which contain such technology should not be exported from Japan or transferred to n...

Page 5: ...patibility 17 3 2 Safety instructions 17 3 3 CE conformity 22 3 4 FCC Class A Compliance Statement 22 3 5 Environmental protection 23 4 Hardware installation 25 4 1 Installation Procedure 26 4 2 Installing replacing a PRIMERGY CX122 S1 server 27 4 2 1 Removing a PRIMERGY CX122 S1 server 27 4 2 2 Installing a PRIMERGY CX122 S1 server 29 4 3 Connecting devices and cables 32 4 3 1 Connecting devices ...

Page 6: ...s 39 5 2 Front panel 41 5 2 1 Controls 42 5 2 2 Indicators 43 5 3 Switching the server on and off 44 5 3 1 Switching the server on 44 5 3 2 Switching the server off 45 5 4 Configuring the server 45 5 4 1 Operating system installation 45 Index 49 ...

Page 7: ...000 rack infrastructure are all purpose servers with top dual processor performance for cloud computing data centers Despite the compact form factor each PRIMERGY CX122 S1 server offers eighteen DDR3 memory slots for up to 144 GB of RAM and up to two 2 5 inch SATA hard disk drives 1 1 Concept and target groups for this manual This manual will familiarize you with the controls and indicators of you...

Page 8: ...ERGY CX1000 S1 System Unit PRIMERGY CX120 S1 Server Operating Manual I PRIMERGY manuals are available in PDF format on the ServerView Suite DVD 2 The ServerView Suite DVD 2 is part of the ServerView Suite supplied with every server If you no longer have the ServerView Suite DVDs you can obtain the relevant current versions using the order number U15000 C289 the order number for the Japanese market...

Page 9: ...erver nodes using the minimum of electrical energy to move air The fans mounted at the top of the rack do not cool the servers directly but exhaust air from a low pressure chamber which subsequently draws the air through the servers The control of the fans is an autonomous function see Rack Management Unit RMU operating manual and serves to maintain a constant under pressure in this chamber System...

Page 10: ... node cooling concept allows for virtually wear free operation 1 4 Notational conventions The following notational conventions are used in this manual Text in italics indicates commands or menu items Quotation marks indicate names of chapters and terms that are being emphasized Ê describes activities that must be performed in the order shown V CAUTION pay particular attention to texts marked with ...

Page 11: ...ated current L5500 series CPUs 200 V 240 V 0 8 A Rated current idle mode 200 V 240 V 0 3 A depending on configuration application Effective power X E L series CPUs 286 W 192 W 185 W depending on configuration application Apparent power X E L series CPUs 302 VA 206 VA 200 VA depending on configuration application Heat dissipation X E L series CPUs 1029 KJ h 975 btu h 691 KJ h 654 btu h 666 KJ h 631...

Page 12: ...lectromagnetic compatibility International AS NZS CISPR22 Class A Europe CE Class A EN 55022 EN 55024 EN 61000 3 2 EN 61000 3 3 ETSI EN 300386 USA Canada FCC Class A ICES 003 Class A Taiwan CNS 13438 Class A China CCC GB 9245 GB 17625 Japan VCCI Class A CE marking to EU directives Low Voltage Directive 2006 95 EC Electromagnetic compatibility 2004 108 EC Width 483 mm front panel Depth 454 mm Heigh...

Page 13: ...1 3 3 class 3K2 ETSI 300 019 2 3 Class 3 1 Temperature Operation 3K2 10 C 35 C Transport 2K2 25 C 60 C Humidity 10 85 RH non condensing Condensation during operation must be avoided Conditions of use Air quality The system complies with regulation Class 3S2 according to DIN EN 60721 3 3 for product class B Sound power level LWAd ISO 9296 SATA sub system no active cooling Sound pressure level at ad...

Page 14: ...14 Operating Manual CX122 S1 Technical data ...

Page 15: ...mportant information on page 17 Ê Your PRIMERGY CX1000 system has been unpacked and set up by a Fujitsu service technician Make sure that the accompanying documentation see Documentation overview on page 8 is complete Print out the required PDF files if necessary Ê Familiarize yourself with the controls and indicators on the front of the CX122 S1 server nodes see section LAN indicators on page 39 ...

Page 16: ...16 Operating Manual CX122 S1 ...

Page 17: ...vice meets the relevant safety regulations for IT equipment If you have any questions about whether you can install the server in the intended environment please contact your sales outlet or our customer service team V CAUTION The actions described in this manual shall be performed by technical specialists A technical specialist is a person who is trained to install the server including hardware a...

Page 18: ...al damage may be caused to the device if this requirement is not observed Installation mounting and removal activities involving the CX1000 system unit may only be performed by technicians service personnel or technical specialists Ignoring the instructions in this manual can result in personal injury or damage to equipment risk of tipping over etc When the unit is transported it is only allowed t...

Page 19: ...et inside the server risk of electric shock short circuit Data cables must be adequately shielded The EN 50173 and EN 50174 1 2 standards apply for LAN cabling The minimum requirement is the use of a category 5 screened LAN cable for 10 100 Mbit s Ethernet or a category 5e cable for Gigabit Ethernet The requirements from the ISO IEC 11801 specification must also be met Route the cables in such a w...

Page 20: ...r from the system unit always install a dummy cover in the empty installation bay Only install system expansions that satisfy the requirements and rules governing safety and electromagnetic compatibility and those relating to telecommunication terminals If you install other expansions they may damage the system or violate the safety regulations Information on which system expansions are approved f...

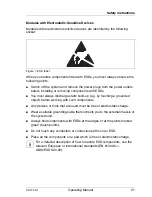
Page 21: ...ys discharge static build up e g by touching a grounded object before working with such components Any devices or tools that are used must be free of electrostatic charge Wear a suitable grounding cable that connects you to the external chassis of the system unit Always hold components with ESDs at the edges or at the points marked green touch points Do not touch any connectors or conduction paths...

Page 22: ...ence to radio communications However there is no warranty that interference will not occur in a particular installation If this equipment does cause harmful interference to radio or television reception which can be determined by turning the equipment off and on the user is encouraged to try to correct the interference by one or more of the following measures Reorient or relocate the receiving ant...

Page 23: ... has been designed in accordance with the Fujitsu Technology Solutions standard for environmentally friendly product design and development This means that key factors such as durability selection and labeling of materials emissions packaging ease of dismantling and recycling have been taken into account This saves resources and thus reduces the harm done to the environment Energy saving informati...

Page 24: ...ficult to recycle them Returns recycling and disposal Details regarding the return and recycling of devices and consumables within Europe can also be found in the Returning used devices manual via your local Fujitsu Technology Solutions branch or from our recycling center in Paderborn Fujitsu Technology Solutions Recycling Center D 33106 Paderborn Tel 49 5251 8 18010 Fax 49 5251 8 333 18010 The de...

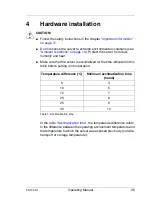
Page 25: ... and heat Make sure that the server is acclimatized for the time indicated in this table before putting it into operation In the table Acclimatization time the temperature difference refers to the difference between the operating environment temperature and the temperature to which the server was exposed previously outside transport or storage temperature Temperature difference C Minimum acclimati...

Page 26: ... the PRIMERGY CX1000 and ready to operate Make sure that the accompanying documentation see Documentation overview on page 8 is complete Print out the required PDF files if necessary Ê Unpack all individual parts Keep the original packaging in case you want to transport the server again Ê Check whether all the necessary details have been entered on the first page of the guarantee booklet Ê Check w...

Page 27: ...X122 S1 server is maintained by Fujitsu service technicians The warranty is void if the server is damaged during installation or replacement of system expansions Ê Shut down the server For information on controls and indicators please refer to section Front panel on page 41 Figure 2 Removing all cables from the front side of the server Ê Disconnect all cables from the server I Cable guides ensure ...

Page 28: ...t of the rack 2 V CAUTION Please keep in mind that PRIMERGY CX122 S1 server nodes will tip over or fall out of the rack if slid out too far Ê Remove the defective server V CAUTION When removing a PRIMERGY CX122 S1 server from the system unit that is not replaced immediately always install a dummy cover in the empty installation bay For further information please refer to the operating manual of PR...

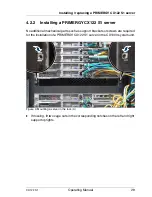
Page 29: ...122 S1 server No additional mechanical parts such as support brackets or screws are required for the installation of a PRIMERGY CX122 S1 server in the CX1000 system unit Figure 4 Mounting a server in the rack A Ê If missing fit two cage nuts in the corresponding notches on the left and right support uprights ...

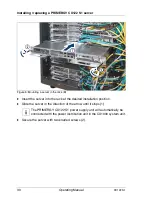
Page 30: ...B Ê Insert the server into the rack at the desired installation position Ê Slide the server in the direction of the arrow until it stops 1 I The PRIMERGY CX122 S1 power supply unit will automatically be connected with the power distribution unit in the CX1000 system unit Ê Secure the server with two knurled screws 2 ...

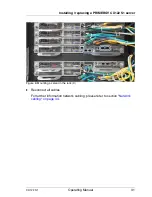
Page 31: ...ing Manual 31 Installing replacing a PRIMERGY CX122 S1 server Figure 6 Mounting a server in the rack C Ê Reconnect all cables For further information network cabling please refer to section Network cabling on page 34 ...

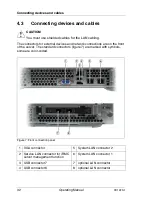
Page 32: ...and network connections are on the front of the server The standard connectors figure 7 are marked with symbols some are color coded Figure 7 Front connection panel 1 VGA connector 5 System LAN connector 2 2 Service LAN connector for iRMC server management function 6 System LAN connector 1 3 USB connector 7 7 optional LAN connector 4 USB connector 6 8 optional LAN connector 5 4 3 2 1 0 6 ...

Page 33: ...mponents with large power requirements e g external USB hard disk drives are connected simultaneously these USB ports may be switched off 4 3 2 Connecting disconnecting cables V CAUTION Always read the documentation supplied with the device you wish to connect Never connect or disconnect cables during a thunderstorm Never pull on a cable when disconnecting it Always take hold of the cable by the p...

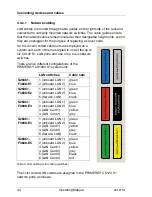
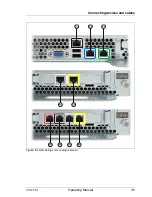
Page 34: ...rk switches There are five different configurations of the PRIMERGY CX1000 S1 system unit The color coded LAN cables are assigned to the PRIMERGY CX122 S1 network ports as follows LAN switches Cable sets S26361 F3608 E1 1 onboard LAN 1 2 onboard LAN 2 green blue S26361 F3608 E2 1 onboard LAN 1 2 onboard LAN 2 5 Service LAN green blue black S26361 F3608 E3 1 onboard LAN 1 2 onboard LAN 2 3 LAN Card...

Page 35: ...CX122 S1 Operating Manual 35 Connecting devices and cables Figure 8 LAN cabling color coding servers ...

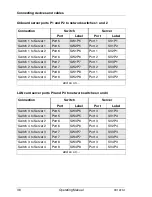
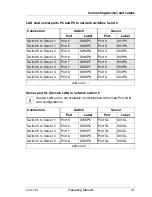
Page 36: ... to Server 3 Port 7 SW1P7 Port 1 SV3P1 Switch 2 to Server 3 Port 7 SW2P7 Port 2 SV3P2 Switch 1 to Server 4 Port 8 SW1P8 Port 1 SV4P1 Switch 2 to Server 4 Port 8 SW2P8 Port 2 SV4P2 and so on Connection Switch Server Port Label Port Label Switch 3 to Server 1 Port 5 SW3P5 Port 3 SV1P3 Switch 4 to Server 1 Port 5 SW4P5 Port 4 SV1P4 Switch 3 to Server 2 Port 6 SW3P6 Port 3 SV2P3 Switch 4 to Server 2 P...

Page 37: ...V1P6 Switch 5 to Server 2 Port 6 SW5P6 Port 5 SV2P5 Switch 6 to Server 2 Port 6 SW6P6 Port 6 SV2P6 Switch 5 to Server 3 Port 7 SW5P7 Port 5 SV3P5 Switch 6 to Server 3 Port 7 SW6P7 Port 6 SV3P6 Switch 5 to Server 4 Port 8 SW5P8 Port 5 SV4P5 Switch 6 to Server 4 Port 8 SW6P8 Port 6 SV4P6 and so on Connection Switch Server Port Label Port Label Switch 5 to Server 1 Port 5 SW5P5 Port SL SV1SL Switch 5...

Page 38: ...38 Operating Manual CX122 S1 Connecting devices and cables ...

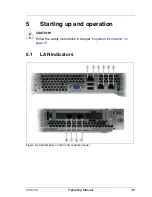
Page 39: ...ing Manual 39 5 Starting up and operation V CAUTION Follow the safety instructions in chapter Important information on page 17 5 1 LAN indicators Figure 9 LAN indicators on the front connection panel 6 1 5 4 3 0 2 1 2 ...

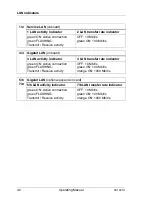
Page 40: ... 4 Gigabit LAN onboard 3 LAN activity indicator 4 LAN transfer rate indicator green ON Active connection green FLASHING Transmit Receive activity OFF 10 Mbit s green ON 100 Mbit s orange ON 1000 Mbit s 5 6 7 8 Gigabit LAN optional expansion card 5 6 LAN activity indicator 7 8 LAN transfer rate indicator green ON Active connection green FLASHING Transmit Receive activity OFF 10 Mbit s green ON 100 ...

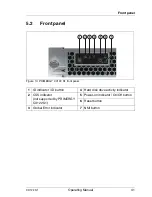
Page 41: ...nt panel Figure 10 PRIMERGY CX122 S1 front panel 1 ID indicator ID button 4 Hard disk drive activity indicator 2 CSS indicator not supported by PRIMERGY CX122 S1 5 Power on indicator On Off button 6 Reset button 3 Global Error indicator 7 NMI button ...

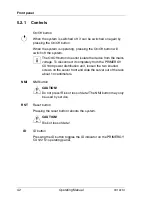
Page 42: ...he mains voltage To disconnect it completely from the PRIMERGY CX1000 power distribution unit loosen the two knurled screws on the server front and slide the server out of the rack about 10 centimeters NMI NMI button V CAUTION Do not press Risk of loss of data The NMI button may only be used by service RST Reset button Pressing the reset button reboots the system V CAUTION Risk of loss of data ID ...

Page 43: ...n Flashes orange if an error was detected that requires service intervention Does not light up if there is no critical event If the event is still acute after a power failure the indicator is activated after the restart The indicator also lights up in standby mode You can find more details on the indicated errors in the System Event Log CSS CSS indicator yellow Not used At present the PRIMERGY CX1...

Page 44: ...stem configuration For further information please refer to section Configuring the server on page 45 System already installed Hard disk drives installed Local boot Ê Press the On Off button item 5 in figure 10 on page 41 The server is switched on performs a system test and boots the operating system No hard disk drives installed iSCSI boot iSCSI Internet SCSI is a protocol for linking servers and ...

Page 45: ...n refer to D2899 BIOS Setup Utility for PRIMERGY CX122 Reference Manual If RAID mode is enabled the RAID must be configured during boot up to use hard disk drives For further information refer to the Embedded MegaRAID Software User s Guide on the ServerView Suite DVD 2 under Industry Standard Servers Expansion Cards Storage Adapters LSI RAID SCSI Controllers The PDF files of the manuals can also b...

Page 46: ...nfigured to network booting Right after the power on self test process POST the system will execute the PXE bootstrap session looking for DHCP servers from the network After selecting the required PXE boot server the bootstrapping process begins and the PXE firmware asks for the exact path of the NBP Network Bootstrap Program After receiving this path the download process begins This is done via t...

Page 47: ...XE server Ê Press the On Off button item 5 in figure 10 on page 41 Your PRIMERGY CX122 S1 server node will boot from the local disk image Ê Follow the on screen instructions No hard disk drives installed iSCSI boot iSCSI Internet SCSI is a protocol for linking servers and data storage facilities similar to the Fibre Channel Protocol FCP iSCSI means SCSI over Internet Protocol iSCSI boot allows a s...

Page 48: ...48 Operating Manual CX122 S1 Configuring the server ...

Page 49: ...ical data CX122 S1 11 electromagnetic compatibility 22 EMC directive 12 environmental protection 23 ESD electrostatic sensitive devices 21 expansion cards 9 F FCC statement 22 features 9 expansion cards 9 hard disk drives 9 high capacity 9 power supply 9 system board 9 ventilation 9 G Global Error indicator 43 CX122 S1 41 H hard disk activity indicator 43 hard disk drives 9 HDD indicator 41 I ID b...

Page 50: ...ff button 42 CX122 S1 41 operation 39 P packaging 23 ports 32 Power on indicator CX122 S1 41 power on indicator 43 R recycling devices 24 regulations and standards CX122 S1 12 reset button 42 CX122 S1 41 returning devices 24 S safety instructions 17 safety standards CX122 S1 12 saving energy 23 server power on indicator 43 Service LAN onboard 40 startup 39 switching on off CX122 S1 44 system board...

Reviews: