


42
L i f e B o o k E 8 0 0 0 N o t e b o o k
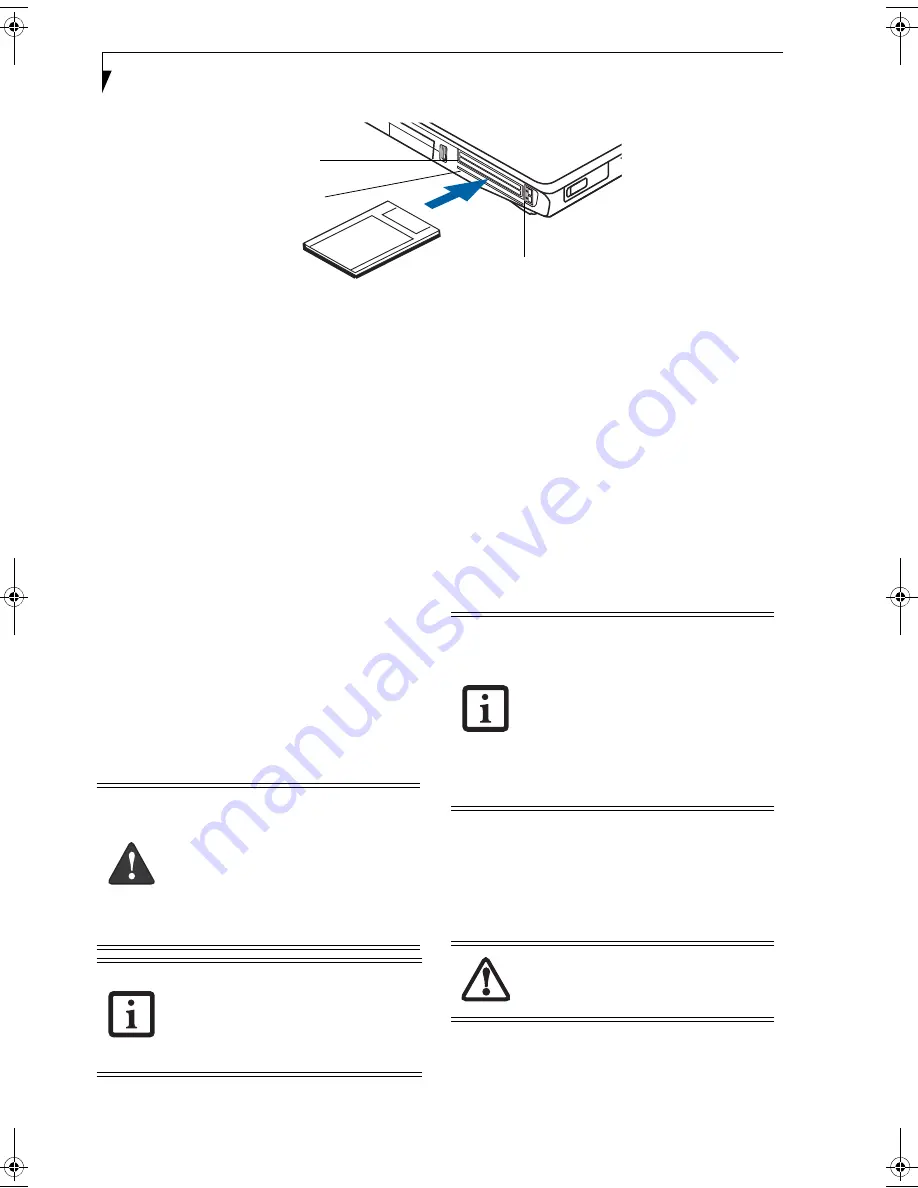
Figure 4-6. Inserting/Removing PC Card
PC Cards/ExpressCards™
Your LifeBook notebook supports Type I and Type II PC
Cards and ExpressCards
TM
, which can perform a variety
of functions depending on which type of card you insert.
You can insert one or two cards at a time, depending on
its type. PC Cards should be inserted in the bottom slot,
and ExpressCards in the top slot.
Some available PC/ExpressCards:
■
Gigabit Ethernet Local area network (LAN) cards
■
IEEE1394 cards
■
S-ATA II cards
■
IEEE802.11n WLAN cards
■
Other PC Cards that conform to PCMCIA 2.1 or
CardBus standards
For further information, refer to the instructions
supplied with your card(s).
INSERTING PC CARDS
PC Cards are inserted in the PC Card slot (the lower of
the two slots). To insert a PC Card, follow these steps:
1. See your PC Card manual for instructions on the
insertion of your card. Some cards may require that
your notebook is off while inserting them.
2. Make sure there is no PC Card currently in the slot.
If there is, see Removing PC Cards.
3. If the eject button is extended, press it until it clicks.
4. Insert the card into the slot with the label facing up.
5. Push the card firmly into the slot until it is seated in
the connector.
REMOVING PC CARDS
See your PC Card manual for specific instructions on
removing your card. Some cards may require your note-
book to be in Suspend Mode or Off during removal.
1. Unlock the card from the slot by pressing the eject
button associated with the slot in which the card is
located. When pressed, the button will pop out.
2. Firmly press the button again until it is flush with
the notebook. This will eject the card slightly out of
the slot allowing you to remove the card.
Eject Buttons
PC Card Slot
ExpressCard Slot
(top slot only)
(bottom slot only)
■
Inserting or removing a PC Card during
your LifeBook notebook’s shutdown or
bootup process may damage the card
and/or your LifeBook notebook.
■
Do not insert a PC Card into a slot if
there is water or any other substance on
the card as you may permanently
damage the card, your LifeBook note-
book, or both.
You may be required to log on as an
Administrator or member of the Adminis-
trator’s Group to complete this procedure.
If the computer is connected to a network,
network policy settings may also prevent
you from completing this procedure.
■
Windows has a shutdown procedure for
PC Cards that must be followed before
removing a card. (Review your operating
system manual for the correct proce-
dure.) It is good practice to remove
devices using the Safely Remove Hard-
ware icon in the system tray.
■
If the dialog box states that the device
cannot be removed, you must save all of
your open files, close any open applica-
tions and shut down your notebook.
If the PC Card has an external connector
and cable, do not pull the cable when
removing the card.
Eagle E8310.book Page 42 Thursday, May 3, 2007 2:55 PM
Summary of Contents for LifeBook E8310
Page 1: ...Fujitsu LifeBook E8310 Notebook User s Guide ...
Page 2: ......
Page 8: ...L i f e B o o k E 8 0 0 0 N o t e b o o k ...
Page 9: ...1 Preface ...
Page 10: ...L i f e B o o k E 8 0 0 0 N o t e b o o k ...
Page 12: ...2 L i f e B o o k E 8 0 0 0 N o t e b o o k ...
Page 13: ...3 2 Getting to Know Your LifeBook Notebook ...
Page 14: ...4 L i f e B o o k E 8 0 0 0 N o t e b o o k ...
Page 34: ...24 L i f e B o o k E 8 0 0 0 N o t e b o o k ...
Page 35: ...25 3 Getting Started ...
Page 36: ...26 L i f e B o o k E 8 0 0 0 N o t e b o o k ...
Page 44: ...34 L i f e B o o k E 8 0 0 0 N o t e b o o k ...
Page 45: ...35 4 User Installable Features ...
Page 46: ...36 L i f e B o o k E 8 0 0 0 N o t e b o o k ...
Page 59: ...49 5 Troubleshooting ...
Page 60: ...50 L i f e B o o k E 8 0 0 0 N o t e b o o k ...
Page 73: ...63 6 Care and Maintenance ...
Page 74: ...64 L i f e B o o k E 8 0 0 0 N o t e b o o k ...
Page 78: ...68 L i f e B o o k E 8 0 0 0 N o t e b o o k ...
Page 79: ...69 7 System Specifications ...
Page 80: ...70 L i f e B o o k E 8 0 0 0 N o t e b o o k ...
Page 85: ...75 8 Glossary ...
Page 86: ...76 L i f e B o o k E 8 0 0 0 N o t e b o o k ...
Page 95: ...85 Appendix A Integrated Wireless LAN User s Guide Optional device ...
Page 96: ...86 L i f e B o o k E 8 0 0 0 N o t e b o o k ...
Page 110: ...100 L i f e B o o k E S e r i e s N o t e b o o k A p p e n d i x A ...
Page 111: ...101 Appendix B Using the Fingerprint Sensor Optional device ...
Page 112: ...102 L i f e B o o k E 8 0 0 0 N o t e b o o k A p p e n d i x B ...
Page 120: ...110 L i f e B o o k E 8 0 0 0 N o t e b o o k A p p e n d i x B ...
Page 124: ...114 L i f e B o o k E 8 0 0 0 N o t e b o o k ...
Page 125: ......
Page 126: ......
Page 127: ......
Page 128: ......


