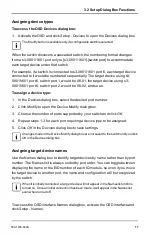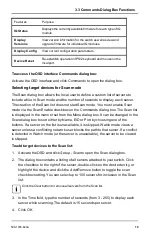
2.4 Connecting the Switch Hardware
When connecting a Sun IQ module, you must use a multi-sync monitor in the local port
to accommodate Sun computers that support VGA or composite sync.
4.
Locate the power cord that came with the switch and plug the appropriate
end into the power socket on the rear of the switch. Plug the other end into
an appropriate AC wall outlet.
To avoid potential video and/or keyboard problems:
If the building has 3-phase
AC power, ensure that the computer and monitor are on the same phase. For best
results, they should be on the same circuit.
WARNING: To reduce the risk of electric shock or damage to your
equipment:
- Do not disable the power cord grounding plug. The grounding plug is an important
safety feature.
- Plug the power cord into a grounded (earthed) outlet that is easily accessible at all
times.
- Disconnect the power from the switch by unplugging the power cord from either the
electrical outlet or
the appliance.
- The AC inlet is the main power disconnect.
5.
Turn on the switch and monitor, then turn on each target device. After about
one minute, the switch completes initialization and displays the graphical
user interface Free tag on the local port monitor.
6.
You can configure the network settings through the OSD or the OBWI.
To configure network settings via the OSD:
1.
Press Print Screen to activate the Main dialog box.
2.
Click
Setup - Network
and enter the appropriate Network Speed,
Transmission Mode and Network Configuration settings for your network.
To configure network settings via the OBWI:
1.
Point your web browser to the default IP address https://192.168.1.1 to
access the switch.
2.
Log in to the OBWI and click the
Configure
tab.
IQ modules
Typically, IQ modules feature two green LEDs: a
POWER
LED and a
STATUS
LED.
590-1035-640A
7
Summary of Contents for Control 3-0801
Page 2: ......
Page 3: ...KVM s3 0801 1601 Installer User Guide Edition February 2011 ...
Page 6: ...Contents 590 1035 640A 6 ...
Page 8: ...1 Product Overview 590 1035 640A 2 ...
Page 28: ...3 Local Port Operation 590 1035 640A 22 ...
Page 44: ...4 Web Interface Operations 590 1035 640A 38 ...
Page 46: ...5 Flash Upgrades 590 1035 640A 40 ...
Page 50: ...6 UTP Cabling 590 1035 640A 44 ...
Page 56: ...8 Sun Advanced Key Emulation 590 1035 640A 50 ...
Page 58: ...9 Technical Support 590 1035 640A 52 ...
Page 59: ......
Page 60: ......
Page 61: ...KVM s3 0801 1601 Installations und Bedienungsanleitung Ausgabe Februar 2011 ...
Page 64: ...Inhalt 590 1035 640A 6 ...
Page 66: ...1 Produktüberblick 590 1035 640A 2 ...
Page 74: ...2 Installation 590 1035 640A 10 ...
Page 90: ...3 Betrieb des lokalen Ports 590 1035 640A 26 ...
Page 108: ...4 Verwenden der Weboberfläche 590 1035 640A 44 ...
Page 114: ...6 UTP Verkabelung 590 1035 640A 50 ...
Page 120: ...8 Tastenemulation für Sun Zusatztasten 590 1035 640A 56 ...
Page 122: ...9 Technischer Kundendienst 590 1035 640A 58 ...
Page 123: ......
Page 124: ......
Page 125: ...KVM s3 0801 1601 Guide d installation et d utilisation Édition de février 2011 ...
Page 128: ...Table des matières 590 1035 640A 6 ...
Page 130: ...1 Présentation du produit 590 1035 640A 2 ...
Page 138: ...2 Installation 590 1035 640A 10 ...
Page 154: ...3 Fonctionnement de la voie locale 590 1035 640A 26 ...
Page 172: ...4 Utilisation de l interface Web 590 1035 640A 44 ...
Page 178: ...6 Câblage UTP 590 1035 640A 50 ...
Page 184: ...8 Émulation des touches avancées du clavier Sun 590 1035 640A 56 ...
Page 186: ...9 Assistance technique 590 1035 640A 58 ...
Page 187: ......
Page 188: ......
Page 189: ...KVM s3 0801 1601 Guía de uso e instalación Edición de febrero de 2011 ...
Page 192: ...Contenido 590 1035 640A 6 ...
Page 194: ...1 Información general del producto 590 1035 640A 2 ...
Page 202: ...2 Instalación 590 1035 640A 10 ...
Page 218: ...3 Funcionamiento del puerto local 590 1035 640A 26 ...
Page 236: ...4 Operaciones de la interfaz Web 590 1035 640A 44 ...
Page 242: ...6 Cableado UTP 590 1035 640A 50 ...
Page 248: ...8 Emulación de teclas avanzadas de Sun 590 1035 640A 56 ...
Page 250: ...9 Asistencia técnica 590 1035 640A 58 ...
Page 251: ......
Page 252: ......
Page 253: ...KVM s3 0801 1601 Guida all installazione e manuale dell utente Versione febbraio 2011 ...
Page 256: ...Sommario 590 1035 640A 6 ...
Page 258: ...1 Panoramica sul prodotto 590 1035 640A 2 ...
Page 266: ...2 Installazione 590 1035 640A 10 ...
Page 282: ...3 Funzioni della porta locale 590 1035 640A 26 ...
Page 300: ...4 Funzioni dell interfaccia Web 590 1035 640A 44 ...
Page 306: ...6 Cablaggio UTP 590 1035 640A 50 ...
Page 312: ...8 Emulazione avanzata di tasti Sun 590 1035 640A 56 ...
Page 314: ...9 Supporto tecnico 590 1035 640A 58 ...
Page 315: ......
Page 316: ......
Page 317: ...KVM s3 0801 1601 インストーラ ユーザー ガイド 2011年2月 ...
Page 320: ...目次 590 1035 640A 6 ...
Page 322: ...1 製品概要 590 1035 640A 2 ...
Page 358: ...4 Webインターフェイスの操作 590 1035 640A 38 ...
Page 364: ...6 UTPケーブル 590 1035 640A 44 ...
Page 370: ...8 Sunキーボードのアドバンスト キー エミュレーション 590 1035 640A 50 ...
Page 372: ...9 テクニカル サポート 590 1035 640A 52 ...
Page 373: ......
Page 374: ...590 1035 640A ...


