
En-7
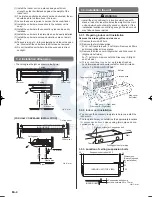
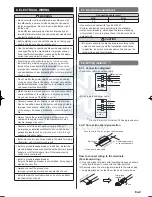
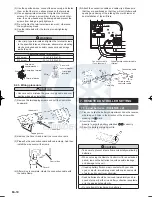
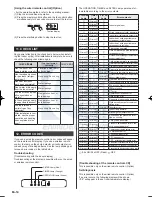
When the flare nut is tightened properly by your hand,
(4)
hold the body side coupling with a separate spanner, then
tighten with a torque wrench. (See the table below for the
flare nut tightening torques.)
CAUTION
Hold the torque wrench at its grip, keeping it in the right
•
angle with the pipe, in order to tighten the flare nut cor
-
rectly.
Tighten the flare nuts with a torque wrench using the
•
specified tightening method. Otherwise, the flare nuts
could break after a prolonged period, causing refrigerant
to leak and generate a hazardous gas if the refrigerant
comes into contact with a flame.
Connection pipe
Torque wrench
Indoor unit pipe
(Body side)
Flare nut
Holding wrench
Tighten with two wrenches.
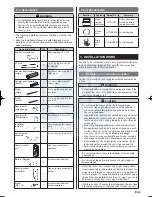
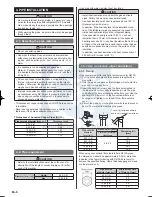
Flare nut [mm (in.)]
Tightening torque [N·m (kgf·cm)]
6.35 (1/4) dia.
16 to 18 (160 to 180)
9.52 (3/8) dia.
32 to 42 (320 to 420)
12.70 (1/2) dia.
49 to 61 (490 to 610)
15.88 (5/8) dia.
63 to 75 (630 to 750)
19.05 (3/4) dia.
90 to 110 (900 to 1,100)
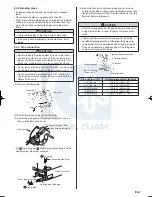
4.3.2 Bending pipes
If pipes are shaped by hand, be careful not to collapse
•
them.
Do not bend the pipes in an angle more than 90°.
•
When pipes are repeatedly bend or stretched, the material
•
will harden, making it difficult to bend or stretch them any
more. Do not bend or stretch the pipes more than three
times.
CAUTION
To prevent breaking of the pipe, avoid sharp bends.
•
If the pipe is bent repeatedly at the same place, it will
•
break.
4.3.3. Pipe connection
CAUTION
Be sure to apply the pipe against the port on the indoor
•
unit and the outdoor unit correctly. If the centering is im-
proper, the flare nut cannot be tightened smoothly. If the
flare nut is forced to turn, the threads will be damaged.
Do not remove the flare nut from the indoor unit pipe until
•
immediately before connecting the connection pipe.
Do not use mineral oil on flared part. Prevent mineral
•
oil from getting into the system as this would reduce the
lifetime of the units.
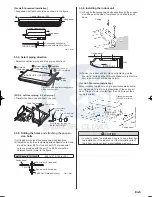
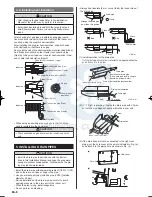
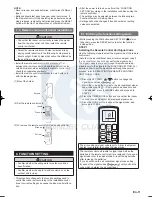
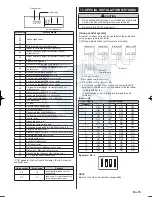
Remove the filter guide.
(1)
Indoor unit
Filter guide
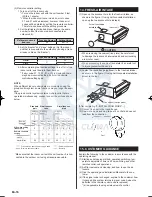
Detach the caps and plugs from the pipes.
(2)
Center the pipe against the port on the indoor unit, and
(3)
then turn the flare nut by hand.
Connection pipe (Liquid)
Indoor unit
Connection pipe (Gas)
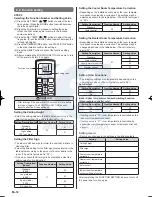
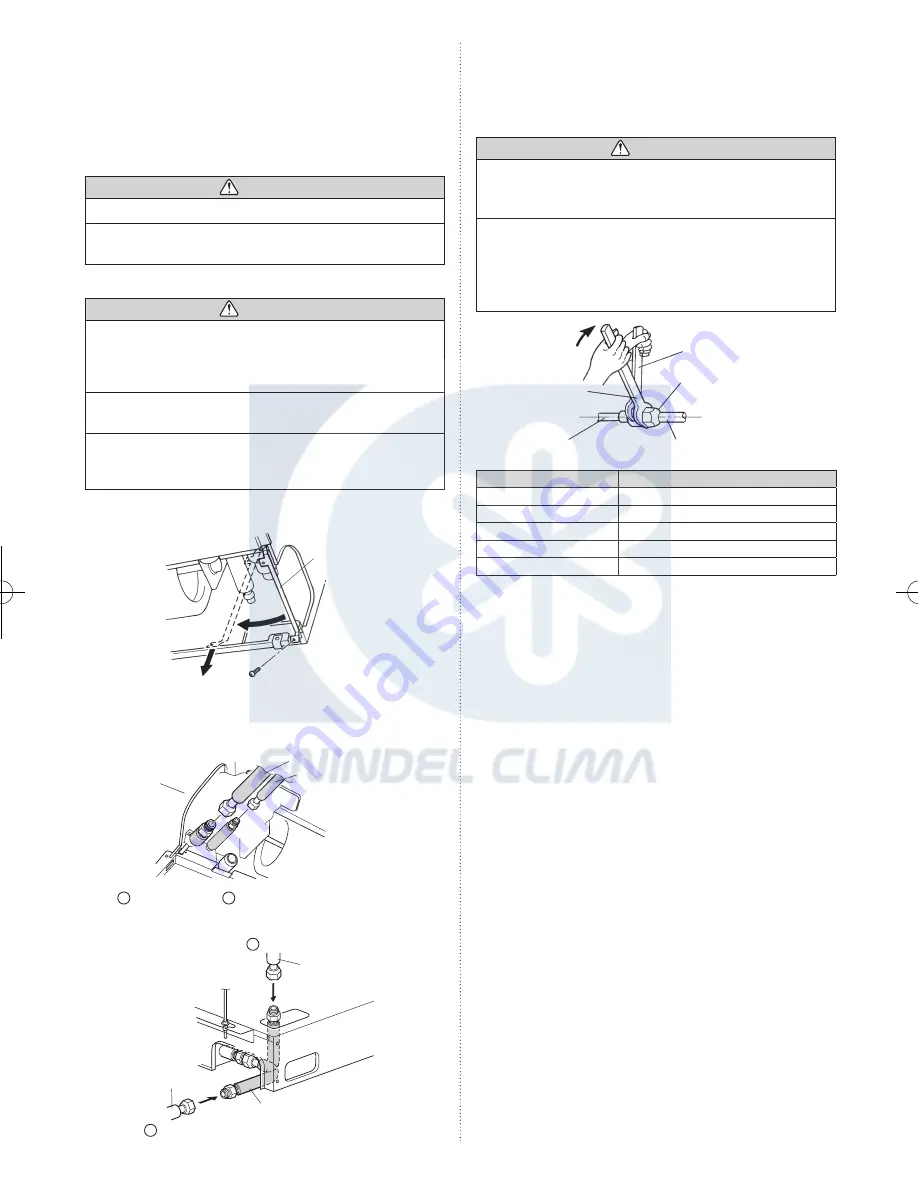
For
•
2
Top piping and
3
Right piping connections, use the
Auxiliary pipe (Gas pipe) provided.
2 Top piping
Connection pipe (Gas)
Indoor unit (rear)
Connection pipe (Gas)
3 Right piping
Auxiliary pipe (Gas pipe)
1125-9379122009.indd 7
2008/11/26 7:57:05
www.enindel.com