En-11
After the power is turned on, perform the “FUNCTION
•
SETTING” according to the installation conditions using the
remote controller.
The settings may be selected between the following two:
•
Function Number or Setting Value.
Settings will not be changed if invalid numbers or setting
•
values are selected.
9
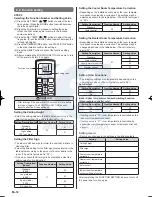
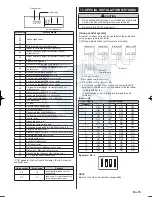
8.1. Entering the function setting mode
While pressing the FAN button and SET TEMP. (
•
) simul-
taneously, press the RESET button to enter the function
setting mode.
STEP 1
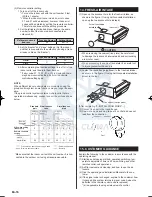
Selecting the Remote Control Unit Signal Code
Use the following steps to select the signal code of the remote
control unit.
(Note that the air conditioner cannot receive a signal code if
the air conditioner has not been set for the signal code.)
The signal codes that are set through this process are ap-
plicable only to the signals in the FUNCTION SETTING. For
details on how to set the signal codes through the normal
process, refer to SELECTING THE REMOTE CONTROL
UNIT SIGNAL CODE.
Press the SET TEMP. (
(1)
) ( ) button to change the
signal code between
.
Match the code on the display to the air conditioner signal
code (initially set to ). (If the signal code does not need
to be selected, press the MODE button and proceed to
STEP 2.)
Press the TIMER MODE button and check that the indoor
(2)
unit can receive signals at the displayed signal code.
Press the MODE button to accept the signal code, and
(3)
proceed to STEP 2.
The air conditioner signal code is set to A prior to shipment.
Contact your retailer to change the signal code.
The remote control unit resets to signal code A when the
batteries in the remote control unit are replaced. If you use a
signal code other than signal code A, reset the signal code
after replacing the batteries.
If you do not know the air conditioner signal code setting,
try each of the signal codes (
) until you find the
code which operates the air conditioner.
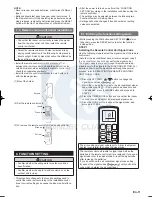
NOTE:
Never mix new and used batteries, or batteries of different
•
types.
Batteries should last about one year under normal use. If
•
the Remote Control Unit’s operating range becomes appre-
ciably reduced, replace the batteries and press the RESET
button with the tip of a ballpoint pen or other small object.
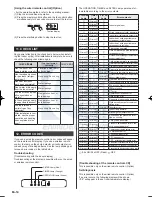
7.2. Remote control unit holder installation
CAUTION
Check that the indoor unit correctly receives the signal
•
from the remote control unit, then install the remote
control unit holder.
Select the remote control unit holder selection site by
•
paying careful attention to the following: Avoid places in
direct sunlight. Select a place that will not be affected by
the heat from a stove, etc.
Install the remote control unit with a distance of 7 m
•
between the remote control unit and the photocell as the
criteria. However, when installing the remote control unit,
check that it operates positively.
Install the remote control unit holder to a wall, pillar, etc.,
•
with the tapping screw.
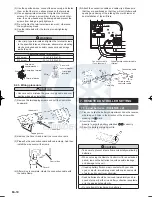
Mount the holder.
(1)
Screws
Set the remote control unit.
(2)
Insert
Press in
To remove the remote control unit (when use at hand).
(3)
Slide up
Pull out
8. FUNCTION SETTING
CAUTION
Confirm whether the wiring work for outdoor unit has
•
been finished.
Confirm whether the cap for electric control box on the
•
outdoor unit is close.
This procedure changes to the function settings used to
•
control the indoor unit according to the installation condi-
tions. Incorrect settings can cause the indoor unit malfunc-
tion.
1125-9379122009.indd 11
2008/11/26 7:57:05
www.enindel.com


