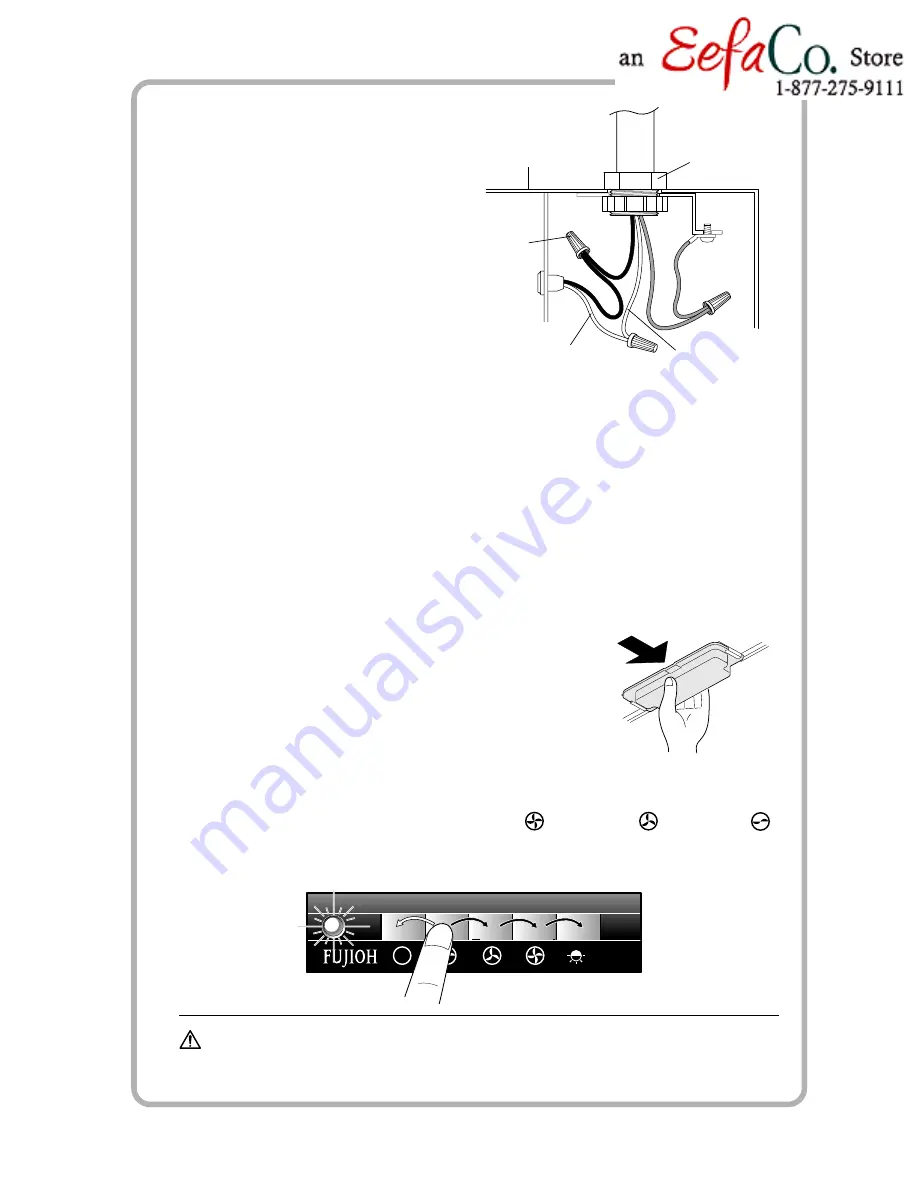
Conduit
Range Hood
Wire (unit side)
Wire
(conduit side)
Wire Connector
(not supplied)
3
Connect the electrical wires as follows:
Connect wires tightly and securely using
wire connectors (not supplied).
• Black to Black
• White to White
• Green to Green
4
Make sure that all wires are connected
properly and enclosed inside of the
wiring compartment.
4. FINAL ASSEMBLY AND CHECK
Two 60 W light bulbs (not supplied) can be mounted to this range hood. Prior to final
assembly, install light bulbs (halogen or ordinary type, in the base diameter 26 mm),
rated 120 V - 60 W or below.
1
Assembly (refer to “PREPARATION”)
(1) Replace the fan case cover with 4 screws.
(2) Replace the Rectifier Baffle Panel with 2 screws.
(3) Install the oil catch tray.
2
Check
(1) Turn on the electrical circuit to the range hood.
(2) Make sure that the switch and light operate correctly.
Refer to page 5 of the Operation Manual.
(3) Check the ventilating functions at High ( ), Medium ( ) and Low ( )
positions.
(4) Make sure that the range hood has no abnormal noises and/or vibration.
CAUTION
: • To reduce the risk of injury, keep your hands and other
objects away from the fan while it is in motion.
• Wear working gloves to avoid injury.
13


