background image

94

5.3 INSTALLATION ON A Mac OS 9.0 TO 9.2

11

To install Acrobat Reader, click “Install Acrobat Reader”.

!

Install Adobe Systems’ Acrobat Reader software to read the FinePixViewer User’s Guide (PDF).
If the latest version already has been installed, this step is not required.

12

Proceed with the installation as directed by the on-screen instructions.

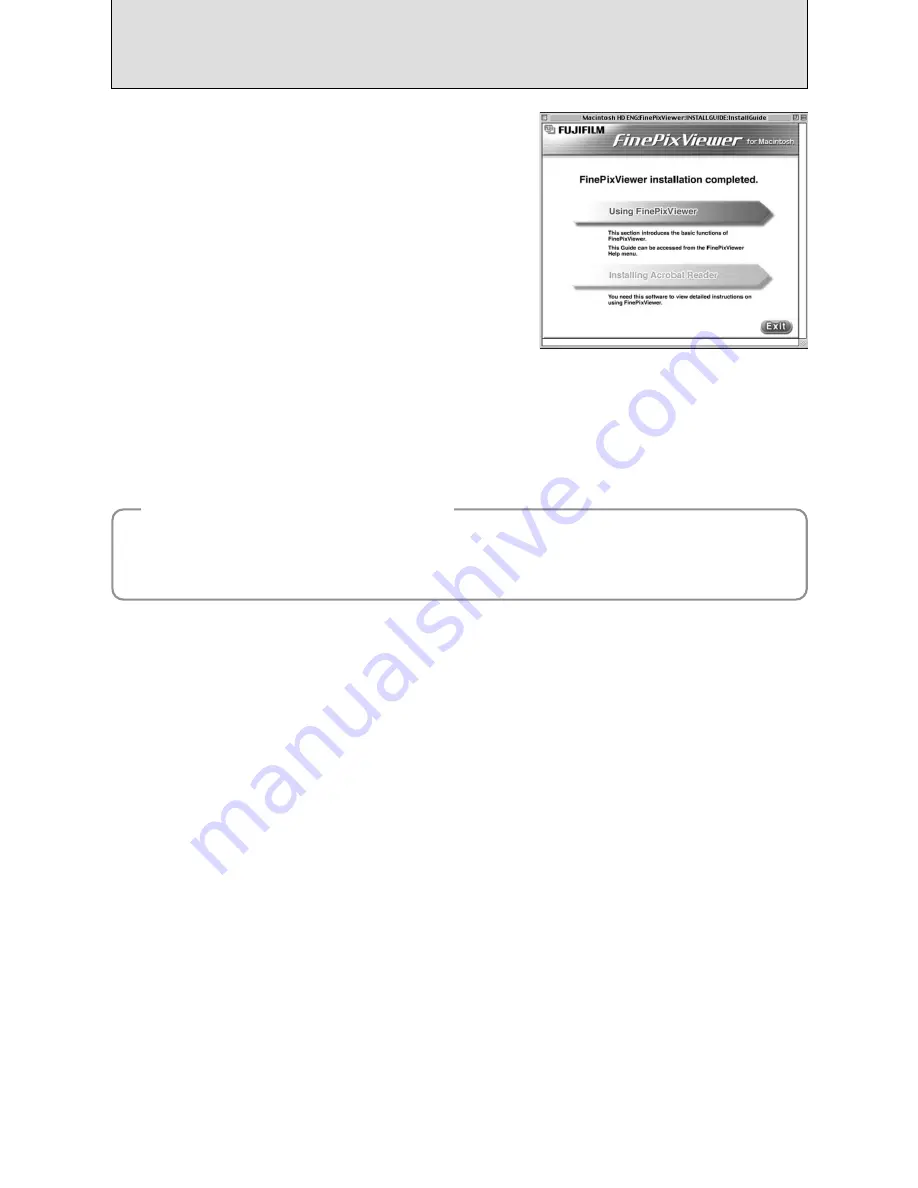
10

After restarting the Macintosh, the “FinePixViewer
installation completed” message appears. Click
“Using FinePixViewer” to view the basic
FinePixViewer functions.

To install Acrobat Reader later... 

1

Double-click the “FinePix” CD-ROM to open the CD-ROM window.

2

Double-click “FinePixViewer for Mac OS 9” 

“Acrobat Reader” 

“English” folder.

3

Double-click “English Reader Installer”.

4

Proceed with the installation as directed by the on-screen instructions.

Summary of Contents for FinePix S20 Pro

Page 1: ...w you how to use your FUJIFILM DIGITAL CAMERA FinePix S20 Pro correctly Please follow the instructions carefully BL00291 200 1 Getting Ready Using the Camera Advanced Features Software Installation Settings Viewing Images ...

Page 2: ...LM grants to you a nontransferable nonexclusive license a to install one copy of Software onto one computer in binary machine executable form b to use Software on the computer onto which Software is installed and c to make one backup copy of Software 3 Restrictions 3 1 You shall not distribute rent lease or otherwise transfer all or any part of Software Media or Documentation to any third party wi...

Page 3: ...abu 2 chome Minato ku Tokyo 106 8620 Japan is in conformity with the following Standards Safety EN60065 EMC EN55022 1998 Classe B EN55024 1998 EN61000 3 2 1995 A1 1998 A2 1998 following the provision of the EMC Directive 89 336 EEC 92 31 EEC and 93 68 EEC and Low Voltage Directive 73 23 EEC Dusseldorf Germany February 1 2004 Place Date Signature Managing Director Bij dit produkt zijn batterijen ge...

Page 4: ...E FRAME 31 PLAYBACK MODE STILL PHOTOGRAPHY MODE 2 Using the Camera B STILL PHOTOGRAPHY MOVIE y QUALITY MODE NUMBER OF RECORDED PIXELS 32 Quality settings in Still photography mode 32 Quality settings in Movie mode 32 B STILL PHOTOGRAPHY S SENSITIVITY 33 High sensitivity photography 1600 34 J FinePix COLOR 35 FOCUSING DISTANCE 36 EXPOSURE SHUTTER SPEED AND APERTURE 37 TAKING PICTURES SELECTING THE ...

Page 5: ...ION ON A Windows PC 90 5 3 INSTALLATION ON A Mac OS 9 0 TO 9 2 92 5 4 INSTALLATION ON A Mac OS X 95 5 Software Installation 6 1 CAMERA CONNECTION 98 6 2 USING FinePixViewer 103 6 Viewing Images k Final 10 frame continuous shooting 51 h Long period continuous shooting with 1280 960 pixel mode 52 D EXPOSURE COMPENSATION 53 USING AE LOCK 54 e MACRO CLOSE UP 55 PHOTOGRAPHY INFORMATION 56 q STILL PHOTO...

Page 6: ... Notes on Electrical Interference If the camera is to be used in hospitals or aircrafts please note that this camera may cause interference to other equipment in the hospital or aircraft For details please check with the applicable regulations Handling Your Digital Camera This camera contains precision electronic components To ensure that images are recorded correctly do not subject the camera to ...

Page 7: ...er 2 h Metal strap clip 2 h Clip attaching tool 1 h Lens cap 1 h Lens cap holder 1 h A V audio visual cable 1 plug 2 5 mm dia to pin plug cable 2 h USB cable mini B 1 h IEEE1394 4 pin to 6 pin cable 1 h Sync terminal cap 1 Attached to camera h CD ROM 1 Software for FinePix SX h Owner s Manual this manual 1 Accessories included ...

Page 8: ... P 40 Aperture priority Auto P 43 Auto P 40 Sync terminal P 65 Sync terminal cap Hot shoe P 64 FZ ring Focus Zoom ring P 21 24 48 Self timer lamp P 58 Still image shooting Movie recording Strap mount P 10 Zoom button P 19 28 AE L AE lock button P 21 54 BACK button P 20 Photo mode button P 21 DISP display button P 21 28 Viewfinder EVF Diopter adjustment dial Focus check button P 21 48 Slot cover P ...

Page 9: ...1 200 1 1 2004 33 33 F P 2000 2000 F2 8 F2 8 AF AF 100 0001 100 0001 1 1 200 1 1 2004 12 00AM 12 00AM ISO800 ISO800 Self Timer Flash Zoom bar Date Playback mode Date Still photography mode Shutter speed AE lock Aperture setting display Number of available frames FinePix COLOR Quality mode Battery level warning Battery level warning Media AF warning Camera shake warning Media Adapter mode Still pho...

Page 10: ...g tool in a safe place as you will also need it for removing the metal strap clip from the camera 2 Keeping the metal strap clip open hook the open metal strap clip through the strap mount on the camera until it is secure 3 1Once the clip is securely hooked through the strap mount hold the clip in place as you remove the clip attaching tool 2Turn the metal strap clip around once until it clicks cl...

Page 11: ...clip 8 Thread the strap through the buckle and retainer Repeat steps 7 to 8 to attach the other end of the strap Attach the lens cap cord to the camera to avoid losing the lens cap 1Attach the lens cap cord by threading it through the metal strap clip near the terminal cover 2Attach the lens cap by pressing in on each side of the cap 0 1 0 2 Using the lens cap holder Make sure that the lens cap do...

Page 12: ...not use manganese or Ni Cd batteries h Soil such as fingermarks on the poles of the batteries can shorten time for which the batteries can be used h The time for which AA size alkaline batteries referred to hereafter simply as alkaline batteries can be used varies depending on the brand and some alkaline batteries may stop providing power more quickly than those supplied with the camera Note also ...

Page 13: ...13 Getting Ready Pull on the battery cover to close it 1 While pressing on the battery cover to push the batteries down 2 slide the cover closed 3 4 0 1 0 2 ...

Page 14: ...slot Push the Microdrive firmly all the way into the Microdrive slot xD Picture Card Microdrive 3 Close the slot cover Use either xD Picture Card or Microdrive as recording media in the FinePix S20 Pro h If an xD Picture Card and a Microdrive are inserted at the same time images will be recorded onto the media selected as the MEDIA P 83 h Data cannot be copied between the two media types on the Fi...

Page 15: ...y when the camera is used in cold locations This is normal Try warming the batteries in your pocket or a similar location before use C appears as a small icon on the right hand side of the screen V appears as a large icon on the screen AUTO AUTO 2 5 0 2 5 0 F 5 6 3 3 3 3 Turn the camera on and check that no battery level warning C or V appears on the screen If no icon appears there is ample charge...

Page 16: ... switch to OFF The lens moves when the camera is in q mode Take care not to obstruct the lens as it is a precision component Obstructing the lens will cause damage and the ß or message will appear Take care also not to get fingerprints on the camera lens as this will result in impaired image quality in your shots If the message see figure at left does not appear refer to Correcting the date and ti...

Page 17: ...E E P S H U T T E R S H U T T E R S E T U P S E T U P 1 3 1 3 1Set the Power switch to q 2Set the Mode dial to W 2 1Press a or b to select DATE TIME 2Press c 0 1 0 2 0 1 0 2 3 0 1 0 2 0 3 CORRECTING THE DATE AND TIME CHANGING THE DATE ORDER Correcting the date and time 1Press d or c to select Year Month Day Hour or Minute 2Press a or b to correct the setting 3Always press the MENU OK button after ...

Page 18: ... Press a or b to select 2Press c to select ENGLISH FRANCAIS DEUTSCH ESPAÑOL or Press c to cycle through the language settings The screens in this manual are shown in English See P 83 for more information on the W SET UP menu 2 0 1 0 2 1 1Set Power switch to q 2Set the Mode dial to W to display the SET UP menu 0 1 0 2 P P OW OWE R S A V E E R S A V E F O F O RM RMA T A T 2 M I N 2 M I N M E D I A M...

Page 19: ... ON OFF and Photography Playback mode selector switch Use the Power switch to select the mode Photography Press T to zoom in telephoto Press W to zoom out wide angle Playback Press T to enlarge the image Press W to revert to normal display Using the Zoom Changing between the viewfinder EVF and the monitor LCD Pressing the EVF LCD button toggles between the viewfinder and the LCD monitor Use whiche...

Page 20: ...ttings such as the shutter speed and aperture 0Using the menus 2Select a menu option Press the left or right arrow on the 4 direction button 3Select a setting Press the up or down arrow on the 4 direction button 1Display the menu Press the MENU OK button 4Confirm the setting Press the MENU OK button 0BACK button Press this button when you want to cancel a procedure mid way I S O I S O2 0 0 2 0 0 P...

Page 21: ...Adjusts the focus When the Focusing mode is set to S AF or C AF the focusing ring can be used instead of the Zoom button 0INFO button Press this button to view image information Photography mode Shows the current settings sensitivity sharpness etc Playback mode Displays the information for the image currently displayed 0One touch AF button Uses the AF function to focus the image once This can only...

Page 22: ...gs Self timer Photometry White balance P 58 P 62 P 59 Hold down the SHIFT button for 1 second or longer 0SHIFT button Holding down the SHIFT button for 1 second or longer displays the SHIFT CONTROL guide By pressing one of the displayed button combinations you can quickly and easily access the corresponding setting The functions you can access vary depending on the current mode The example below s...

Page 23: ...hen it is snowing white dots may appear in the image The flash will reflect off the dust particles or snowflakes Try taking the shot using Suppressed flash mode 3 Each time you press the EVF LCD button the display switches between the viewfinder EVF and the monitor LCD If the AF frame in the viewfinder EVF is difficult to see adjust the viewfinder using the Diopter adjustment dial LCD EVF Diopter ...

Page 24: ...rs or the camera strap you may not get the correct brightness exposure for your shot 5 Check that the lens is clean If it is dirty clean the lens as informed on P 107 Using the FZ ring to adjust the zoom When the Focusing mode is set to S AF or C AF the FZ ring can be used instead of the Zoom button to change the zoom setting Turn the FZ ring clockwise to zoom in and counterclockwise to zoom out A...

Page 25: ... heard the camera records the image There is a slight delay between the Shutter button being pressed and the picture being taken Playback the shot to check the image When pressing the Shutter button down fully in one motion the picture is taken without the AF frame changing Taking the picture the indicator lamp lights orange shooting disabled The indicator lamp then changes to green to indicate th...

Page 26: ...peed h When there is very little contrast between the subject and the background such as white walls or subjects dressed in the same color as the background h When there is a high contrast subject other than the main subject at or near the center of the image and that subject is closer to or further from the camera than the main subject as when taking a picture of someone against a background with...

Page 27: ...iginal image and then fully press down on the Shutter button You can reapply the AF AE lock as many times as you like before releasing the shutter The AF AE lock operates in all Photography modes and can be used to ensure excellent results 4 2 5 0 2 5 0 F 5 6 AF AE lock On the FinePix S20 Pro when you press the Shutter button down half way the focus and exposure settings are locked AF AE lock If y...

Page 28: ... The area to the right of the separator indicates digital zooming while the area to the left indicates optical zooming h Optical zoom focal lengths Approx 35 mm 210 mm max zoom scale 6 h Digital zoom focal lengths 3 Approx 210 mm 290 mm max zoom scale Approx 1 4 2 Approx 210 mm 372 mm max zoom scale 1 77 1 Approx 210 mm 465 mm max zoom scale Approx 2 2 35 mm camera equivalents Text displayed Frami...

Page 29: ...y shown on the screen changes each time you press the DISP button Press the DISP button until the multi frame playback screen 9 frames appears 1Press a b d or c to move the cursor orange frame to the frame you want to select Pressing a or b repeatedly changes to the next page 2Press the DISP button again to make the current image bigger A bar is displayed to the location of the current image on th...

Page 30: ... cropped image is added as a separate file in the final frame Press the MENU OK button to crop the image Single frame playback Press the BACK button to cancel playback zoom 1M 1M R E C O K R E C O K R E C R E C C A N C E L C A N C E L OK OK B A C K B A C K T R I T R I MM I N G M I N G Zoom bar The size of the saved image varies depending on the zoom scale If the saved image size is less than 1 ΩTR...

Page 31: ...lect FRAME 2Press the MENU OK button to confirm the selection See P 71 for information on ALL FRAMES 4 1Press d or c to select a frame file to be erased 2Press the MENU OK button to erase a displayed frame file To erase another frame file repeat steps 1 and 2 0 1 0 2 0 1 0 2 0 1 0 2 0 1 0 2 Pressing the MENU OK button repeatedly erases consecutive frame files Take care not to erase a frame files b...

Page 32: ... are and h Movie size 640 480 pixels for better quality 320 240 pixels to record longer movies h Frame rate 30 frames per second fixed See P 117 for information on the frame rate Quality settings in Movie mode QU QUA L I T Y A L I T Y 6 4 0 x 4 8 0 6 4 0 x 4 8 0 3 2 3 2 0 x 0 x 2 4 2 4 0 0 1 0 3 0 2 0 1 0 2 y QUALITY MODE NUMBER OF RECORDED PIXELS p PHOTO MODE STILL PHOTOGRAPHY MOVIE 3 Advanced Fe...

Page 33: ...1600 When setting CCD RAW P 88 only the 200 and 400 sensitivity settings can be selected While selecting a higher sensitivity setting will allow you to take pictures in darker locations it will also increase the amount of speckling in your images Streaking may also be visible in shots of scenes such as the night sky Choose the sensitivity setting that best suits the conditions 0 1 0 2 2 0 0 2 0 0 ...

Page 34: ... is selected the quality is set to 1 the appears The digital zoom cannot be used in high sensitivity photography The high sensitivity photography cannot be selected when setting CCD RAW P 88 When you specify a high sensitivity the amount of noise interference in the image shown on the screen before the picture is taken increases However this is normal QUALITY QUALITY P 33 33 250 250 F5 6 F5 6 ISO ...

Page 35: ...close up shots of people portraits Because the effects on the image differ depending on the scene being shot in p CHROME mode take pictures in standard mode as well as this mode Note that you may not be able to see any difference on the screen For shots taken in p CHROME mode or p B W mode automatic quality adjustment will be suppressed on Exif Print compliant printers When setting p CHROME or p B...

Page 36: ...ode the digital zoom AREA or C AF focusing is used or when ADAPTER YES is selected It may take longer to focus if the external AF sensor is soiled P 113 Causes of focusing errors and the solutions The subject is not suited to AF Use AF lock Focus mode AF CENTER 1 or MF The subject is not in the AF frame Use AF lock Focus mode AF CENTER 1 or MF The subject is outside the shooting range Turn Macro m...

Page 37: ... is decreased by one step the shutter speed also decreases by one step the dot moves upper left h When the aperture is increased by one step the shutter speed also increases by one step the dot moves lower right h Combinations that result in the shutter speed or aperture being outside the available range of settings cannot be selected white dots h In the N M and photography modes it is easy to sel...

Page 38: ...series of continuous shots or to use auto bracketing with exposure compensation 3 Take the pictures check the exposure and focus adjust the shot composition press the Shutter button down fully You can use the menus for more detailed settings P 32 35 57 66 The table below provides a number of sample settings Use the settings effectively To achieve this result Sample settings To express the motion o...

Page 39: ... Sports Night scene N M r Photography mode Function List of functions available in each mode The flash cannot be used for Continuous shooting and Super Macro Long period continuous shooting and high sensitivity photography cannot be used together 1 The factory default quality for Movie mode is 640 480 pixels 2 AUTO can only be set in B mode High sensitivity photography cannot be used together with...

Page 40: ...le flash modes m Portrait This is the best mode for shooting portrait Skin tones are shown beautifully and the overall tone is soft x b d c n Landscape This is the best mode for shooting scenery in daylight and provides crisp clear shots of scenery such as buildings and mountains Flash not available When the flash is popped up v appears Sports This is the best mode for shooting sporting events Thi...

Page 41: ...ing combinations without changing the exposure setting The shutter speed and aperture setting are displayed in yellow when the camera is in Program shift mode Program shift is automatically cancelled in the following situations i When the Photography mode is changed i When the flash is popped up i When EXTERNAL FLASH in the main menu is set to ON i When the Playback mode is selected i When the cam...

Page 42: ...hat are extremely underexposed the aperture setting F2 8 appears in red When this occurs select a slower shutter speed down to 3 sec Underexposed When the brightness of the subject is outside the camera s brightness metering range F appears as the aperture setting When this occurs press the Shutter button down halfway to measure the light level again and display a value Metering failed In scenes t...

Page 43: ...peed setting 1 1000 sec appears in red When this occurs select a larger number of aperture up to F11 Overexposed In scenes that are extremely underexposed the shutter speed setting 3 sec appears in red When this occurs select a smaller number of aperture down to F2 8 When Forced flash mode is selected the slowest available shutter speed is 1 60 sec Underexposed When the brightness of the subject i...

Page 44: ...res noise dots may appear on the image If the shutter speed is set to a speed faster than 1 2000 sec smearing white stripes may appear in the image P 117 If the shutter speed is set to a speed faster than 1 1000 sec the image may appear dark even if the flash is used Setting the aperture 1Hold down the D button 2Turn the Command dial to select aperture h Aperture settings F2 8 to F11 in 1 3 EV inc...

Page 45: ...y disappear and the screen may go dark due to flash charging When this happens the indicator lamp blinks orange Suppressed flash Pressing the flash down changes the camera to Suppressed flash mode Use this mode for photography using indoor lighting for shots taken through glass and for photography in venues such as theaters or at indoor sporting events where the distance is too great for the flash...

Page 46: ... will be taken without the flash b Red eye reduction Use this mode to make sure that the subject s eyes appear normal when taking pictures of people in low light conditions The flash fires a pre flash just before the picture is taken and then fires again to take the actual picture The flash fires as required by the shooting conditions If pressing the Shutter button while the flash is charging the ...

Page 47: ...h Red eye reduction The image may be overexposed when shooting bright scenes To take a picture of a main subject at night with the background brightly lit please use the mode Night scene settings P 40 Increasing the monitor brightness This is useful when you are checking the shot composition for dimly lit scenes Slow synchro shots etc 1 Hold down the D button 2 Press the DISP button appears on the...

Page 48: ...he subject in the AF frame 2A focusing indicator mark appears on the screen Adjust the focus until appears Focusing indicator marks The focusing mark appears when moving the focus a set amount close to the focused position Use the mark to focusing If the mark appears when the shot is not in focus try using the One touch AF function Use this function to focus the shot quickly Pressing the button th...

Page 49: ... is heard the camera focuses on your subject At that point the AF frame on the screen becomes smaller and the camera sets the shutter speed and aperture the indicator lamp green stops blinking and remains lit 3 Bebeep 2 5 0 2 5 0 F 5 6 3 3 3 3 P Click Press the Shutter button down fully without releasing it When a clicking noise is heard the camera records the image The AF mode is forcibly reset t...

Page 50: ...n be recorded on the available space When auto bracketing if there is insufficient space on the media to record 3 frames no pictures are taken h The focus is determined in the first frame and cannot be changed in mid sequence h The exposure is determined in the first frame but in Long period continuous shooting the exposure is adjusted for the scene being shot h The speed of continuous shooting va...

Page 51: ...tography menu h Auto bracketing settings 3 1 3 EV 2 3 EV 1 EV If the underexposed or overexposed frame is outside the camera s control range the picture is not taken with the specified setting increments Auto bracketing cannot be used in B or mode k Final 10 frame continuous shooting Press Shutter button Max 40 shots 10 frames Release Shutter button 1 2 3 4 5 6 7 8 9 10 This mode allows you to rel...

Page 52: ... and then lock the focus so that it does not shift This feature is also useful for photographing fast moving subjects that are difficult to focus on Focus on and the focus is wrong at Focus on and lock the focus A B B Starting point Point where you want to take the picture A B NEAR FAR f CONTINUOUS SHOOTING STILL PHOTOGRAPHY FUNCTIONS Quality and flash When a Continuous shooting mode is selected t...

Page 53: ...ene is dark 0 1 0 2 3 Exposure compensation indicator This setting is retained when the mode is changed or the camera is turned off D appears Set the exposure compensation to 0 unless compensation is required D EXPOSURE COMPENSATION STILL PHOTOGRAPHY FUNCTIONS To obtain the optimum brightness Adjust the exposure compensation according to the level of brightness or darkness in the image Guide to co...

Page 54: ...s the E button R appears on the screen and the exposure is locked while you hold down the E button AE lock cannot be used when Long period continuous shooting is selected With the E button held down press the Shutter button down halfway to focus the shot and then compose the shot again Once you press the Shutter button down halfway the exposure remains locked even if you release the E button When ...

Page 55: ...otography mode is changed to r or i When the camera is turned off If the flash is too bright use flash brightness adjustment P 64 If you are shooting in a dark location when the camera shake warning icon appears use a tripod to prevent camera shake Focal range Effective flash range Optical zoom focal length 35 mm camera equivalent e Macro Approx 10 cm 80 cm 3 9 in 2 6 ft Approx 30 cm 80 cm 1 0 ft ...

Page 56: ...heck them by holding down the INFO button 1 1Set the Power switch to q 2Set the Mode dial to Still photography mode 33 33 ISO 200 ISO 200 2 0 0 2 0 0 0 6 0 6 P 2 5 0 2 5 0 F 5 6 S T A N D A R D S T A N D A R D NORMAL NORMAL Sensitivity FinePix COLOR Photometry White balance Sharpness Flash brightness Adjustment 0 1 0 2 ...

Page 57: ...lance P 59 Change the white balance setting to take a picture with the white balance fixed for the surroundings and lighting when the picture is taken AF mode P 60 This sets the focusing method j Bracketing P 62 Use this setting to photograph the same image with different exposure settings Photometry P 62 Change this setting for scenes where the brightness of the subject and background differ mark...

Page 58: ...o start the self timer 3 The self timer lamp lights and then starts blinking until the picture is taken To stop the self timer once it has started running press the BACK button 4 A countdown appears on the screen indicating the time remaining until the picture is taken Self timer mode is cancelled after each shot O F F O F F A U T O A U T O 1 3 1 3 S E L S E L F TI ME R E R O F F O F F The AF AE l...

Page 59: ... White fluorescent lamps Shooting under Cool White fluorescent lamps 8 Shooting in incandescent light When the flash fires the white balance setting excluding custom white balance for the flash is used Consequently to achieve a particular effect the flash mode should be set to Suppressed flash P 45 The color tones may vary depending on the shooting conditions light source etc Custom white balance ...

Page 60: ...ce was not measured at the correct exposure Set the exposure compensation again using a negative value when appears and a positive value when appears O V E R O V E R P ーーーー ーーーー Fーーー ーーー 3 3 3 3 I S O I S O2 0 0 2 0 0 O F F O F F A U T O A U T O 1 3 1 3 A F A F MO D E O D E C E N T E R C E N T E R A R E A A R E A MU L T I U L T I AF MODE AREA CENTER MULTI UNDER UNDER OVER OVER or MULTI Pressing th...

Page 61: ... when composing the shot using a tripod and changing the focusing position 1 Hold down the button 2 Press a b d or c to move the target point to the focusing position 3 Release the button 0 1 0 2 0 3 After moving Before moving Regardless of the AF frame location the exposure is always set using the area in the center of the screen To expose the shot for your main subject use AE lock P 2 5 0 2 5 0 ...

Page 62: ... and background differ markedly so that the MULTI setting is unlikely to achieve the desired result MULTI Pattern Light metering where the camera assesses the scene and selects the correct exposure _ SPOT Light metering where the exposure is optimized for the center of the image AVERAGE Light metering where an average value for the entire image is used In the B and r modes light metering is locked...

Page 63: ...evious image Press d h To stop without recording any images Press the BACK button A preview image is always shown regardless of the IMAGE DISPLAY setting P 84 However note that the Preview zoom function cannot be used Changing the Photography mode exits Multiple exposure mode without recording the images P R E V I P R E V I EW MU L T U L T I EX P O S U R E X P O S U R E OK OK BACK BACK C A N C E L...

Page 64: ...de can be set to N M P 41 42 43 or P 44 but the use of or is better Flash photography cannot be used when continuous shooting P 50 or auto bracketing P 51 is selected Use this setting to change just the amount of light emitted by the flash to suit the photography conditions or to achieve a desired effect h Compensation range 2 levels 0 6 EV to 0 6 EV in approx 0 3 EV increments total 5 levels sele...

Page 65: ...can be used The image may appear dark when the shutter speed is set to speeds higher than 1 1000 sec Set the white balance P 59 to AUTO or Custom white balance P 66 0 O F F O F F O F F O F F E X T E R N A L F L A S H E X T E R N A L F L A S H O F F O F F O N O N 1 Sync terminal Sync terminal cap Synchronization cord 1Close the built in flash 2Attach the synchronization cord from the external flash...

Page 66: ... Press the MENU OK button O F F O F F 1 3 1 3 WB A U T O A U T O Click Hold a sheet of white paper so that it fills the entire screen When pressing the Shutter button the flash fires and the white balance is set When or appears the white balance was not measured at the correct exposure Set the exposure compensation again using a negative value when appears and a positive value when appears O V E R...

Page 67: ...B Y S T A N D B Y 1 3 s 1 3 s Recording times for media These figures are the available recording times using a new media formatted on the camera The actual recording times will vary depending on the free space available on the media 3 Press the Zoom button to zoom in or out before you start recording You must zoom beforehand as you cannot zoom during recording h Optical zoom focal length 35 mm ca...

Page 68: ...emperature is high As a general guide to shooting times you can shoot movies for around 20 minutes at an ambient temperature of 30 C 86 F and for around 30 minutes at 25 C 77 F 1 If the camera s internal temperature rises during shooting the message MICRODRIVE IS OVERHEATING MOVIE RECORDING WILL AUTOMATICALLY STOP SOON appears 2 This then changes to PLEASE STOP MOVIE RECORDING If you continue shoo...

Page 69: ... S E P A U S E 0 1 0 2 0 1 0 2 Indicated by the r icon Playing movie files i You may not be able to play some movie files recorded on other cameras i To play back movie files on a computer save the movie file on the media to the computer s hard disk and then play back the saved file Playing Back Movies Playback Pause Stop Fast forward Rewind Skip playback Control Description Playback begins Playba...

Page 70: ...ter speed Aperture setting display FinePix COLOR Sensitivity Flash ON OFF Histogram Histograms A histogram is a chart showing the distribution of brightness in an image horizontal axis brightness vertical axis pixels 1 Optimal exposure There is an ample distribution of pixels overall with a peak in the middle range 2 Overexposed The number of highlight pixels is high with the distribution sloping ...

Page 71: ...on B A C K B A C K E R A S E E R A S E F R F R AM AME A L L F R A L L F R AM AME S E S ALL FRAMES Erases all unprotected frames files Copy important frames files to your computer or another media FRAME Erase only the selected frame file BACK Returns to playback without erasing any frames files 0 1 0 2 0 1 0 2 o ERASING SINGLE ALL FRAMES PLAYBACK MENU Note that erased images cannot be recovered Ple...

Page 72: ...o erase another frame file repeat steps 1 and 2 When you have finished erasing frames files press the BACK button Pressing the MENU OK button repeatedly erases consecutive frames files Take care not to erase an frame file by mistake Protected frames files cannot be erased Unprotect the frames files before erasing them P 73 FRAME 0 1 0 2 If the message appears press the MENU OK button again to eras...

Page 73: ... S E T A L L S E T A L L R E S E T A L L R E S E T A L L RESET ALL Removes the protection from all the frames files SET ALL Protects all the frames files FRAME Protects or unprotects only the selected frame file 0 1 0 2 0 1 0 2 1Press d or c to select the frame file to be protected 2Press the MENU OK button to protect the frame file currently displayed To protect another frame file repeat steps 1 ...

Page 74: ... OK button to unprotect all the frames files RESET ALL R E S E T A L L R E S E T A L L R E S E T A L L O K R E S E T A L L O K I T I T MA Y T A K E A A Y T A K E A WH I L E H I L E 1 0 0 0 0 0 9 1 0 0 0 0 0 9 Y E S Y E S C A N C E L C A N C E L OK OK BACK BACK 0 1 0 2 To stop the procedure mid way If the images are very large protecting or unprotecting all the frames files may take some time If yo...

Page 75: ...ck Movie starts automatically When the preview movie or movie ends playback moves on to the next frame 0 1 0 2 3 1Press a or b to select the playback interval and the type of image transition 2Press the MENU OK button The image frames are advanced and played back Pressing the DISP button once during playback causes the playback frame number to appear on the screen To interrput g PLAYBACK press the...

Page 76: ...s unprotect the frame The remaining recording time appears during recording and the self timer lamp blinks When the time remaining reaches 5 seconds the self timer lamp starts blinking quickly V O I C E V O I C E MEM MEMO R E C O R D I N G R E C O R D I N G 1 5 s 1 5 s R E C R E C R E R E C R E C OK OK BACK BACK 1 0 0 0 0 0 9 1 0 0 0 0 0 9 0 1 0 3 0 2 3 ø appears on the screen Press the MENU OK bu...

Page 77: ...dy has a voice memo If you select an image that already has a voice memo a screen appears in which you can select whether or not to re record the memo B A C K B A C K V O I C E V O I C E MEM MEMO R E R E C R E C When the message appears unprotect the frame V O I C E V O I C E MEM MEMO F I N I S H F I N I S H 1 0 0 0 0 0 9 1 0 0 0 0 0 9 R E C R E C R E R E C R E C OK OK BACK BACK ...

Page 78: ...aker Indicated by the t icon Compatible voice memo files You can use your FinePix S20 Pro to playback voice memos recorded on this camera or voice memos up to 30 seconds long recorded onto a media using a FUJIFILM digital camera Playing back voice memos Playback Pause Resume Stop Fast forward Rewind Control Description The voice memo stops when playback ends Pauses the voice memo during playback P...

Page 79: ...nts with the FinePix S20 Pro On the FinePix S20 Pro you can specify only one print per image in the DPOF settings Note that some printers do not support date and time imprinting or specification of the number of prints Note that the warnings shown below may be displayed while you are specifying the prints P 72 When you erase the image the DPOF setting for that image is deleted at the same time P 8...

Page 80: ...ding on the printer specifications the date may not be printed in some cases u DPOF SET FRAME p PHOTO MODE PLAYBACK When DPOF settings were specified on another camera When the data includes a frame file with DPOF setting that were specified on another camera appears Pressing the MENU OK button or p button erases all of the DPOF settings already specified for each frame file You must then specify ...

Page 81: ...tal number of prints Setting for that frame Pressing the BACK button during the settings all the new settings are cancelled If there were previous DPOF settings only the modifications are cancelled 5 Always press the MENU OK button or p button to complete the settings Pressing the BACK button no DPOF settings are specified D P O F D P O F 1 0 0 0 0 0 9 1 0 0 0 0 0 9 T O T A L T O T A L 9 S H E E T...

Page 82: ... 1 0 2 2 1Press d or c to select U DPOF ALL RESET 2Press the MENU OK button 3 A message appears To reset all the DPOF settings press the MENU OK button or p button R E S E T D P O F O K R E S E T D P O F O K やめる やめる Y E S Y E S C A N C E L C A N C E L OK OK BACK BACK 0 1 0 2 U DPOF ALL RESET p PHOTO MODE PLAYBACK ...

Page 83: ...TE TIME SET Use this option to correct the date or time See P 16 for details ADAPTER YES NO NO Select this setting when a conversion lens is used See P 87 for details MEDIA º xD Picture Card ª Microdrive º Sets the media to be used when an xD Picture Card and Microdrive are loaded in the camera FRAME NO CONT RENEW CONT Specifies whether frame numbers are assigned consecutively from previous number...

Page 84: ...of your shot are shown as a preview for image checking and you can then choose whether or not to record the image h To record the image Press the MENU OK button h To discard the image Press the BACK button The preview zoom can be also used The color tones in images displayed when ON is selected may differ slightly from those in the images actually recorded In Long period continuous shooting the im...

Page 85: ...Press a b d or c to display another part of the image A ruined image can not be saved from the preview function Preview zoom works in the same way as the playback zoom P 30 0 1 0 2 1 2 8 0 x 1 2 8 0 x 9 6 0 9 6 0 N O N O RM RMA L A L S 1 2 5 0 S 1 2 5 0 F 5 6 F 5 6 S T D S T D 2 0 0 2 0 0 O O N See P 70 for detailed information on each item Continuous shooting preview image checking When the PREVI...

Page 86: ...ressing the Shutter button down halfway wakes the camera up Pressing any other button as well as the Shutter button wakes the camera up POWER SAVE SETTING low power setting To restore power to the camera When the Auto power off function has shut the camera down after 2 minutes or 5 minutes 1 Set the Power switch to OFF 2 Set the Power switch back to q or w 0 1 0 2 FORMAT media initialization Initi...

Page 87: ...e zoom setting equal to 28 mm 46 mm When using the lens at the telephoto setting the image is distorted and not be in focus The wide conversion lens and built in flash cannot be used together Teleconversion lens TL FX9 TL FX9B This is a set that includes a teleconversion lens and adapter ring This accessory increases the focal length of your lens by 1 5 times equal to a 315 mm telephoto lens witho...

Page 88: ...efore opening the slot cover Opening the slot cover without turning the camera off may cause the Frame number memory to not function File number runs from 0001 to 9999 Once 9999 is exceeded the directory number changes from 100 to 101 The maximum number is 999 9999 The displayed frame number may differ for images photographed on other cameras When the æ message appears see P 111 2 1 0 2 0 0 4 1 0 ...

Page 89: ...erating system Connect the camera with selected as the USB setting P 100 Connect the camera with PC selected as the USB setting Allows a digital camera to be used as USB Mass Storage removable disk drive card reader Allows a digital camera to be used as a PC Camera Windows Mac OS 9 only USB PC Camera Driver Exif Launcher USB Mass Storage Driver FinePixViewer PictureHello Software used to read PDF ...

Page 90: ...Internet connection 3 i To use the FinePix Internet Service or mail attachment function An Internet connection and e mail transmission software i Connection speed 56 k or better recommended Sound functions 4 Speakers microphone and sound card Notes i Connect the camera directly to the computer using the USB cable mini B The software may not operate correctly when you use an extension cable or conn...

Page 91: ...Computer icon Windows XP users should click My Computer in the Start menu 2 Right click FINEPIX CD ROM drive in the My Computer window and select Open 3 Double click SETUP or SETUP exe in the CD ROM window Installing other applications You may see messages for installing NetMeeting ImageMixer VCD2 for FinePix and WINASPI Install these applications as directed by the on screen instructions The inst...

Page 92: ...for installation 400 MB minimum Amount required for operation 600 MB minimum When ImageMixer VCD2 for FinePix 2 GB or better Minimum 1 GB when RAW FILE CONVERTER LE is used Display 800 600 pixels or better at least 32 000 colors When ImageMixer VCD2 for FinePix 1024 768 or better Internet connection 4 i To use the FinePix Internet Service or mail attachment function An Internet connection and e ma...

Page 93: ...ewer 1Click the Open button to open the installation destination folder 6 A message appears asking whether you want to continue with the installation Click the OK button 7 The User License Agreement for this software appears Read the agreement carefully and then if you agree to the terms of the Agreement click the Agree button If you click the Disagree button the software is not installed 9 Instal...

Page 94: ...stallation as directed by the on screen instructions 10 After restarting the Macintosh the FinePixViewer installation completed message appears Click Using FinePixViewer to view the basic FinePixViewer functions To install Acrobat Reader later 1 Double click the FinePix CD ROM to open the CD ROM window 2 Double click FinePixViewer for Mac OS 9 Acrobat Reader English folder 3 Double click English R...

Page 95: ... and e mail transmission software i Connection speed 56 k or better recommended Hardware and software requirements 1 Models with a USB port as a standard feature 2 Required to use the FinePix Internet Service The software can still be installed even if you do not have an Internet connection Notes i Connect the camera directly to the Macintosh using the USB cable mini B The software may not operate...

Page 96: ... enclosed CD ROM into the CD ROM drive The FinePix window opens If the FinePix window does not open double click the CD ROM icon 3 Double click Installer for MacOS X 4Click the icon This operation is not required on version 10 2 or later 5 Enter the administrator name and password Then click the OK button The window displayed in Mac OS X is slightly different 6 Click the Continue button 7 Quit any...

Page 97: ...appears Installation may take several minutes 14 Launch Image Capture from the Applications folder 13 When you have completed the installation click the Restart button 15 Change the ImageCapture settings OS X 10 1 5 1 Select Other from Hot plug Action OS X 10 2 or later 1 Select Preferenes from the Image Capture menu 2 Select Other from When a camera is connected open 16Select FPVBridge from FineP...

Page 98: ...e of the plug and socket outlet depends on the country of use See P 108 for notes on using the AC power adapter Refer to the instructions provided with your TV for more information on video input for your TV 6 1 1 Using the AC power adapter sold separately Always use a FUJIFILM AC Power Adapter AC 5VH AC 5VHS P 106 Use the AC power adapter to avoid losing power at inconvenient times such as when d...

Page 99: ...eHello is not supported on Macintosh computers Connection is only possible with a FUJIFILM camera equipped with a PC Camera function Change between ºª and qPC in the camera s SET UP screen qPC PC CAM PC camera mode For information on taking pictures using IEEE 1394 refer to the Hyper Utility Software HS V2 Ver 2 0 or later Help menu Operating system compatibility chart Windows u Can be connected C...

Page 100: ...f you use other cable your camera may not work correctly Make sure that the USB cable mini B or IEEE 1394 cable is connected correctly and is pushed in Do not connect the USB cable mini B and the IEEE 1394 cable at the same time Connect your camera and a PC with the IEEE 1394 cable only when the Power switch is set to w If the Power switch is set to q the lens of the camera will be extended DC IN ...

Page 101: ...con and name change to the FinePix icon and name 2Specify the settings in the AutoPlay dialog box h When FinePixViewer is included in the list of actions to perform Select Viewing images using FinePixViewer and then select the Always do the selected action checkbox This checkbox may not be shown in some cases Click the OK button to launch FinePixViewer h When FinePixViewer is not included in the l...

Page 102: ...era Windows 98 98 SE For a DSC connection proceed to step 2 For a PC CAMERA connection proceed to step 3 1 2 Check that the indicator lamp is lit green no data is being exchanged with the computer Quit all applications FinePixViewer etc that are using the camera Perform the steps shown below before you turn the camera off This procedure differs depending on the operating system software or PC you ...

Page 103: ...1Turn on your PC 2Disconnect the camera P 102 3Quit all currently running applications 4Close all files 5Open the My Computer window open the Control Panel and double click Add Remove Programs 6 2 2 Uninstalling the software Windows Macintosh h To read How to Use FinePixViewer You must install Adobe Systems Acrobat Reader See P 94 for information on installing Acrobat Reader For more information o...

Page 104: ... FinePixViewer Quit FinePixViewer and DP Editor Then drag the installed FinePixViewer folder to the Trash and select Empty Trash in the Special menu Uninstalling Exif Launcher FinePixViewer and DP Editor 1After you have quit Exif Launcher in Exif Launcher Settings in the FinePixViewer Settings menu move the Exif Launcher file from the Startup Items folder in the System folder to the Trash Then sel...

Page 105: ...ally available USB IEEE 1394 Image input output to the PC Print creation TV monitor commercially available Audio Visual output Digital Photo Printer CX 550 Also shown on a TV PC Card Adapter DPC AD Image Memory Card Reader DPC R1 USB PC card slot PC Card Adapter DPC AD CompactFlash Card Adapter DPC CF USB xD Picture Card USB Drive DPC UD1 eBy using the FinePix S20 Pro together with other optional ...

Page 106: ...artMedia The DPC R1 uses the USB interface for high speed file transfer h Compatible with Windows 98 98 SE Windows Me Windows 2000 Professional Windows XP or iMac Mac OS 8 6 to 9 2 2 Mac OS X 10 1 2 to 10 2 2 and models that support USB as standard h Compatible with xD Picture Card of 16 MB to 512 MB and SmartMedia of 3 3 V 4 MB to 128 MB h PC Card Adapter DPC AD The PC Card Adapter allows the xD ...

Page 107: ... size manganese or nickel cadmium Ni Cd batteries in your FinePix S20 Pro because the heat created by the batteries could damage the camera or cause is not to work h The life of alkaline batteries varies between brands The life of batteries you purchase may be shorter than those provided with the camera Notes on the Batteries Incorrect use of the batteries could cause them to leak become hot ignit...

Page 108: ... only providing power for a short time after being charged To prevent this problem discharge and recharge them several times using the camera s Discharging rechargeable batteries function By repeating this cycle several times the temporary reduction in performance caused by memory or deactivation can be remedied and the batteries can be restored to their original performance levels Deactivation an...

Page 109: ...batteries have not been used for a long period i When you purchase new Ni MH batteries Do not use the Discharging rechargeable batteries function while using the AC power adapter In these situations the Ni MH batteries will not be discharged due to the external power supply Procedure for discharging rechargeable Ni MH batteries 1 P P OW OWE R S A V E E R S A V E F O F O RM RMA T A T 2 M I N 2 M I ...

Page 110: ...o not apply pressure and avoid bending h Do not use the xD Picture Card in a hot or humid place h Clean the xD Picture Card with a soft dry piece of cloth when dirty h When carrying or storing an xD Picture Card keep it in the special protective case h The xD Picture Card will work well for long time but will sooner or later lose its ability to store and play back images or movies If this happens ...

Page 111: ...f the error message is still displayed replace the xD Picture Card i Contact your FUJIFILM dealer i Turn the camera off and then on again or use skip playback frame rewind i Movies cannot be played back The frame number has reached 999 9999 1 Insert a formatted media into the camera 2 Set RENEW as the FRAME NO setting in the SET UP menu 3 Start taking pictures The frame numbers start from 100 0001...

Page 112: ...ote that you can still shoot still images during this time When q 1394 is selected in 1394 MODE in the SET UP menu the Mode dial is set to another mode excluding the Still photography mode i When taking pictures using PC set the Mode dial to the Still photography mode i Select ºª in 1394 MODE in the SET UP menu Warning Displayed Explanation Remedy Camera malfunction or fault i Turn the camera on a...

Page 113: ...atteries in your pocket or another warm place to heat them and then load them into the camera just before you take a picture i Wipe the battery terminals with a clean dry cloth i Load new or fully charged batteries i Insert a media i Insert a new media or erase some unwanted frames i Format the media i Wipe the xD Picture Card contact area with a clean dry cloth i Insert a new media i Turn the cam...

Page 114: ...ble is not correctly connected to the PC or camera i The PC is not turned on The camera has suffered an unforeseen problem i Clean the lens i Try standing approx 2 m 6 6 ft from your subject to take the picture i Cancel Macro mode i Select Macro mode i Use AF AE lock to take the picture This is a characteristic of CCDs and does not indicate a camera fault Wipe the xD Picture Card contact area with...

Page 115: ...000 sec 30 sec to 1 10000 sec Bulb Up to 30 sec Aperture F2 8 to F11 13 steps in 1 3 EV increments Manual Auto selectable Sensitivity B Equivalent to ISO160 800 Manual Equivalent to ISO200 400 800 1600 resolution is set at 1 for shots taken at ISO 1600 During setting CCD RAW 200 400 Photometry TTL 64 zones metering Multi Spot Average Exposure control Program AE B N Shutter priority AE Aperture pri...

Page 116: ...batteries and xD Picture Card Accessories See P 7 Optional Accessories See P 106 Power Supply and Others The number of available frames for battery operation given here is a guide to the number of consecutive shots that can be taken under FUJIFILM test conditions i Batteries used alkaline batteries bundled with the camera fully charged Ni MH batteries i Shooting conditions Measured at normal tempe...

Page 117: ...V increases by 1 Likewise when the light is halved the EV decreases by 1 Frame rate fps The frame rate refers to the number of images frames that are photographed or played back per second For example when 10 frames are continuously photographed in a 1 second interval the frame rate is expressed as 10 fps For reference TV images are displayed at 30 fps JPEG Joint Photographics Experts Group A file...

Page 118: ...your FUJIFILM dealer Do not allow water or foreign objects to enter the camera If water or foreign objects get inside the camera turn the camera off remove the batteries and disconnect and unplug the AC power adapter Continued use of the camera can cause a fire or electric shock h Contact your FUJIFILM dealer Do not use the camera in the bathroom or shower This can cause a fire or electric shock N...

Page 119: ...d it and gently release the card If an xD Picture Card comes out of camera quickly it could hit someone and cause injury Request regular internal testing and cleaning for your camera Build up of dust in your camera can cause a fire or electric shock h Contact your FUJIFILM dealer to request internal cleaning every 2 years Do not heat change or take apart the batteries Do not drop or subject the ba...

Page 120: ...Printed in Japan FGS 305112 FG Printed on recycled paper 26 30 Nishiazabu 2 chome Minato ku Tokyo 106 8620 Japan http home fujifilm com products digital ...

Reviews: