105
6
104
CONNECTING AT PC-CAMERA MODE
Stand
3
4
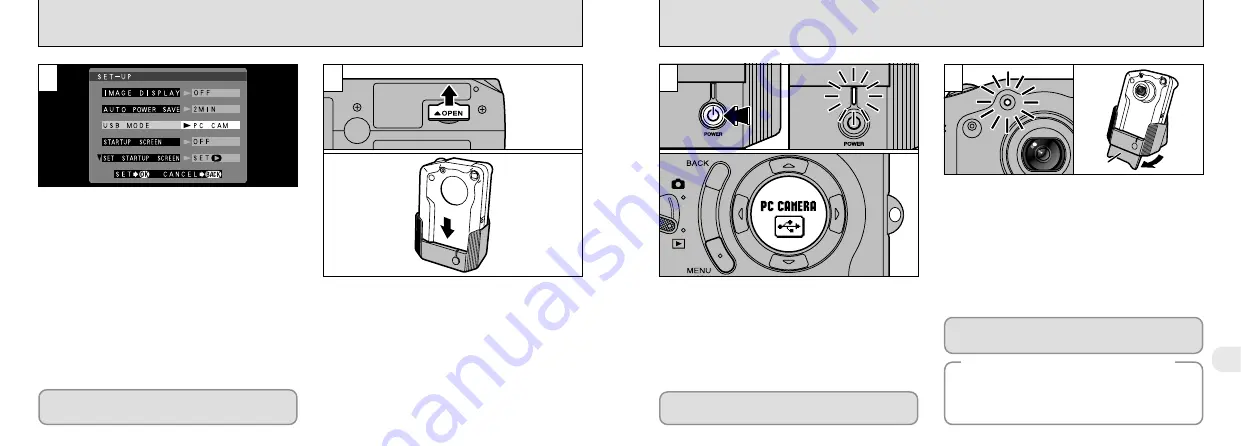
Set the “USB MODE” setting in the “SET–UP”
menu to “PC CAM” (
➡
P.92, 93).
1
2
Refer to the Software Quick Start Guide booklet
for information on installing the software.
➀
Open the connection socket cover on the
bottom of the camera.
➁
Switch the camera off and place it in the
cradle.
●
!
Push the camera firmly onto the cradle connector.
When you press the “
<
” (power) button on the
cradle, the camera is connected to your PC and
the power lamp on the cradle lights. “PC
CAMERA” also appears on the display panel.
●
Focal range:
Approx. 50 cm (1.6 ft.) to infinity
●
!
The Auto Power Save function does not operate
when the camera is connected to a PC.
➀
The self-timer lamp blinks or the viewfinder lamp
alternately blinks green and orange while the
camera is communicating with your computer.
Do not disconnect the camera while
communication is in progress.
➁
The angle of the cradle can be changed. This
is useful when the cradle is used for a PC-
camera connection.
●
!
The lens is fixed at the wide-angle zoom setting
during PC-camera connection.
●
!
See P.106 for information on removing the camera.
◆
When the Cradle is Not Used
◆
The PC Camera connection allows you to record movies on
your PC and use the camera for videoconferencing. Refer to
the Software Quick Start Guide booklet for details.
Connect the special USB cable to the DIGITAL
(USB) socket on the camera and switch the camera
on. (
➡
P.9, 22)
●
!
The AC power adapter should be used when the
camera is connected to a PC. (
➡
P.19)
●
➀
●
➁
●
!
Check that the AC power adapter and the special
USB cable are connected to the cradle.
●
➀
●
➁
If Windows driver installation has started, refer
to the Software Quick Start Guide booklet.


