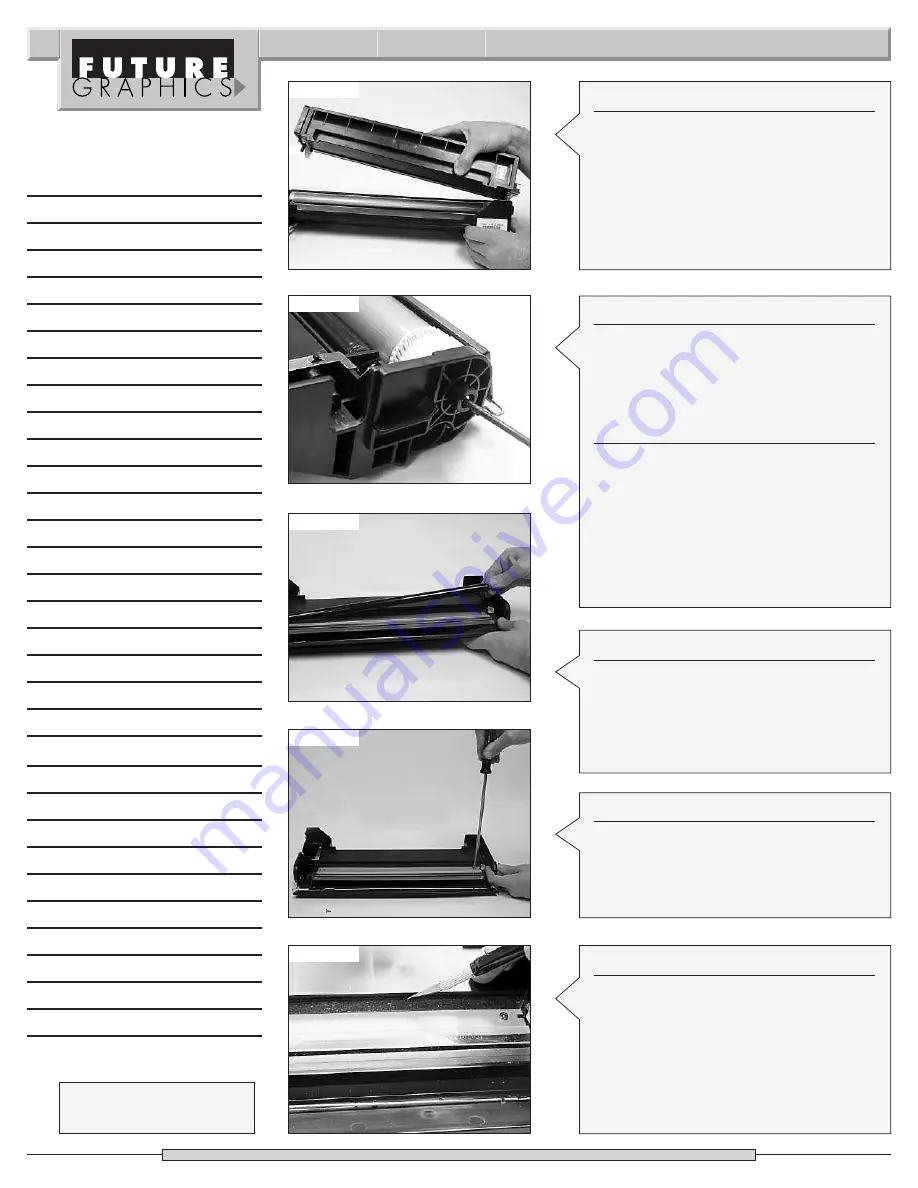
Step 3
Separate the two sections of the
cartridge. (See Photo 4) Set the toner
hopper aside.
Photo 4
Photo 5
Photo 6
Step 6
Remove the PCR from the PRC cradles.
(See Photo 6)
NOTE:
Clean the PCR using a lint free
cloth and water, a mild soap maybe used
if needed.
Photo 7
Photo 8
2
Fuji Xerox P-880 Technical Instructions
Need trust-worthy, detailed Technical
Instructions for another engine?
V isit: www.futuregraphicsllc.com
Step 7
Using a Philips screwdriver remove the
two screws holding the wiper blade.
(See Photo 7)
Step 4
Using a punch and a hammer, hit the
drum axle out from the drive gear side of
the hopper. (See Photo 5) Slide the drum
axle out from the waste hopper.
Step 5
Remove the drum.
NOTE:
If you plan to reuse the drum, wipe
the drum with a lint free cloth. If toner is
built up on the drum apply a small
amount of alcohol to the lint free cloth.
Clean the drum and then wipe dry. Place
the drum in a protective area out of the
light.
Step 8
Use a knife to cut the foam that holds the
wiper blade to the toner hopper.
(See Photo 8)
Remove the wiper blade.
NOTE:
Do not remove the foam from the
waste hopper. The foam helps prevent
toner from leaking out from behind the
wiper blade.
Notes


