4.2 Loading Paper
139
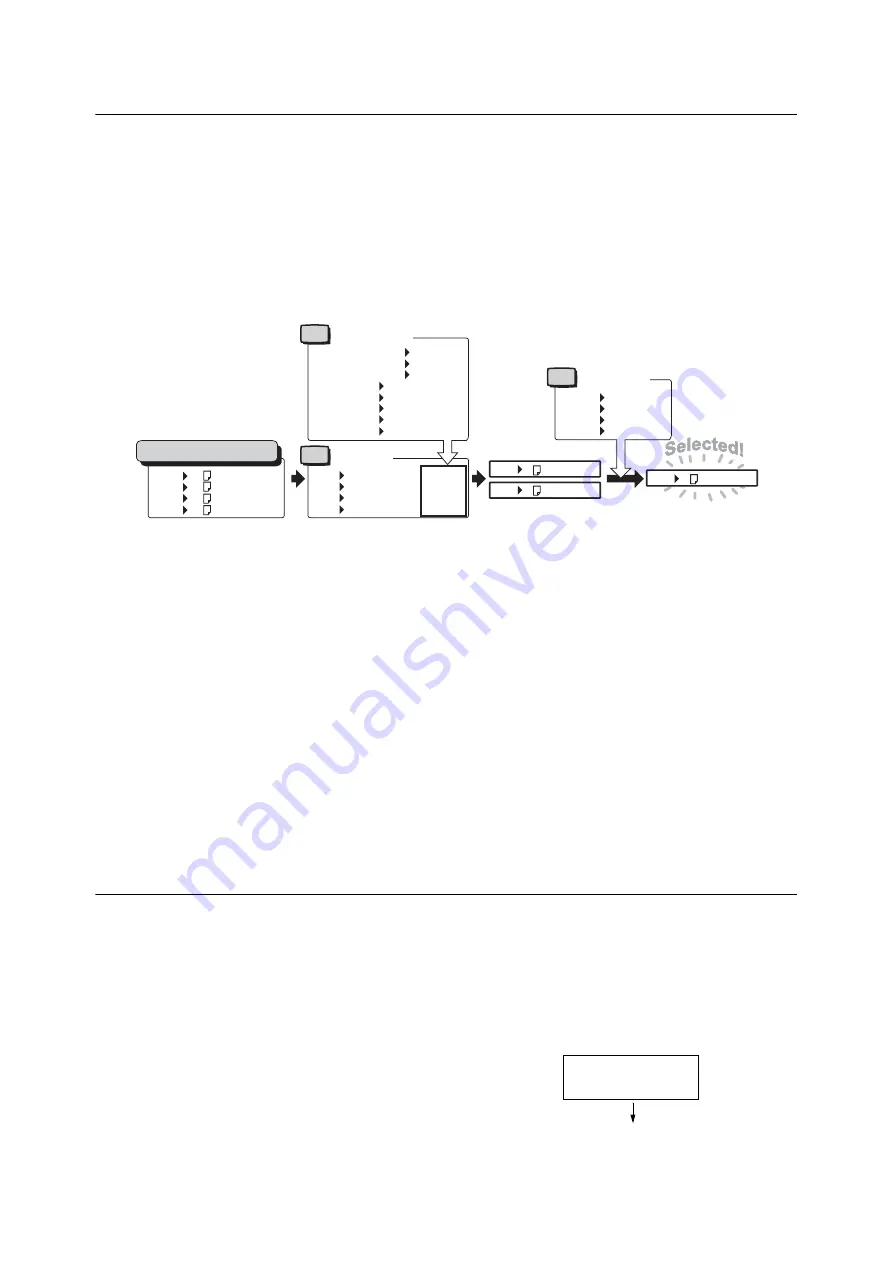
Auto Tray Selection Feature
Printing while [Automatically Select] is selected for the [Paper] > [Select By Tray] setting on the
[Paper/Output] tab of the print driver, the printer automatically selects a paper tray based on the
size and orientation or paper type and color of the document to be printed. This feature is called
“
Auto Tray Selection
”
.
If there are several appropriate trays for the document, the printer applies [Paper Type] setting
specified in the control panel to [Paper Type Priority] to select a paper tray with the highest
priority. In this case, if the [Paper Type Priority] is set to [Auto Paper Off] for the type of paper in
the tray, it is not subject to Auto Tray Selection. If the [Paper Type Priority] setting is the same
for all of the paper types, the printer selects paper based on the [PaperTrayPriority] setting.
Note
• Bypass tray is set to [No AutoTraySwitch] by default. Refer to "Setting Tray 5 (Bypass) for Auto Tray Selection"
(P.139) to set it for auto tray selection.
• When the bypass tray is set for auto tray selection, only the lowest priority can be set for the bypass tray. For
information on how to set the highest priority for the bypass tray, refer to "[Prioritize Bypass]" (P.193).
• The printer does not perform auto tray selection for the tray which is set to [No AutoTraySwitch] in [Paper Tray
Priority].
• If there is no tray that corresponds to the automatically selected tray, the printer will display a message
prompting you to load paper. You can program your printer not to display this message and have the printer print
the job on paper that is nearly the same size or larger than the document size (Substitute Tray feature).
• If a tray runs out of paper during printing, the printer automatically switches to another tray that contains paper
of the same size and orientation (Auto Tray Switch feature). The printer will not switch trays if the [Paper Type
Priority] is set to [Auto Paper Off] for the type of paper in the tray.
• You can assign names to paper of the same type and configure them as custom paper. For example, if blue plain
paper is loaded in one tray, you can name it
“
Plain blue
”
to differentiate it from other plain paper.
Refer to
• "[Printer Settings]" (P. 189)
Setting Tray 5 (Bypass) for Auto Tray Selection
Use the procedure below to set Tray 5 (Bypass) for auto tray selection on the control panel.
You can set Tray 5 (Bypass) for auto tray selection by specifying paper tray priority and paper
size.
Refer to
• "Auto Tray Selection Feature" (P. 139)
1.
On the control panel, press the <Settings>
button to display the menu screen.
Tray 1 Recycled Paper··
Tray 2 Plain S2 Paper··
Tray 3 Plain Paper·····
Tray 4 3.Custom 3······
Tray 1 A4 Recycled Paper
Tray 2 A4 Plain S2 Paper
Tray 3 A4 Plain Paper
Tray 4 A4 Plain Paper
For example
Set
Set
Tray Priority
Paper Priority
Plain Paper 1st
Recycled Paper 1st
Plain S2 Paper Auto Paper Off
1.Custom 1 Auto Paper Off
2.Custom 2 Auto Paper Off
3.Custom 3 2nd
4.Custom 4 Auto Paper Off
5.Custom 5 Auto Paper Off
Paper in the paper trays
Paper Type
1st
Auto Paper Off
1st
2nd
Tray 1 A4 Recycled Paper
Tray 3 A4 Plain Paper
Tray 1 1st
Tray 2 2nd
Tray 3 3rd
Tray 4 4th
Tray 1 A4 Recycled Paper
Set
Settings
Print Reports
Summary of Contents for DocuPrint 5105 d
Page 1: ...DocuPrint 5105 d User Guide...
Page 75: ...3 3 Printing on Custom Size Paper 75 2 Click the Device Settings tab 3 Click Custom Paper Size...
Page 78: ...78 3 Printing 6 Click Print on the Print dialog box to start printing...
Page 94: ...94 3 Printing 8 Press the Print Menu button to return to the Ready to print screen...
Page 418: ...418 Control Panel Menu Tree...


