FTE MAX S400 HD PLUS Quick Installation Manual Download Page 36

PAG. 36

rev 1.1

OSD 67

OSD 68

OSD 69

OSD 70

8.1.6. VIDEO PLAYER

1.Press the button [OK] over a video fi le (OSD 67).
2. The fi le will be played on the screen.
3. Press the key [Exit] to exit.

8.1.7. HOW TO REPRODUCE A RECORDING *

If you want to reproduce a recording, you only have to select it 
and press the key [OK].

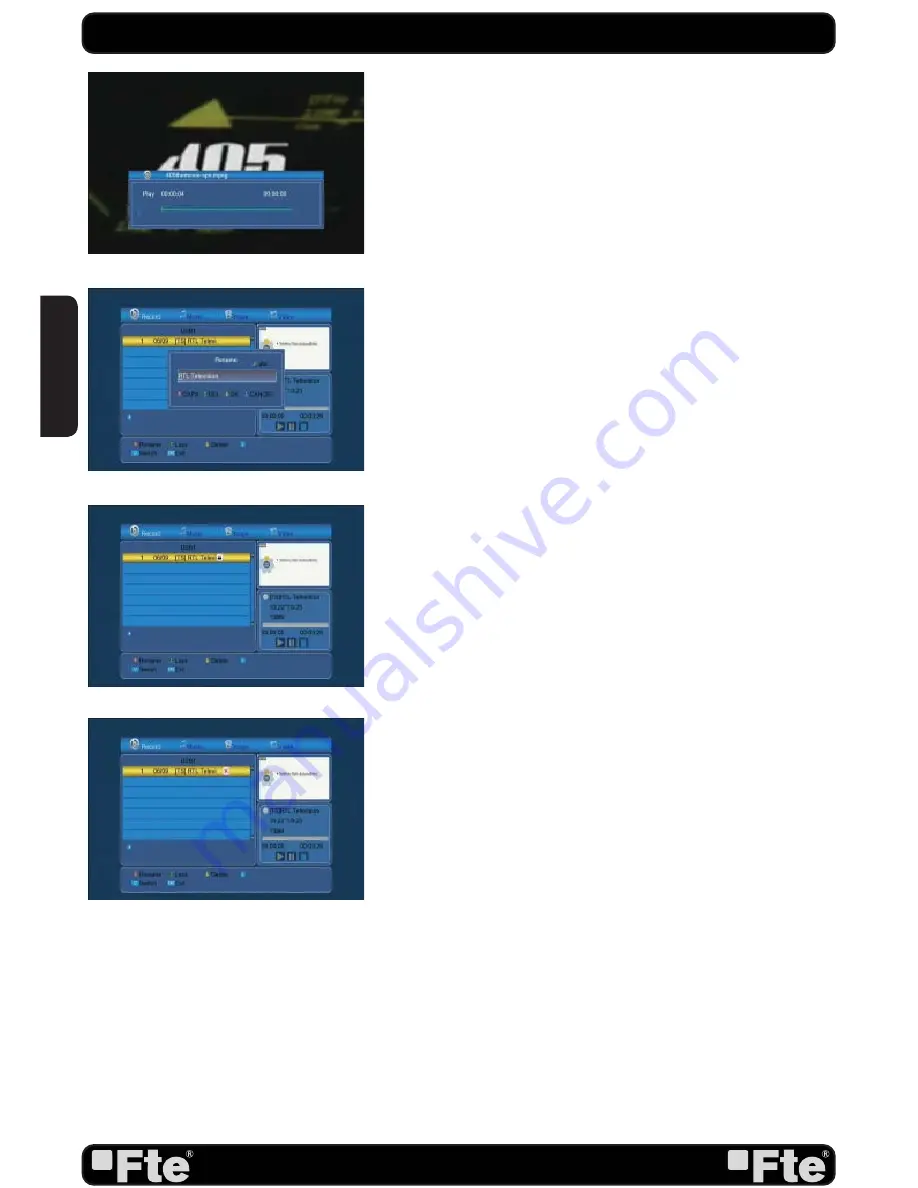
8.1.7.1. HOW TO RENAME A RECORDING *

1. Press the key [Red] to rename a recording.
2. A window will appear where you can change the name of 

the record (OSD 68). Press OK [Yellow] to go out and mod-
ify the name.

3. Press the [Exit] key to leave. A window will ask for confi rma-

tion to save the changes.

8.1.7.2. HOW TO BLOCK A RECORDING *

With this function it is possible to block a recording so it is nec-
essary to introduce a password to watch it.
1. If you want to block a recording, select it and press the 

[Green] key. 

2. 

A window appears and asks for the password. If it has not 

been modifi ed, it is by default the code “0000”.

3. The blocked channel is marked with an icon (OSD 69).
4. In order that the blockade of channels work, it is necessary 

that the blocking option is activated in the menu of “Blockade 

with password”.

5. Press the key [Exit] to leave.

8.1.7.3

. HOW TO DELETE A RECORDING *

1. To delete one or more recordings, press the [Blue] key on 

the recording you want to delete (if you want to delete sever-
al recordings, select them one by one).

2. A mark will appear on the name of the channel (OSD 70).
3. The marked recordings will be deleted once you exit the 

menu.

8.2. HDD INFORMATION

In the HDD information submenu you can see the capacity 
of the hard disk. You also see the free space available (OSD 
71).

1. Press the key [Yellow] and a new window will appear, 

where you will have to choose the kind of format that you want 
to assign to the partition. Options: FAT or NTFS . Press [OK] 
over one of the options (OSD 72). The hard disk will be format-
ted and it will lose all the recordings in the memory.

REC

ENGLISH

Summary of Contents for MAX S400 HD PLUS

Page 1: ...MAX S400 HD PLUS...

Page 2: ...not block these openings or allow them to be blocked by placing the STB on a bed sofa or other similar surface nor should it be placed over a radiator or heat register Power Cord Protection Place the...

Page 3: ...o output By pressing the V FORMAT key you can configure the output format Options By source By Native TV 480i 480p 576i 576p 720p_50 720p_60 1080i_50 1080i_60 1080p_50 1080p_60 STEP 2 CONNECTIONS The...

Page 4: ...l If a Short circuit on the LNB message is shown on the TV please check the connections before continuing the installation Language press to select languages The selection of languages include English...

Page 5: ...be that you don t need to provide the power to the LNB But since this is depending on the kind of installed distribution system we recommend you to contact your installer or to refer to the user manua...

Page 6: ...n FTA Only item press to select scanning of all channels or just scanning of free channels If you select Yes it will scan free channels only 3 On Scan Channel item press to select the scanning range f...

Page 7: ...r if you wish to introduce the offset respect GMT manually GMT Usage On 3 GMT Offset If GMT Usage is On the offset respect GMT has to be configured depending on your region or country Use the keys to...

Page 8: ...s choosing the video Standard and other parameters of the screen Display setting Local Time Setting Time setting menu Timer Setting Timer setting menu Parental Lock In this option user can lock the ac...

Page 9: ...s all the stored TP This list can be modified Installation Information Shows all the technical information for the selected channel Factory Default This option resets the receiver and loads the factor...

Page 10: ...15 2 13 Mute 15 2 14 Back 15 2 15 Information 15 2 16 TTX 16 2 17 Favourites 16 2 18 Fast recordings 16 2 19 Timeshift 16 2 20 Find 17 2 21 Video Format 17 2 2 2 S l e e p 1 7 3 Edit Channel 3 1 T V...

Page 11: ...o f t w a r e u p g r a d e b y U S B 3 0 7 Game 7 1 Othello 32 7 2 Sudoku 32 8 Rec Media 8 1 Media Player 33 8 1 1 Adding a new file to the list 34 8 1 2 Sort file 34 8 1 3 Edit 34 8 1 3 1 Rename fi...

Page 12: ...vel at the ANT IN input 5 BUTTONS These buttons allow controlling some functions of the receiver 1 IF IN Satellite input 2 TV SCART Output SCART for the connection to a TV set 3 AC IN Mains input cabl...

Page 13: ...up and down 13 Vol Vol Adjusts audio volume up and down 14 OK LIST Confirms selections or opens channel list 15 Menu Opens the main menu 16 Exit Exit menus or stop operations 17 Record Quick start fo...

Page 14: ...to the desired channel 2 5 TV RADIO In TV mode press TV RADIO to switch to Radio mode In Radio mode press TV RADIO again to switch back to TV mode 2 6 CHANNEL LIST 1 In full screen press OK List key c...

Page 15: ...lecting a satellite the channel list will be reduced to the channels of this satellite OSD 5 2 10 SUBTITLES In TV mode press TXT button for activating deactivating the channel subtitles depending on t...

Page 16: ...T RECORDING To start the recording OSD 10 1 If you would like to record a programme immediately press the Key Record In order to stop a recording before the ending of the programmed length press the S...

Page 17: ...hannel according your input and list the matched channel 3 Press Blue key can close Find window 2 21 VIDEO FORMAT In Tv mode press RES key in order to configure the output format of your receiver 2 22...

Page 18: ...until you confirm with OK button 3 Press on the RCU to jump between the channels by pages 4 Press to switch the Program Group 5 The colour buttons offer further functions to manage the channel list 3...

Page 19: ...s Blue button to mark a channel for deleting Marked channels OSD 18 will be deleted after you confirm to save the changes when you leave this menu 3 1 3 3 EDIT In Channel Edit menu press Green button...

Page 20: ...first Select Yes to delete all channels or No to cancel and confirm with OK OSD 23 Pressing Exit will exit the function directly without saving FREQUENTLY ASKED QUESTION Q IF I incautiously delete all...

Page 21: ...window like the one beside OSD 26 1 Move through the satellite list using and mark unmark the satellites that you want pressing OK 2 Press Red button to enter edit satellite menu OSD 27 You can edit...

Page 22: ...kHz sig nal is used in KU Universal LNBs to change between low band and high band After choosing LNB type Universal you cannot modify 22K Toneburst 0 12V Press to switch this function On or Off Polar...

Page 23: ...d channels OSD 31 4 5 MULTI SEARCH Entering in this menu you can make a search in all the satellites of the list configured in the Satellites list option The configuration options are the same as in t...

Page 24: ...related channels will be deleted If you select No the operation will be cancelled 5 Press the key Blue to make a searching of the selected TP When selecting this option a new window will appear here y...

Page 25: ...ou to set the preferred audio language for those channels using If a channel offers the same audio language as the First Audio you set the system will play this audio language as default If the channe...

Page 26: ...rom TV System menu 5 3 DISPLAY SETTING When you enter to Display Setting menu you will see window like below OSD 32 This menu will allow you to set the features of the image Options 1 Brightness 0 100...

Page 27: ...l press OK key to enter channel list and select channel that you want to setting 5 Wake up Date use number keys to input your wakeup date 6 Wake up Time use number keys to input your wakeup time Once...

Page 28: ...tup menu the revising is complete 4 Press Exit key to draw back from the Parental Lock menu 5 7 OSD SETTING When you input to OSD Setting menu you will see a screen like below OSD 47 1 Subtitle displa...

Page 29: ...be able to choose which type of channels the receiver shown every time it starts Press in order to select among All Free or Scrambled 5 9 3 CHANNEL CHANGE From this option you will be able to select t...

Page 30: ...item 1 A warning message will be displayed like the one beside OSD 52 2 If you select Yes then all changes you made will be reset to default values Make sure you really want to do this 3 Press Exit in...

Page 31: ...ng of the file it is corrupt ed or it would be a not appropriated for this model of receiv er an alert messagewould appear Error reading the USB disk 5 After pressing OK the receiver will write into t...

Page 32: ...essman Exit Quit game and draw back to Game menu 7 2 SUDOKU 1 Moving highlight to Setup and press Left Right keys to select the game level degree of difficulty OSD 56 2 Moving highlight to Start and p...

Page 33: ...is menu option you can accede and manage the contents of the HDD previously copied from your computer You also can create playlists of music or pictures OSD 58 You can move through the different type...

Page 34: ...list press Yellow button 8 1 2 SORT FILE 1 Press the red key to open the Sort window OSD 60 Press to select and OK to confirm your choice 2 The ways of sorting are Default Sorting by scanning result...

Page 35: ...you want to play 2 A Player will be opened as it is shown in the picture 2 It changes among the different ways of replay random list or single 8 1 5 PICTURE VIEWER 1 Press OK over the file JPG that y...

Page 36: ...password If it has not been modified it is by default the code 0000 3 The blocked channel is marked with an icon OSD 69 4 In order that the blockade of channels work it is necessary that the blocking...

Page 37: ...channel information If the users makes a Pause the image will stop but when he wants to continue watching the program it will be running in the cur rent moment 2 With this option you can settle the j...

Page 38: ...ates DVB S DVB S2 recommendation Input Signal Frequency Input Level Band Width Input connector 950 2150MHz 65dBm 25dBm 36 MHz F Type connector LNB control LNB supply Polarized control DiSEqC control 1...

Page 39: ...1 1 WE FTE MAXIMAL DECLARE THAT THE PRODUCT MAX S400 HD PLUS IS IN CONFORMITY WITH FOLLOWING DIRECTIVES LOW VOLTAGE DIRECTIVE 2006 95 EC EMC DIRECTIVE 2004 108 EC PART OF THE DECLARATION OF CONFORMITY...

Page 40: ...Tel 00 39 05 22 90 97 01 Fax 00 39 05 22 90 97 48 fte fte it www ftemaximal com PORTUGAL Rua Jos Carlos Ary dos Santos A das Lebres Loures 2670 791 Santo Ant o do Tojal Tel 00 351 219 83 87 00 Fax 00...

Reviews: