Page 17
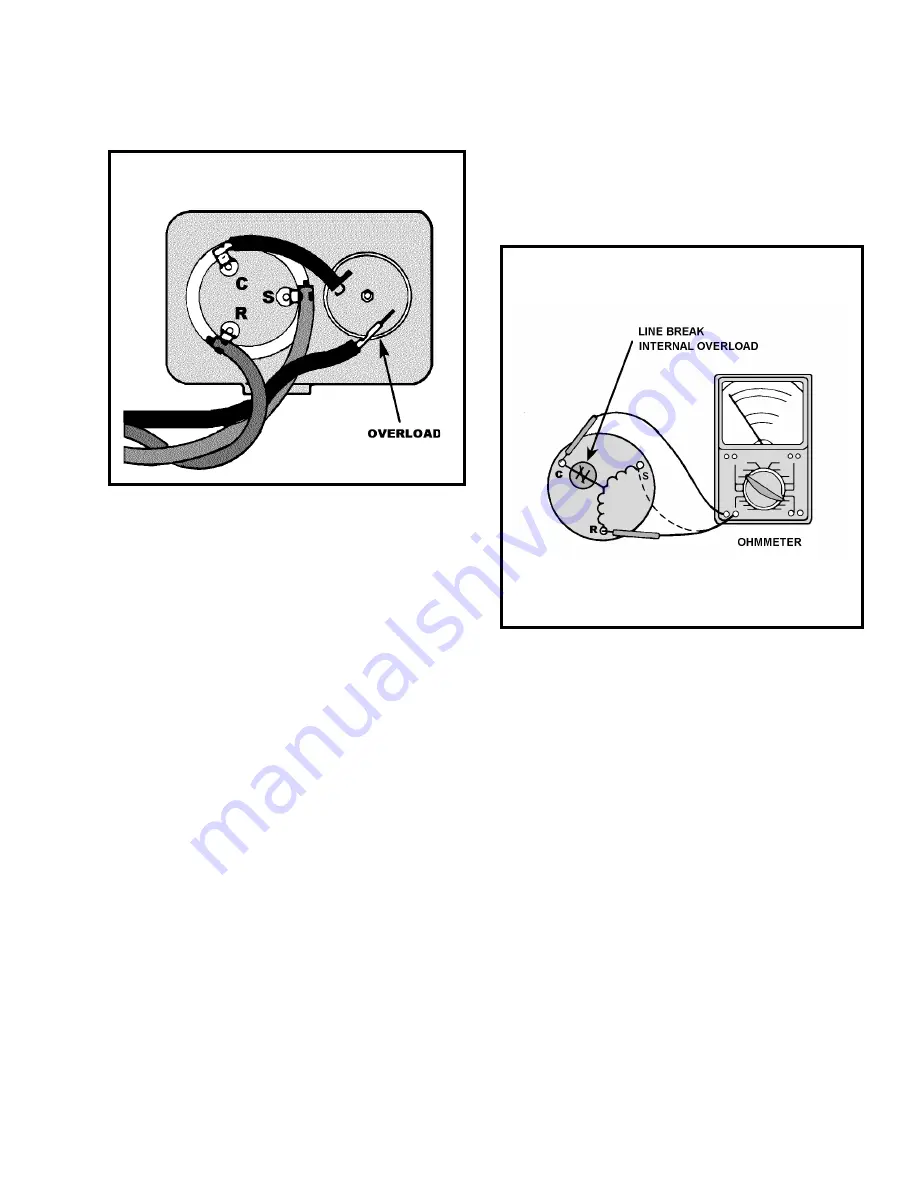
The overload is wired in series with the common motor
terminal. The overload senses both major amperage and
compressor temperature. High motor temperature or
amperage heats the disc causing it to open and break
the circuit to the common motor terminal.
Figure 3: External Overload
Heat generated within the compressor shell is usually
due to:
1.
High amperage.
2.
Low refrigerant charge.
3.
Frequent recycling.
4.
Dirty condenser.
TERMINAL OVERLOAD - TEST
(Compressor - External Type)
1.
Remove overload.
2.
Allow time for overload to reset before attempting
to test.
3.
Apply ohmmeter probes to terminals on overload
wires. There should be continuity through the over-
load.
TERMINAL OVERLOAD (Internal)
Some model compressors are equipped with an internal
overload. The overload is embedded in the motor wind-
ings to sense the winding temperature and/or current
draw. The overload is connected in series with the com-
mon motor terminal.
Should the internal temperature and/or current draw be-
come excessive, the contacts in the overload will open,
turning off the compressor. The overload will automati-
cally reset, but may require several hours before the heat
is dissipated.
CHECKING THE INTERNAL OVERLOAD
(see Figure 4.)
Figure 4
INTERNAL OVERLOAD
1.
With no power to unit, remove the leads from the
compressor terminals.
2.
Using an ohmmeter, test continuity between termi-
nals C-S and C-R. If not continuous, the compres-
sor overload is open and the compressor must be
replaced.
FAN MOTOR
A single phase permanent split capacitor motor is
used to drive the evaporator blower and condenser
fan. A self-resetting overload is located inside the
motor to protect against high temperature and high
amperage conditions.
FAN MOTOR - TEST
1.
Determine that capacitor is serviceable.
2.
Disconnect fan motor wires from fan speed switch
or system switch.
3.
Apply "live" test cord probes on black wire and com-
mon terminal of capacitor. Motor should run at high
speed.
Summary of Contents for 2000 TwinTemp EK12J33A-1
Page 36: ...Page 36 WIRING DIAGRAM FOR MODEL YS09J10 1...
Page 37: ...Page 37 WIRING DIAGRAM FOR MODELS YS13J33 YM18J34A YL24J35A...
Page 39: ...Page 39 YS YM YL SERIES CHASSIS PARTS...
Page 40: ...Page 40 YS YM YL SERIES CABINET MOUNTING PARTS...
Page 46: ...Page 46 ES EM SERIES CHASSIS PARTS...
Page 47: ...Page 47 ES EM SERIES CABINET MOUNTING PARTS...
Page 51: ...Page 51 EL SERIES CHASSIS PARTS...
Page 52: ...Page 52 EL SERIES CABINET MOUNTING PARTS...
Page 56: ...Page 56 EK SERIES CHASSIS PARTS...


