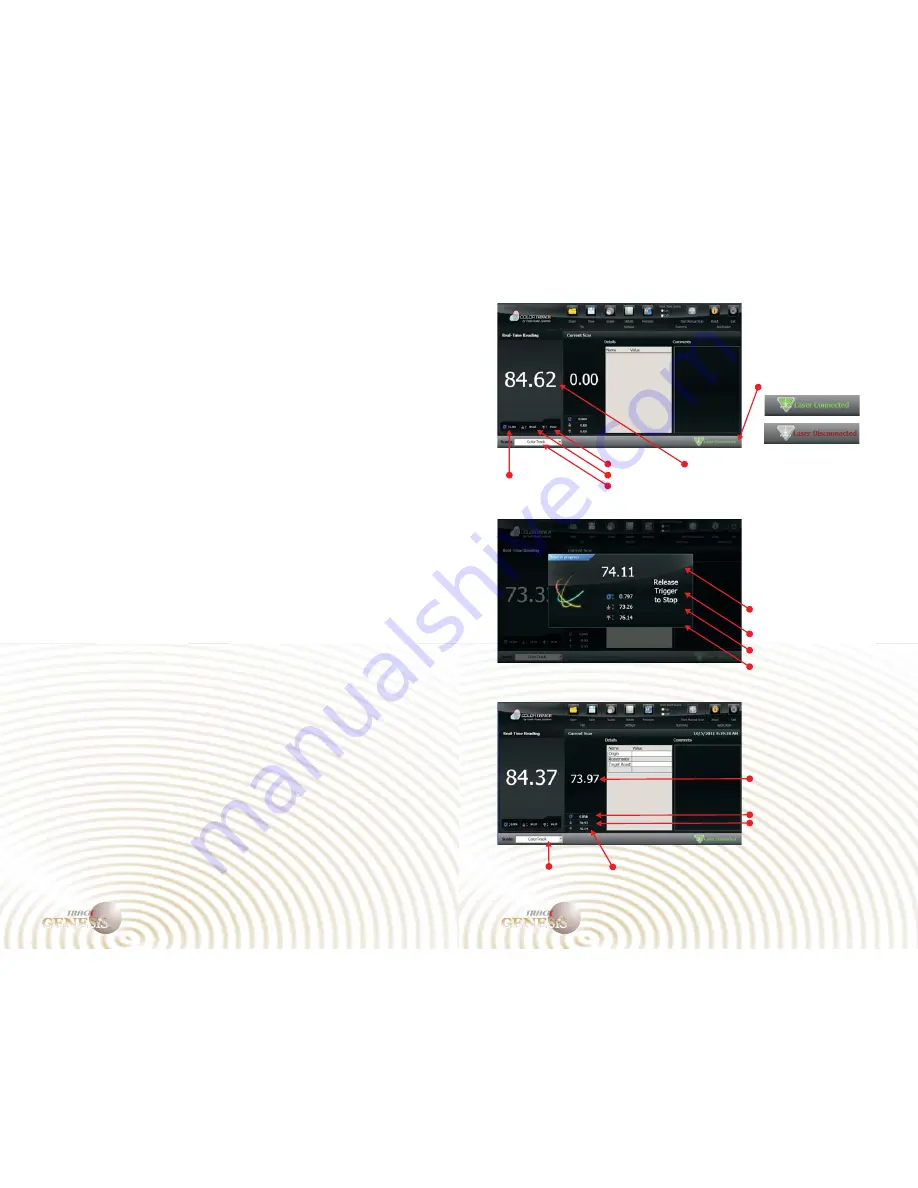
QuickStart
tall the ColorTrack Software
If you purchased a ColorTrack system without a computer controller you
will need to install the ColorTrack program on your computer. To do so,
place the installation disk or USB drive into your computer and then
access the drive. Select the install icon (setup.exe) and then follow the
instructions as they appear on-screen. After you've installed the program,
reboot your computer.
Connect the supplied USB cord to the ColorTrack device and then
connect the cord to any USB connection on your computer. Start the
ColorTrack program from the icon on the desktop. The main screen will
be displayed and assuming everything is installed correctly there will be
an indicator in the lower right hand corner of the screen indicating that
the laser is active and ready for use. In addition, if your laser is properly
connected it will automatically start reading and displaying values.
Run/Record a Scan
With the USB cord securely connected, and ColorTrack software running
point the laser at a sample. The ColorTrack program will automatically
begin reading from the device in real-time displaying the results on
screen. To record a final result press the red button on the front of the
laser and hold it for a few seconds while waving it over the sample.
Release it when you feel you have a good stabilized result. The value
will be recorded and displayed in a separate window on your screen.
Ins
Connect the Device
User Reference Guide
5
User Reference Guide
6
TM
GENESiS
COLOR
TM
TM
GENESiS
COLOR
TM
Ready Mode
Recording Mode
Results Mode
Real-time Minimum Reading
Real-time Maximum Reading
Real-time Standard Deviation
Real-time Recorded Reading
Recorded Minimum Reading
Recorded Maximum Reading
Recorded Standard Deviation
Recorded Average Reading
Active Scale
Minimum Reading
Maximum Reading
Real-time Average Reading
Active Scale
Standard Deviation
Laser Connection Indicator


