background image

01

5

Before You Start

Tuner 

36

07

Handle the disc by its edge to keep 

        the disc clean, and do not touch
        the surface.

        Do not attempt to modify the unit,
        modifying the unit may cause an 
        accident. 

        Stop the vehicle before carrying 
        out any operation that could 
        interfere with your driving.

        Do not work in extremely high or 
        low temperature. Be  sure the
        temperature inside the vehicle
        is b60  C and -10  C
        before turning on your unit .


To enjoy optimum sound and 

        images while playing, handle the 
        discs as follows:

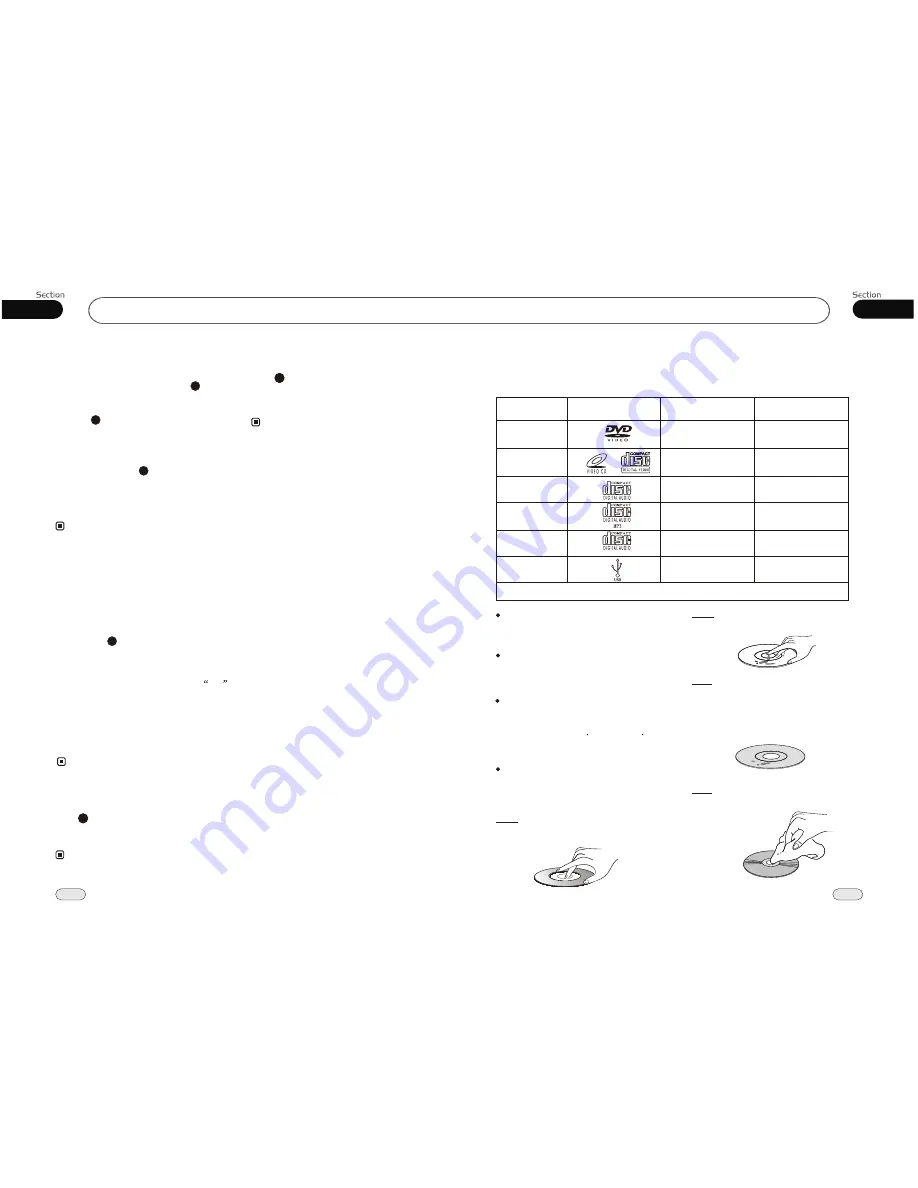
Do not use your CDs with paste residue

or ink attached.

Do not use CDs with labels or stickers 

attached, which may leave a sticky residue 
while beginning to peel off. 
 (Shown as the picture)

Clean the discs with an optional clean-

ing cloth. Wipe each disc from the center out. 
(Shown as the picture)

PRECAUTIONS

This unit can play the following discs only: 

*   This function is only operated by using rem-
     ote control.

Type of disc           

VCD 

12cm

MP3 

 12cm

CD

12cm

NOTE:  The unit is compatible with  VCD1.0/2.0/3.0 version and DVCD disc.

12cm

DVD       

Label on the disc      

Recorded material      

Sound and moving 
        pictures  

Sound and moving 
        pictures  

Sound only

Sound only

Size of disc   

MPEG-4 

Sound and moving 
        pictures  

12cm

MPEG-4

USB 

Sound and moving 
        pictures  

Version 2.0 
and less

Scanning/Memorizing Stations 

Automatically

During radio status, you can press       

AMS


button on the remote control to scan each 
stored station 5 seconds respectively which 
stored in      Number Buttons (from 1 to 6). 
You can press the corresponding Number 
Buttons or AMS button when your desired 
station is charged. And it starts playing that 
station.
When press and hold 


AMS 

automatically memory storing fun-

ction. The radio automatically selects a 
station and has it stored in any one of the 
Number Buttons from 1 to 6.

button it will 

activate 

4

23

Notes:

Number Buttons

During radio mode,


Number Buttons 

from 1 to 6 


can help you store your

favorite station. You can follow the 
as below:

steps 

You can store up to 18 FM stations  6 each 
for FM1,FM2,FM3),up to 12AM stations 
(6 each for AM1/MW and AM2/LW).

(

23

When receiving a station, press and hold
any one of the Number Buttons until

CH

appears in the LCD, which indicates that 
station is already stored in the corres-
ponding number button.

Note:

This function is operated by using the remote
control only.

The unit can be stored up to 6 stations for 
each band. 
Regarding the function of Number Buttons,
refer to 

Number Buttons

 for more inform-

ation.

4

Selecting Station Directly

Press      GOTO button, the monitor shows:
FR:, input the number to receive the station
of this frequencies.  

Note: 

2

*   This function is only operated by using rem-
     ote control.

To Capture Picture

Press      

P/N

 button, the monitor shows:

Wait, Capture Logo....,

when the monitor 

turn to black, the picture is captured.

11

*  It had better to use the picture size is 4:3.
*  To avoid big picture.

Note: 

Summary of Contents for DVD-2685

Page 1: ...AY USB FUNCTION 16 9 OR 4 3 WIDE DISPLAY NTSC PAL COMPATIBLE PICTURE CONTROL BRIGHTNESS CONTRAST CHROMA HUE SUPPORT DVD DVD R VCD CD CD R CD RW MP3 WMA JPG REPEAT PROGRAM RANDOM AM FM STEREO RADIO SYS...

Page 2: ...ing the Track F F F REW Stop the Playback Slow Motion Playback System Button Increase Picture Size Pause the Playback Number Buttons Repeat Playing On Screen Display Setting the Playing Time Changing...

Page 3: ...erted or the antenna is properly connected if not insert the antenna or connect it properly Antenna may not be the proper length Make sure the antenna is fully extended if broken replace the antenna w...

Page 4: ...explanatory This manual will help you understand the functions and operations of the unit This manual main explains remote control operation However in addition to those functions related with DVD VC...

Page 5: ...s you can press AMS button on the remote control to scan each stored station 5 seconds respectively which stored in Number Buttons from 1 to 6 You can press the corresponding Number Buttons or AMS but...

Page 6: ...he fol Band Selector Manual Automatic Tuning Manual Tuning Briefly pressing button on the remote control continuously to select a or res pectively or station downward upward Automatic Tuning ress and...

Page 7: ...button to return to if you would like to end the track and select others To cancel PBC playing press button again press the menu TITLE 18 23 3 This function is operated by using the remote control No...

Page 8: ...is operated by using remote control the Picture Sizes 9 Note 2X 3X 4X To perform this function with the button 27 On screen display During VCD CD playback press OSD the monitor shows This function is...

Page 9: ...pressitagaintoplaythe currenttrack DuringVCD CD MPEG 4playback firstly pressing toreplaythecurrenttrack press within3secondstoplaythepre vioustrack press toplaythenexttrack 21 4X 8X 16X 18 Note During...

Page 10: ...button 6 ST AUDIO stereo or mono selection language or audio switch button 7 ANGLE play angle button 8 Briefly press it to display the current information press and hold it to adjust the current setu...

Page 11: ...measurable limit Wow and Flutter 65 74 MHz Russia Max Power Output 45W X 4 Optional Optional Preferencespage DiscMenu Example showing how to set Disc Menu Language Press or thenpressENTER Press Prefe...

Page 12: ...to Eng Eng Eng PreferencePage TVType Audio Subtitle DiscMenu Parental Password Default Auto Eng Eng Eng NTSC English French Spanish Chinese Japanese Russian Thai Korean English French Spanish Chinese...

Page 13: ...wn to a position of 45 hold and slide the front panel to left pull it out and then DolbyDigitalSetup DualMono Example showing howto set stereo mode Press Press or thenpressENTER DolbyDigitalSetup Dual...

Page 14: ...howing howto set captions on off Press Press or thenpressENTER GeneralSetupPage TVDisplay AngleMark OSDLang Captions ScreenSaver Wide On Eng Off On GoToGeneralSetupPage GeneralSetupPage TVDisplay Angl...

Page 15: ...e TVDisplay AngleMark OSDLang Captions ScreenSaver Wide On Eng Off On GoToGeneralSetupPage GeneralSetupPage TVDisplay AngleMark OSDLang Captions ScreenSaver Wide On Eng Off On SetTVDisplaymode Normal...

Page 16: ...only operates with DVDs fea turing multi audio recordings The number in the mark on a DVD s package indicates the number of recorded languages audio systems 2 Note 6 Changing the subtitle language Mu...

Page 17: ...set modes to adjust the sou nd quality ing EQ button can perfectly by us ROCK POP CLASSIC OFF Pressing EQ button on the unit also performs the same operation head 26 26 Note On screen display During D...

Page 18: ...sizes as following This function is operated by using remote control the Increase the size of the picture 9 Note This function is operated by using remote control the Press or toplaythetrackfastforwa...

Page 19: ...his menu Press and and ENTER Press or BACK then press ENTER to back to the previous menu Setting KEY BEEP ON or OFF in this menu the default setting is OFF Press and and ENTER Press or BACK then press...

Page 20: ...ess or to select then press ENTER EQUALIZER Press or to select EQUALIZER then press ENTER the setting menu appears as follow Press to select your desired item then press ENTER press to back to the pre...

Reviews: