background image

14

MAINTENANCE AND CLEANING (contd.)
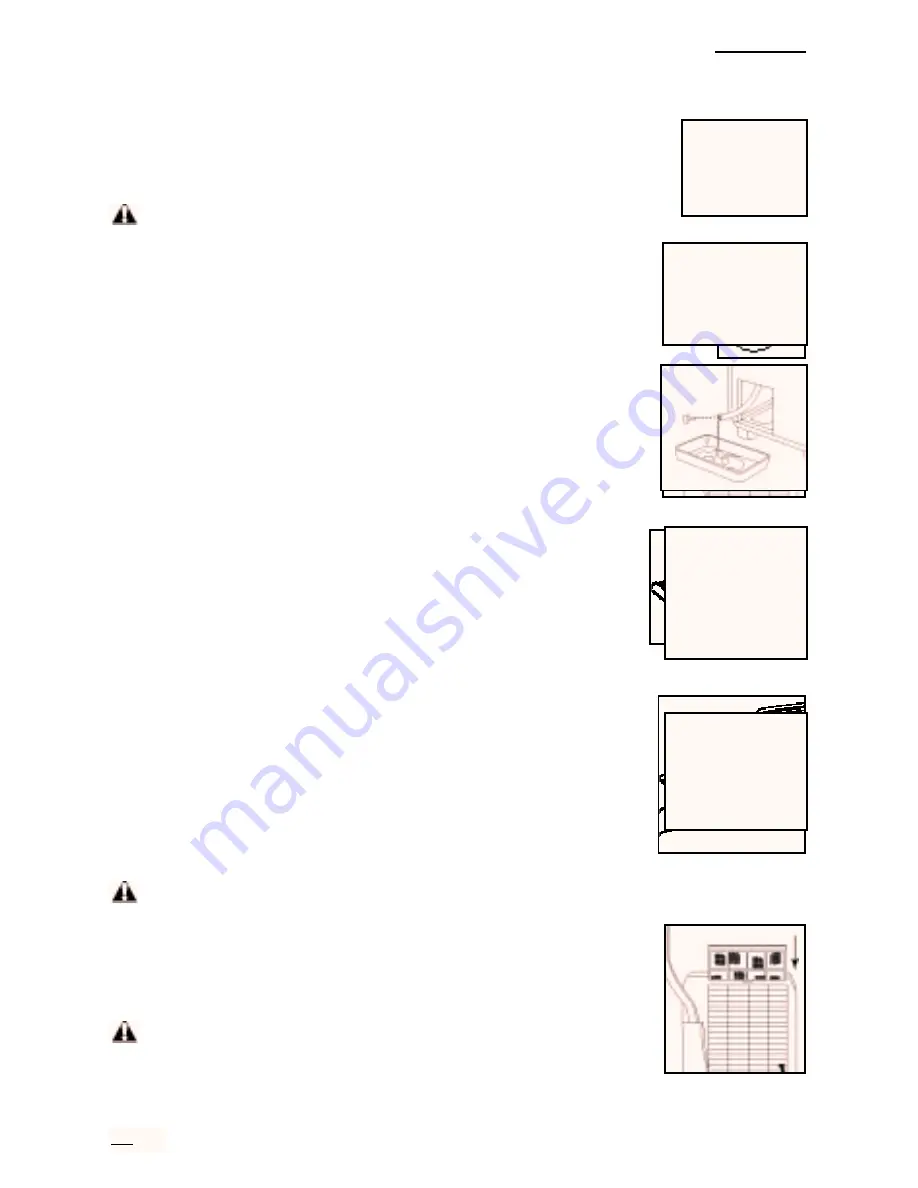
Cleaning Air Filter

This unit has one air filter. For best results and maximum performance,
clean filter every two weeks, or as required by environmental conditions.

CAUTION: Neglect or failure to regularly clean the filter will result in

poor efficiency, reduced performance, possible damage to the unit,
and voiding your warranty.

1.

Press Power On/Off "I/O" button to stop unit if it is operating.
Unplug power cord from outlet.

2.

Locate filter on top, rear side of indoor unit. Carefully pull filter
from top of indoor unit.

3.

Place air filter on a flat, level surface so “dirty” side of filter
faces up. Using a brush or nozzle vacuum attachment, gently
vacuum “dirty” side of filter. Turn filter over and vacuum other
side. Use care not to damage or puncture the filter mesh. DO
NOT use brushes, brooms, or other course materials to clean
the filters.

4.

Hold air filter, “dirty” side down, under cool, running water. DO
NOT use hot water, harsh detergents, chemicals, solvents, gaso-
line or any other abrasive materials or household items to clean
the filters. Be sure to rinse all residue from the air filter mesh.
Carefully shake air filter to remove excess water. Allow air filter to
dry completely before reinstalling into unit.

WARNING: Forcing filter improperly into unit may cause damage.

Repair due to improper filter installation is not covered under
warranty.

5.

Align bottom of filter with opening in top, rear side of indoor unit.
Carefully slide filter completely into place.

CAUTION: DO NOT operate the unit without the air filter

properly installed.

Summary of Contents for RCS-S3000T

Page 1: ...ace both units in their upright positions for a minimum of two hours before operating For best results and more enjoyment from your new FREECOM portable air conditioning unit please read this instruct...

Page 2: ...the unit This time period permits the liquids gases and oils contained within the sealed systems to return to their proper positions OWNER S RECORD Enter product information here for future use Date o...

Page 3: ...esh air conditioned dehumidified air Automatic oscillating louvers provides air distribution over a wide area Low noise rotary compressor cools from air to air no water required Attractive design and...

Page 4: ...l exposition directe du soleil en fermant rideaux et stores etc pour am liorer le rafra chissement Ne pas placer l appareil pr s de rideaux qui risquent de bloquer l entr e ou la sortie d air distanc...

Page 5: ...ter or moisture DO NOT use indoor unit outdoors CAUTION Failure to follow the safety information below can result in minor personal injury property damage damage to the unit and voiding your warranty...

Page 6: ...Air Louver E Air Outlet F Built in Handle G Air Filter H Emergency Water Drain Tube I Water Drain Plug J Power Cord K Flex Tube L Caster Wheels M Connector Cover N Fan O Drain Port outdoor unit P Supp...

Page 7: ...e of approximately 77 F when the unit is initially plugged in and started Press right button to lower cooling setting press left button to raise cooling setting Each press of either button adjusts the...

Page 8: ...ible water leakage 2 Place indoor unit at least 30 from any draperies or other obstructions Carefully push the unit on its castor wheels to desired location 3 Determine a location for outdoor unit If...

Page 9: ...e tube set See Disconnecting Tube Set for detailed information There are two choices for installing the outdoor unit surface placement and wall mounting See below for surface placing the outdoor unit...

Page 10: ...rt belt to wall with the appropriate hardware Disconnecting Tube Set This air conditioner is equipped with convenient quick Connect Couplings which allow for the removal and routing of the Tube Set th...

Page 11: ...h a special safety time delay feature The compressor cooling mechanism may be delayed for up to five minutes This safety feature prevents damage to the compressor The COMP ON light will turn on while...

Page 12: ...button If the power on off I O but ton is pressed while a timer ON setting is scheduled the timer function will be can celled and the unit will continue to operate as normal To Turn Unit Off with Tim...

Page 13: ...or unit NOTE If emptying water tank before DRAIN WATER alert press Power On Off I O button to stop unit if it is operating 1 Unplug power cord from outlet Allow unit to remain off for 3 5 minutes 2 Re...

Page 14: ...m dirty side of filter Turn filter over and vacuum other side Use care not to damage or puncture the filter mesh DO NOT use brushes brooms or other course materials to clean the filters 4 Hold air fil...

Page 15: ...hment STORAGE INDOOR UNIT 1 Press power on off I O button if unit is operating Unplug power cord from outlet 2 Drain water tube See Draining Water Tank on page 13 for detailed instructions 3 For long...

Page 16: ...Check MODE and or THERMO CONTROL selection and adjust for higher air output See OPERATION 4 Allow unit to stand upright for a minimum of two hours before attempting to operate 1 Power voltage is too l...

Reviews: